

Note for teachers using this lesson plan
This lesson focuses on equipping students with essential knowledge and practical skills for maintaining safety in the biology laboratory. Prepare visual aids of safety equipment and consider having a sand bucket and fire extinguisher available for demonstration. Ensure students understand the importance of following safety procedures to prevent accidents and respond appropriately to emergencies, demonstrating their ability to identify hazards and safety measures by the end of the lesson.
Class: SS 1
Term: First Term
Week: 3
Age: 15 years
Duration: 60 minutes
Subject: Biology
Curriculum Theme: Biology and Scientific Enquiry
Focal competence: Administering first aid and responding to emergencies in the laboratory
Key competencies/values: Communication; Collaboration; Information Literacy
Skills:
- Identifying potential causes of accidents and hazards in the laboratory
- Handling minor accidents in the laboratory
Previous Lesson: Biology Laboratory Apparatus, Equipment and Safety Rules
Topic: Safety Procedures In The Laboratory
Subject Matter: Meaning of Safety Procedures in the laboratory, Safety equipment, Potential causes of emergencies in the laboratory
Specific Objectives
By the end of the lesson, pupils/students should be able to:
Cognitive Domain
- Define Safety Procedures in the laboratory.
- Identify different Safety equipment used in the laboratory.
- Identify potential causes of emergencies in the laboratory.
Affective Domain
- Appreciate the importance of safety procedures in preventing accidents.
- Collaborate effectively during role-play activities on emergency responses.
Psychomotor Domain
- Demonstrate appropriate responses to simulated laboratory emergencies.
- Handle minor accidents in a laboratory setting.
Reference Materials
The following resources were used in planning this lesson:
- 2025 New Revised Senior Secondary Education Curriculum (SSEC)
- Relevant State Unified Scheme of Work
- Essential Biology for Senior Secondary Schools
- The HeadTeacher Scheme of work For The New Revised Senior Secondary Education Curriculum (SSEC)
Instructional Materials
The teacher will teach this lesson with the aid of:
- Charts of different safety equipment
- Sand buckets
- Fire extinguishers
- Protective glasses
- Fume cupboard
- Short video clips on laboratory safety and emergency responses
Rationale for the Lesson
This lesson is crucial for students to understand and practice safety measures in the laboratory, which is an environment with potential hazards. It equips them with the knowledge to prevent accidents and respond effectively to emergencies, fostering a responsible and safe scientific inquiry approach. This understanding is fundamental for any practical work in science.
Prerequisite/Previous Knowledge
Students should have a basic understanding of what a laboratory is and some common apparatus used in science experiments.
Lesson Content/Board Summary
Safety Procedures In The Laboratory
Meaning of Safety Procedures in the Laboratory
Safety procedures in the laboratory refer to a set of rules, guidelines, and practices designed to prevent accidents, minimize risks, and ensure the well-being of individuals working within the laboratory environment. These procedures are essential for handling chemicals, equipment, and biological materials safely.
Safety Equipment in the Laboratory
Various pieces of equipment are specifically designed to ensure safety in the laboratory. These include:
- Sand buckets: Used to smother small fires, especially those involving flammable liquids or electrical equipment, by cutting off the oxygen supply.
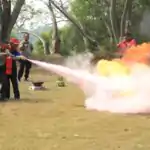
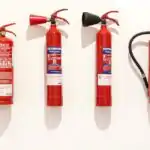
- Fire extinguishers: Devices used to put out fires. Different types exist for different classes of fire (e.g., water for ordinary combustibles, CO2 for electrical/flammable liquids, foam for flammable liquids).
- Protective glasses (safety goggles): Worn to protect the eyes from chemical splashes, flying debris, and harmful fumes during experiments.
- Fume cupboard: A ventilated enclosure that removes harmful fumes, vapours, and dust from the laboratory air, protecting individuals from inhaling toxic substances.
- First aid box: Contains essential medical supplies for treating minor injuries like cuts, burns, or chemical splashes.
- Laboratory coats/aprons: Protect clothing and skin from chemical spills and splashes.
- Safety showers: Used to drench individuals who have been exposed to hazardous chemicals over a large area of their body.
- Eyewash stations: Provide a continuous flow of water to flush chemicals from the eyes in case of a splash.
Potential Causes of Emergencies in the Laboratory
Emergencies in the laboratory can arise from various factors, often due to negligence, improper handling, or equipment malfunction. Common causes include:
- Exposed electrical wires: Can lead to electric shocks, short circuits, and fires.
- Gas leakage: Leaking gas cylinders or connections can cause explosions, fires, or suffocation if the gas is toxic or displaces oxygen.
- Improper storage of chemicals: Storing incompatible chemicals together, or in incorrect containers, can lead to dangerous reactions, explosions, or the release of toxic fumes.
- Cracked beakers and glassware: Using damaged glassware can lead to breakage during experiments, causing cuts, chemical spills, or loss of experimental integrity.
- Spillage of corrosive chemicals: Accidental spills of acids or bases can cause severe burns to skin and eyes, and damage laboratory surfaces.
- Unattended experiments: Leaving experiments running without supervision can lead to overheating, uncontrolled reactions, or fires.
- Eating or drinking in the laboratory: Can lead to ingestion of harmful chemicals or contamination of food/drinks.
- Horseplay or careless behaviour: Lack of seriousness and playful behaviour can easily lead to accidents, spills, and injuries.
Teaching Methods/Instructional Techniques
Discussion, Demonstration, Guided Practice, Question and Answer, Explanation, Observation, Role-play, Video Presentation
Instructional Procedures
Step 1: Introduction
Time: 5 minutes
Teaching Skill: Questioning/Engagement
Teacher’s Activity: The teacher greets the students and asks them to recall any safety rules they know from their previous science classes or everyday life. The teacher then introduces the topic: “Safety Procedures in the Laboratory.”
Pupils’ Activity: Pupils respond to the teacher’s questions and listen attentively to the introduction of the new topic.
Learning Point: Introduction to lab safety
Step 2: Meaning of Safety Procedures
Time: 10 minutes
Teaching Skill: Explanation/Discussion
Teacher’s Activity: The teacher explains the meaning of safety procedures in the laboratory, emphasizing their importance in preventing accidents and ensuring well-being. The teacher encourages students to contribute their understanding.
Pupils’ Activity: Pupils listen, ask questions for clarification, and participate in the discussion by offering their own ideas on why safety procedures are important.
Learning Point: Definition of safety procedures
Step 3: Identification of Safety Equipment
Time: 10 minutes
Teaching Skill: Demonstration/Observation
Teacher’s Activity: The teacher displays charts of various safety equipment (sand buckets, fire extinguishers, protective glasses, fume cupboard, first aid box, etc.) and, where possible, demonstrates the actual items. The teacher explains the function and proper use of each equipment.
Pupils’ Activity: Pupils observe the charts and demonstrations, identify the equipment, and listen to the explanations of their uses.
Learning Point: Laboratory safety equipment
Step 4: Potential Causes of Emergencies (Part 1)
Time: 10 minutes
Teaching Skill: Video Presentation/Discussion
Teacher’s Activity: The teacher guides students to watch short safety training video clips on potential causes of emergencies in the laboratory, such as exposed electrical wires, gas leakage, and improper chemical storage. After the video, the teacher leads a discussion on what they observed.
Pupils’ Activity: Pupils watch the video clips carefully and actively participate in the discussion, identifying the causes of emergencies shown.
Learning Point: Identifying emergency causes
Step 5: Potential Causes of Emergencies (Part 2)
Time: 5 minutes
Teaching Skill: Explanation/Examples
Teacher’s Activity: The teacher further explains other potential causes of emergencies not covered in the video, such as cracked glassware, spillage of corrosive chemicals, unattended experiments, eating/drinking in the lab, and horseplay, providing concrete examples for each.
Pupils’ Activity: Pupils listen and take note of the additional causes of emergencies, asking questions for better understanding.
Learning Point: More emergency causes
Step 6: Role-Playing Emergency Responses
Time: 5 minutes
Teaching Skill: Guided Practice/Role-play
Teacher’s Activity: The teacher guides students to role-play appropriate responses to simulated emergencies, such as a small fire incident (using a sand bucket), a chemical splash on the hand (using a first aid box), or a gas leakage (evacuation). The teacher provides constructive feedback.
Pupils’ Activity: Pupils actively participate in the role-playing scenarios, demonstrating appropriate responses to emergencies.
Learning Point: Practicing emergency responses
Step 7: Evaluation/Review
Time: 5 minutes
Teaching Skill: Questioning/Assessment
Teacher’s Activity: The teacher evaluates the learning by asking the following questions:
- What are safety procedures in the laboratory?
- Mention three safety equipment found in a laboratory and their uses.
- List three potential causes of emergencies in the laboratory.
Pupils’ Activity: Pupils answer orally and in writing.
Learning Point: Assessment of safety knowledge
Step 8: Note-Taking
Time: 10 minutes
Teaching Skill: Guided Writing
Teacher’s Activity: The teacher guides pupils/students to copy the essential Board Summary notes on safety procedures, equipment, and emergency causes into their notebooks.
Pupils’ Activity: Pupils/students copy the notes carefully into their notebooks.
Learning Point: Recording lesson notes
Step 9: Conclusion
Time: 5 minutes
Teaching Skill: Summarization
Teacher’s Activity: The teacher briefly summarizes the key points of the lesson, reiterating the importance of adhering to safety procedures and being prepared for emergencies in the laboratory. The teacher encourages students to always prioritize safety.
Pupils’ Activity: Pupils listen to the summary and ask any final questions.
Learning Point: Reinforcement of lab safety
Continuous Assessment/Further Study
Type: Homework/Further Reading
Instruction: Research and write short notes on the following:
- The importance of a first aid box in the laboratory.
- The different classes of fire and the appropriate fire extinguishers for each.
- Design a simple safety poster for your school’s biology laboratory, highlighting at least five key safety rules.
Lesson Keywords
- Safety Procedures – Rules and guidelines to prevent accidents.
- Laboratory – A place for scientific experiments.
- Safety Equipment – Tools designed to ensure safety.
- Fume Cupboard – Ventilated enclosure to remove harmful fumes.
- Fire Extinguisher – Device to put out fires.
- Emergency – A serious, unexpected, and often dangerous situation requiring immediate action.
Differentiation
For struggling learners: Provide simplified charts with fewer details and clearer labels. Pair them with more capable students during role-play activities for support. Focus on identifying just two key safety equipment and two causes of emergencies.
For advanced learners: Encourage them to research specific types of chemicals and their associated hazards, or to propose additional safety measures for a typical school laboratory. They can also lead the role-play scenarios.
Suggested Lesson Videos
For further understanding, search on YouTube for: laboratory safety procedures for students SS1 biology

Community Join the conversation Open discussion +