

Class: Pre-School Level 4
Term: First Term
Week: 9
Age: 5 years
Duration: 30 minutes
Subject: Basic Science and Technology
Curriculum Theme: Basic Science and Technology
Previous Lesson: Not separately stated in the scheme.
Topic: ROCKS: Meaning, Formation and Types
Subject Matter: Meaning, formation and types of rocks.
Specific Objectives
By the end of the lesson, pupils should be able to:
Cognitive Domain
- Define a rock in simple terms.
- Explain in simple words how rocks are formed.
- Identify different types of rocks based on their observable features (e.g., size, texture, colour).
- Name one popular rock in Abuja (e.g., Zuma Rock, Aso Rock).
Affective Domain
- Show interest in observing different rocks.
- Participate actively in discussions about rocks.
- Appreciate rocks as natural parts of our environment.
Psychomotor Domain
- Point to pictures of different rocks.
- Sort small rocks based on simple characteristics like smooth or rough.
- Draw a simple picture of a rock.
Social Domain
- Take turns speaking during class discussions.
- Work cooperatively when observing rock samples.
Reference Materials
- NAPPS National Unified Teaching Scheme for Pre-School Level 4.
- Relevant Early Childhood Care and Education resources.
- Pictures of various rocks (e.g., granite, sandstone, marble).
- Charts showing rock formation (simplified for preschoolers).
Instructional Materials
- Real rock samples (smooth, rough, different sizes/colours).
- Pictures of various rocks (e.g., Zuma Rock, Aso Rock, river stones, mountain rocks).
- A large chart displaying different types of rocks and a simplified diagram of rock formation.
- Video clips showing rocks and simple rock formation processes.
- Drawing paper and crayons for pupils.
Rationale for the Lesson
This lesson introduces Pre-School Level 4 pupils to the natural world around them by focusing on rocks. Understanding rocks helps children develop observation skills, learn about the earth’s features, and appreciate the materials found in their environment. It also lays a foundation for future science learning.Prerequisite/Previous Knowledge
Pupils can identify common objects like stones, sand, and soil. They have observed different natural features in their environment like trees, plants, and perhaps hills or mountains.Lesson Content/Board Summary
ROCKS: Meaning, Formation, and Types
What are Rocks?
- Rocks are hard, natural materials found all over the earth.
- They are usually bigger than small stones and pebbles.
- We see rocks in mountains, rivers, beaches, and even in our compounds.
How are Rocks Formed?
- Rocks are formed naturally over a very, very long time.
- Wind, water (like rain and rivers), and the sun can break down bigger rocks into smaller pieces.
- Sometimes, hot, melted material deep inside the Earth cools down and becomes hard rock.
- Other times, small pieces of sand and mud get pressed together for a long, long time and become rock.
What the Teacher Should Show or Draw
- Display real rock samples of different sizes and textures.
- Show pictures of mountains, riverbeds, and famous rocks like Zuma Rock and Aso Rock.
- Draw a simple picture of a mountain or a river with rocks.
Types of Rocks (Based on what we can see):
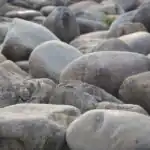
- Big Rocks: Like mountains or large boulders.
- Small Rocks: Like pebbles or stones we find on the ground.
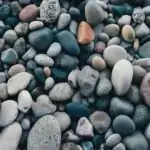
- Smooth Rocks: Rocks that feel soft and smooth to touch (e.g., river stones).
- Rough Rocks: Rocks that feel bumpy and uneven to touch.
- Rocks of Different Colours: Some are grey, brown, red, black, or even white.
Rock Discovery Rhyme
Tune: “Twinkle, Twinkle Little Star”
Lyrics:
Rocks, rocks, big and small,
Found upon the ground for all.
Some are smooth and some are rough,
Strong and sturdy, oh so tough.
Wind and water help them grow,
Rocks, rocks, watch them show!
Actions:
- “Big and small” – use hands to show big then small.
- “Smooth and rough” – rub hands together smoothly, then make bumpy motions.
- “Strong and sturdy” – make strong arm muscles.
- “Wind and water” – wave hands like wind, then make flowing motion for water.
How to use the rhyme: Sing the rhyme together after introducing the meaning and types of rocks to reinforce the concepts. Repeat several times with actions.
Watch and Learn About Rocks
Let’s watch a short video to see more about rocks and how they are formed!
Key Words
- Rocks – hard, natural materials found on Earth.
- Formed – how something is made or comes into being.
- Types – different kinds or categories.
- Smooth – having an even, flat surface.
- Rough – having an uneven or bumpy surface.
Teaching Methods/Instructional Techniques
Play-based Learning, Demonstration, Guided Practice, Songs and Rhymes, Picture Talk, Question and Answer, Manipulation of Objects, Video Presentation.Instructional Procedures
Step 1: Introduction
Time: 3 minutes
Teaching Skill: Engaging/Recalling
Teacher’s Activity: The teacher greets the pupils and asks them what they see around them in nature (e.g., trees, sand, stones). The teacher then holds up a small stone and asks what it is, leading to the topic of rocks.
Pupils’ Activity: Pupils respond to greetings and name natural objects they see. They identify the stone.
Learning Point: Pupils are introduced to the concept of natural materials and stones, linking to rocks.
Step 2: Meaning of Rocks
Time: 5 minutes
Teaching Skill: Explaining/Demonstrating
Teacher’s Activity: The teacher explains that rocks are like very big, hard stones found everywhere. The teacher shows real rock samples and pictures of large rocks (e.g., mountains, boulders) to illustrate the meaning.
Pupils’ Activity: Pupils observe the real rocks and pictures, touching the samples carefully. They repeat the simple definition of a rock.
Learning Point: Pupils understand that rocks are large, hard natural materials.
Step 3: How Rocks are Formed (Discussion)
Time: 5 minutes
Teaching Skill: Explaining/Facilitating Discussion
Teacher’s Activity: The teacher explains in simple terms how rocks are formed (e.g., wind and water breaking them, hot earth material cooling, sand/mud pressing together). The teacher encourages pupils to contribute by saying what they think might make rocks (e.g., “the sun makes things hot,” “water makes things move”).
Pupils’ Activity: Pupils listen to the explanation and offer simple ideas on how rocks might be formed, guided by the teacher.
Learning Point: Pupils grasp the basic idea that rocks are formed naturally over time by forces like wind, water, and heat.
Step 4: Types of Rocks (Observation)
Time: 5 minutes
Teaching Skill: Classifying/Observing
Teacher’s Activity: The teacher displays various rock samples and pictures, guiding pupils to observe and describe them. “Look, this rock is smooth, this one is rough. This one is big, this one is small. What colour is this rock?”
Pupils’ Activity: Pupils observe and touch different rock samples, describing them using words like “smooth,” “rough,” “big,” “small,” and naming colours.
Learning Point: Pupils can identify different types of rocks based on observable features.
Step 5: Rhyme and Video Reinforcement
Time: 4 minutes
Teaching Skill: Reinforcing/Engaging
Teacher’s Activity: The teacher leads the pupils in singing the “Rock Discovery Rhyme” with actions. Afterwards, the teacher plays the short educational video about rocks.
Pupils’ Activity: Pupils sing the rhyme with actions and watch the video attentively, pointing out things they recognise.
Learning Point: Concepts about rocks are reinforced through song and visual media.
Step 6: Practical Activity: Drawing Rocks
Time: 4 minutes
Teaching Skill: Application/Creativity
Teacher’s Activity: The teacher distributes drawing paper and crayons. Pupils are asked to draw a rock they saw or touched, or a famous rock like Zuma Rock from the pictures. The teacher assists as needed.
Pupils’ Activity: Pupils draw simple pictures of rocks, using different colours and shapes.
Learning Point: Pupils apply their understanding by visually representing rocks.
Step 7: Evaluation/Review
Time: 4–5 minutes
Teaching Skill: Questioning/Assessment
Teacher’s Activity: The teacher checks pupils’ understanding through short questions and practical tasks.
- What is a rock? (Show a real rock)
- Can you tell me one way rocks are formed?
- Show me a smooth rock. Show me a rough rock.
- Mention one popular rock in Abuja that we saw pictures of.
Pupils’ Activity: Pupils respond orally and demonstrate the required skill where appropriate (e.g., pointing to rocks, saying a simple explanation).
Learning Point: Pupils demonstrate understanding of the lesson.
Step 8: Conclusion
Time: 1 minute
Teaching Skill: Summarizing/Concluding
Teacher’s Activity: The teacher praises the pupils for their participation and summarises that rocks are important parts of our world. The teacher encourages them to look for different rocks around their homes.
Pupils’ Activity: Pupils listen and respond to the teacher’s summary.
Learning Point: Pupils consolidate their learning and are encouraged to observe rocks in their environment.
Lesson Keywords
- Rocks – hard, natural materials found all over the earth.
- Formed – how something is made or comes into being.
- Types – different kinds or categories.
- Smooth – having an even, flat surface.
- Rough – having an uneven or bumpy surface.
Differentiation
- Support: For pupils who need extra support, provide larger, distinct rock samples for touching and sorting. Use more repetition of key terms and actions. Guide their hands for drawing if necessary. Focus on identifying just two types (e.g., big/small or smooth/rough).
- Extension: For pupils who grasp concepts quickly, encourage them to describe rocks using more detail (e.g., “This rock is grey and has tiny sparkly bits”). Ask them to find two rocks that are similar and two that are different. They can draw multiple types of rocks.


Community Join the conversation Open discussion +