

Class: Pre-School Level 4
Term: First Term
Week: 10
Age: 5 years
Duration: 30 minutes
Subject: Basic Science and Technology
Curriculum Theme: Basic Science and Technology
Previous Lesson: Observing living and non-living things in our environment.
Topic: SOIL: MEANING AND TYPES
Subject Matter: Meaning, types, textures and uses of soil.
Specific Objectives
By the end of the lesson, pupils should be able to:
Cognitive Domain
- Identify soil as the surface of the earth where plants grow.
- Name three types of soil: sandy, clay, and loamy.
- Describe the texture of each type of soil.
- State at least one use for each type of soil.
Affective Domain
- Show curiosity about different soil types.
- Appreciate the importance of soil for plants and people.
- Participate actively in touching and feeling soil samples.
Psychomotor Domain
- Touch and feel the texture of sandy, clay, and loamy soil.
- Plant a seed in loamy soil.
Social Domain
- Share observations about soil textures with classmates.
- Take turns when exploring soil samples.
Reference Materials
- NAPPS National Unified Teaching Scheme for Pre-School Level 4.
- Relevant Early Childhood Care and Education resources.
- Early years Basic Science and Technology workbook.
Instructional Materials
- Samples of different soil types: sandy soil, clay soil, loamy soil (in separate clear containers).
- Small seeds (e.g., bean seeds, maize seeds).
- Small plant pots or clear plastic cups for planting.
- Watering can or small cup for water.
- Picture cards showing plants growing in soil, houses built with bricks (clay) or cement (sand).
- Magnifying glass (optional, for closer observation).
Rationale for the Lesson
This lesson introduces young children to the concept of soil, a fundamental part of their environment. Understanding soil helps them appreciate where plants grow and how it supports life, connecting them to nature and basic ecological principles. It also encourages sensory exploration and observation skills.
Prerequisite/Previous Knowledge
Pupils have observed plants growing around them and are familiar with the ground beneath their feet.
Lesson Content/Board Summary
SOIL: MEANING, TYPES, TEXTURES, AND USES
Meaning of Soil
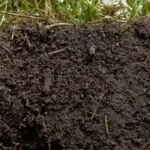
Soil is the top part of the earth where plants grow. It is made up of tiny bits of rocks, dead leaves, and water. We walk on soil every day.
Types of Soil
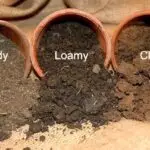
There are different types of soil. Today, we will learn about three main types:
- Sandy Soil: This soil feels rough and gritty, like tiny stones. Water passes through it very quickly.
- Clay Soil: This soil feels smooth and sticky when wet. It can be moulded into shapes, like making pots. Water stays in it for a long time.
- Loamy Soil: This soil feels soft, crumbly, and a bit sandy and a bit sticky. It is the best soil for plants to grow well because it holds enough water and air.
Textures of Soil
We can feel the texture of soil with our hands:
- Sandy soil: Feels rough and gritty.
- Clay soil: Feels smooth and sticky when wet.
- Loamy soil: Feels soft and crumbly.
Uses of Soil
- For planting: Plants grow in soil, giving us food, fruits, and flowers. Loamy soil is best for planting.
- For building: We use sand (from sandy soil) to mix cement for building houses. Clay soil is used to make bricks and pots.
Key Words
- Soil – the ground where plants grow.
- Sandy – soil that feels rough like tiny stones.
- Clay – soil that feels smooth and sticky when wet.
- Loamy – soft, crumbly soil, good for plants.
- Texture – how something feels when you touch it.
- Plant – to put a seed in the soil to grow.
What the Teacher Should Show or Draw
- Display the three types of soil samples clearly labelled.
- Show pictures of different plants growing in soil.
- Draw simple pictures of a plant in soil and a house made of bricks.
Soil Song
Tune: “Twinkle, Twinkle Little Star”
Soil, soil, all around,
Where the lovely plants are found.
Sandy, gritty, rough to touch,
Clay is sticky, oh so much.
Loamy soil, soft and fine,
Helps the plants to grow and shine.
Actions:
- “Soil, soil, all around”: Point to the ground.
- “Where the lovely plants are found”: Make a growing motion with hands.
- “Sandy, gritty, rough to touch”: Rub hands together roughly.
- “Clay is sticky, oh so much”: Clap hands together and try to pull apart slowly.
- “Loamy soil, soft and fine”: Gently rub palms together.
- “Helps the plants to grow and shine”: Make a growing motion and then raise hands up like shining.
How to use the rhyme: Sing the song after introducing each soil type and its texture, encouraging pupils to do the actions as they sing.
Video Demonstration
The teacher can show a short educational video to reinforce the concept of soil and its types.
Teaching Methods/Instructional Techniques
Play-based Learning, Demonstration, Guided Practice, Songs and Rhymes, Picture Talk, Question and Answer, Manipulation of Objects, Repetition, Practical Activity.
Instructional Procedures
Step 1: Introduction
Time: 3 minutes
Teaching Skill: Greeting/Engaging
Teacher’s Activity: The teacher greets the pupils and asks them what they see on the ground outside the classroom. “What do we walk on every day?”
Pupils’ Activity: Pupils respond, “Ground!” or “Floor!”
Learning Point: Pupils recall familiar surroundings.
Step 2: Meaning of Soil
Time: 5 minutes
Teaching Skill: Explanation/Observation
Teacher’s Activity: The teacher explains that the ground we walk on is called soil. “Soil is the top part of the earth where plants grow.” The teacher shows a picture of plants growing in soil and the pre-prepared soil samples. “Look, this is soil!”
Pupils’ Activity: Pupils listen, look at the pictures and soil samples, and repeat “soil”.
Learning Point: Pupils understand the basic meaning of soil.
Step 3: Types of Soil (Demonstration)
Time: 6 minutes
Teaching Skill: Identification/Demonstration
Teacher’s Activity: The teacher introduces the three types of soil one by one: sandy, clay, and loamy. For each type, the teacher holds up the sample and names it clearly. “This is sandy soil. This is clay soil. This is loamy soil.” The teacher briefly describes what each looks like.
Pupils’ Activity: Pupils observe the different soil samples and repeat the names of the soil types after the teacher.
Learning Point: Pupils recognise and name different types of soil.
Step 4: Textures of Soil (Pupil Activity)
Time: 6 minutes
Teaching Skill: Sensory Exploration/Guided Practice
Teacher’s Activity: The teacher allows pupils, in small groups or individually, to gently touch and feel each soil sample. The teacher guides them to describe the texture: “How does the sandy soil feel? Is it rough or smooth?” “How does the clay soil feel? Is it sticky?” “How does the loamy soil feel? Is it soft and crumbly?”
Pupils’ Activity: Pupils touch and feel the different soil samples and describe their textures using simple words (e.g., “rough,” “sticky,” “soft”).
Learning Point: Pupils experience and differentiate soil textures through touch.
Step 5: Uses of Soil (Discussion and Activity)
Time: 5 minutes
Teaching Skill: Discussion/Practical Application
Teacher’s Activity: The teacher discusses the uses of soil, focusing on planting. “What do we do with soil? We plant seeds!” The teacher demonstrates planting a seed in a pot with loamy soil. “Loamy soil is the best for plants to grow big and strong.” The teacher encourages pupils to plant their own seeds in small pots with loamy soil, explaining that they will observe it over time.
Pupils’ Activity: Pupils discuss uses of soil, observe the teacher planting, and then plant their own seeds in loamy soil.
Learning Point: Pupils understand that soil is used for planting and begin a long-term observation activity.
Step 6: Reinforcement (Rhyme)
Time: 2 minutes
Teaching Skill: Repetition/Engagement
Teacher’s Activity: The teacher leads the pupils in singing the “Soil Song” again, encouraging them to do the actions and remember the names and textures of the soil types.
Pupils’ Activity: Pupils sing the “Soil Song” with actions.
Learning Point: Pupils reinforce their learning through song and movement.
Step 7: Evaluation/Review
Time: 4–5 minutes
Teaching Skill: Questioning/Assessment
Teacher’s Activity: The teacher checks pupils’ understanding through short questions and practical tasks.
- “What is the name of the ground where plants grow?”
- (Teacher holds up sandy soil) “What type of soil is this? How does it feel?”
- (Teacher holds up clay soil) “What type of soil is this? How does it feel?”
- (Teacher holds up loamy soil) “What type of soil is this? How does it feel?”
- “What can we do with loamy soil?”
- “Which type of soil do you think is in our school compound?” (Connecting to the seed’s assessment)
Pupils’ Activity: Pupils respond orally and demonstrate the required skill where appropriate (e.g., pointing to the correct soil sample).
Learning Point: Pupils demonstrate understanding of the lesson.
Step 8: Conclusion
Time: 1 minute
Teaching Skill: Summarising/Encouragement
Teacher’s Activity: The teacher praises the pupils for their participation and reminds them to observe their planted seeds. “Remember to watch your seeds grow in the loamy soil!”
Pupils’ Activity: Pupils listen and tidy up their materials.
Learning Point: Pupils consolidate learning and look forward to future observation.
Lesson Keywords
- Soil – The loose top layer of the Earth’s surface where plants grow.
- Sandy soil – A type of soil that feels rough and gritty, with large particles.
- Clay soil – A type of soil that feels smooth and sticky when wet, with very fine particles.
- Loamy soil – A type of soil that is a mixture of sand, silt, and clay, feels soft and crumbly, and is good for growing plants.
- Texture – The way something feels when you touch it.
- Planting – The act of putting seeds or young plants into the soil to grow.
Differentiation
- Support: For pupils who are struggling, the teacher can provide more one-on-one guidance during the touching and feeling activity, using hand-over-hand to help them feel the textures. Use only two types of soil first (e.g., sandy and clay) before introducing loamy.
- Extension: For quicker learners, the teacher can ask them to draw a picture of their favourite type of soil or identify other things they have seen growing in the school compound’s soil. They can also be encouraged to describe the soil textures in more detail.
Note for teachers using this lesson plan
Before the lesson, ensure you have clearly labelled samples of sandy, clay, and loamy soil. It is helpful to have them in clear containers so pupils can see them before touching. Prepare the small pots and seeds for the planting activity. Emphasize the sensory experience by allowing pupils ample time to touch and feel the different soil textures. Supervise closely during the planting activity to ensure seeds are handled gently. The observation of the planted seeds is a long-term activity that can be revisited in subsequent lessons. For the assessment question about school compound soil, encourage pupils to make an educated guess based on what they have learned and observed, rather than expecting a definitive answer.


Community Join the conversation Open discussion +