

Class: Pre-School Level 4
Term: Third Term
Week: 10
Age: 5 years
Duration: 30 minutes
Subject: Basic Science and Technology
Curriculum Theme: Basic Science and Technology
Previous Lesson: Not separately stated in the scheme.
Topic: Simple Machines Used at School
Subject Matter: Meaning, examples and uses of simple machines at school.
Specific Objectives
By the end of the lesson, pupils should be able to:
Cognitive Domain
- Define simple machines in their own words.
- Identify at least three simple machines found in the school environment.
- State one use for each identified simple machine.
Affective Domain
- Show appreciation for how simple machines make work easier.
- Participate actively in discussions and demonstrations.
Psychomotor Domain
- Demonstrate the use of a stapler, duster, and sharpener.
- Point to pictures of simple machines when named.
Social Domain
- Share ideas about how different tools help people.
Reference Materials
- NAPPS National Unified Teaching Scheme for Pre-School Level 4
- Relevant Early Childhood Care and Education resources
Instructional Materials
- Real objects: Stapler, broom, duster, pencil sharpener, scissors, small toy wheelbarrow.
- Pictures/flashcards of a ramp (slide), wheelbarrow, stapler, broom, duster, sharpener, scissors.
- Chart showing different simple machines and their uses.
Rationale for the Lesson
This lesson introduces young learners to the concept of simple machines, which are everyday tools that make work easier. Understanding these tools helps children observe their environment more keenly and appreciate the technology around them, fostering early scientific curiosity and practical life skills.
Prerequisite/Previous Knowledge
Pupils can identify various objects in their classroom and school environment. They have used some basic tools like pencils and crayons before.
Lesson Content/Board Summary
Simple Machines Used at School
Simple machines are tools that help us do work more easily. They make our tasks faster and less tiring.
Examples of Simple Machines at School and Their Uses
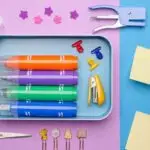
- Stapler: Used to join papers together. It uses a lever to push staples.
- Broom: Used to sweep and clean the floor. It helps us gather dirt easily.
- Duster: Used to clean chalkboards or wipe surfaces. It helps to remove dust.
- Pencil Sharpener: Used to sharpen pencils. It has a wedge inside that cuts the wood.
- Scissors: Used to cut paper or fabric. It is a type of lever and wedge.
- Wheelbarrow: Used to move heavy things like sand or blocks around the school compound. It has a wheel and axle and acts as a lever.
- Ramp (Slide): A sloping surface that helps us move things up or down easily, like a slide in the playground. It is an inclined plane.
Key Words
- Simple machine – a tool that makes work easier.
- Stapler – joins papers.
- Broom – sweeps the floor.
- Duster – cleans surfaces.
- Sharpener – sharpens pencils.
- Scissors – cuts things.
- Wheelbarrow – moves heavy items.
- Ramp – a slope to move things up or down.
What the Teacher Should Show or Draw
- Show real stapler, broom, duster, sharpener, scissors, toy wheelbarrow.
- Display pictures of a ramp (slide) and other simple machines.
- Demonstrate how each tool is used.
Simple Machines Song
Tune: “Twinkle, Twinkle Little Star”
Tools that help us every day,
Make our work an easy way.
Stapler, broom, and sharpener too,
Scissors, duster, see what they do!
Ramps and wheelbarrows help us move,
Simple machines, we all approve!
Actions:
- “Tools that help us” – show hands helping.
- “Stapler, broom, and sharpener too” – mime using each tool.
- “Scissors, duster, see what they do!” – mime cutting and dusting.
- “Ramps and wheelbarrows” – make a sloping hand motion and push hands forward.
- “Simple machines, we all approve!” – nod head and clap.
How to use the rhyme: Sing the song together after introducing a few simple machines. Repeat it several times, encouraging pupils to do the actions.
Watch and Learn About Simple Machines
The teacher will play a short educational video to introduce the general concept of simple machines.
Teaching Methods/Instructional Techniques
Play-based Learning, Demonstration, Guided Practice, Songs and Rhymes, Picture Talk, Question and Answer, Manipulation of Objects, Repetition.
Instructional Procedures
Step 1: Introduction
Time: 3 minutes
Teaching Skill: Engaging/Recalling
Teacher’s Activity: The teacher greets the pupils and asks them about different tools they see at home or school that help grown-ups or themselves do things. “What tools do we use to clean the class? What do we use to cut paper?”
Pupils’ Activity: Pupils respond by naming tools like broom, scissors, etc.
Learning Point: Pupils recall familiar tools.
Step 2: Meaning of Simple Machines
Time: 4 minutes
Teaching Skill: Explaining/Defining
Teacher’s Activity: The teacher explains that many tools we use are called “simple machines” because they make our work easier. “Simple machines are tools that help us do work more easily.” The teacher shows the video about simple machines.
Pupils’ Activity: Pupils listen attentively and watch the video. They repeat “Simple machines make work easier.”
Learning Point: Pupils understand the basic concept of simple machines.
Step 3: Examples – Stapler, Broom, Duster
Time: 5 minutes
Teaching Skill: Demonstrating/Identifying
Teacher’s Activity: The teacher brings out a real stapler, broom, and duster. For each item, the teacher asks, “What is this? What do we use it for?” and then demonstrates its use. “This stapler helps us join papers quickly!”
Pupils’ Activity: Pupils identify the objects, state their uses, and observe the teacher’s demonstration. They may try to mime the actions.
Learning Point: Pupils identify and understand the uses of a stapler, broom, and duster.
Step 4: Examples – Sharpener, Scissors
Time: 5 minutes
Teaching Skill: Demonstrating/Practising
Teacher’s Activity: The teacher brings out a pencil sharpener and scissors. “What is this? What does it do?” The teacher demonstrates how to sharpen a pencil (safely) and how to cut paper with scissors. The teacher guides pupils to mime the actions.
Pupils’ Activity: Pupils identify the objects, state their uses, and mime sharpening and cutting actions. They can practice with blunt scissors on paper if available and safe.
Learning Point: Pupils identify and understand the uses of a sharpener and scissors.
Step 5: Examples – Wheelbarrow, Ramp
Time: 4 minutes
Teaching Skill: Showing/Explaining
Teacher’s Activity: The teacher shows pictures of a wheelbarrow and a ramp (like a slide). “Have you seen a wheelbarrow? What does it do?” “Who has played on a slide? A slide is like a ramp, it helps us go down easily.”
Pupils’ Activity: Pupils look at the pictures, share if they have seen these items, and listen to the explanations.
Learning Point: Pupils recognise wheelbarrows and ramps as simple machines.
Step 6: Rhyme and Reinforcement
Time: 4 minutes
Teaching Skill: Reinforcing/Singing
Teacher’s Activity: The teacher leads the pupils in singing the “Simple Machines Song” with actions. The teacher points to real objects or pictures and asks pupils to name them and their uses again.
Pupils’ Activity: Pupils sing the song with actions and participate in naming the simple machines and their uses.
Learning Point: Pupils reinforce their knowledge of simple machines through song and repetition.
Step 7: Evaluation/Review
Time: 4 minutes
Teaching Skill: Questioning/Assessment
Teacher’s Activity: The teacher checks pupils’ understanding through short questions and practical tasks.
- “What is a simple machine?” (A tool that makes work easier).
- Show a stapler: “What is this? What do we use it for?”
- Show a duster: “What is this? How do we use it?”
- Show a picture of a ramp: “What is this called? How does it help?”
Pupils’ Activity: Pupils respond orally and demonstrate the required skill where appropriate (e.g., miming using a duster).
Learning Point: Pupils demonstrate understanding of the lesson.
Step 8: Conclusion
Time: 1 minute
Teaching Skill: Summarising/Praising
Teacher’s Activity: The teacher praises the pupils for their participation and reminds them that simple machines are all around us, helping us every day. “Great job today, everyone! Keep an eye out for more simple machines!”
Pupils’ Activity: Pupils respond with “Thank you, teacher!” and clap for themselves.
Learning Point: Pupils conclude the lesson with a positive reinforcement.
Lesson Keywords
- Simple machine – a tool that helps us do work more easily.
- Stapler – a tool used to join papers together.
- Broom – a tool used for sweeping and cleaning floors.
- Duster – a cloth or brush used for removing dust.
- Sharpener – a tool used to make pencils pointed.
- Scissors – a tool with two blades used for cutting.
- Wheelbarrow – a cart with one wheel at the front, used for carrying heavy loads.
- Ramp – a sloping surface that connects different levels.
Differentiation
- Support: For pupils who are struggling, the teacher will use larger real objects and pictures, provide hand-over-hand guidance for miming actions, and repeat names and uses more frequently. They can focus on identifying just two or three simple machines.
- Extension: For pupils who grasp the concept quickly, the teacher can ask them to identify other simple machines they might see at home (e.g., a spoon as a lever, a knife as a wedge) or describe in more detail how a specific simple machine helps.
Note for teachers using this lesson plan
Before the lesson, gather all the real simple machines (stapler, broom, duster, sharpener, scissors, toy wheelbarrow) and pictures of a ramp. Arrange them for easy display and demonstration. The main idea for children to grasp is that these tools make work easier. Encourage active participation by allowing pupils to touch and safely handle the objects where appropriate, and to mime the actions of using them. Repeat the names and uses of each simple machine multiple times throughout the lesson. Observe pupils’ ability to identify the objects and demonstrate their uses as a key indicator of understanding. Ensure safety when demonstrating the use of sharp objects like sharpeners and scissors; pupils should only mime or use blunt, child-safe versions if available for practice.

Community Join the conversation Open discussion +