

Note for teachers using this lesson plan
This lesson introduces Primary 4 pupils to the art of weaving. Prepare a variety of safe, simple materials like paper strips, raffia, or yarn, along with charts showing different weaving types and finished products. Ensure the classroom setup allows for practical demonstration and hands-on activity. By the end of the lesson, pupils should be able to define weaving, identify its types and materials, describe a basic weaving method, and create a simple woven object.
Class: Primary 4
Term: First Term
Week: 10
Age: 9 years
Duration: 45 minutes
Subject: Cultural and Creative Arts
Curriculum Theme: Arts and Crafts
Focal competence: Producing woven artworks using local materials
Key competencies/values: Collaboration; Creativity and Innovation
Skills:
- Producing woven craft article
Previous Lesson: Crafts and Design, Examples and Simple Craftwork
Topic: Weaving
Subject Matter: Meaning of weaving, types of weaving, simple weaving methods, tools and materials, production of a woven craft
Specific Objectives
By the end of the lesson, pupils/students should be able to:
Cognitive Domain
- Define weaving.
- State the types of weaving: twill, plain, and leno.
- Identify simple materials and tools used for weaving.
- Describe a simple weaving method.
Affective Domain
- Appreciate the creativity involved in weaving.
- Collaborate with peers during practical weaving activities.
Psychomotor Domain
- Produce a hand-woven object using a suitable local or classroom material.
Reference Materials
The following resources were used in planning this lesson:
- 2025 Revised 9 Years Basic Education Curriculum
- Relevant State Unified Scheme of Work
- Cultural and Creative Arts for Primary 4 textbook
- The HeadTeacher Scheme of work
Instructional Materials
The teacher will teach this lesson with the aid of:
- Charts showing different types of weaving patterns (e.g., plain, twill, leno).
- Samples of already made woven items (e.g., small mat, basket, hand fan).
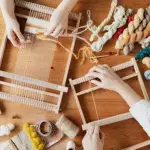
- Weaving materials such as paper strips, raffia, yarn, and small cardboard frames.
- Exercise books and pencils.
Rationale for the Lesson
This lesson introduces pupils to the fundamental art of weaving, which is an important aspect of cultural and creative arts. It helps them develop fine motor skills, creativity, and an appreciation for traditional crafts. Understanding weaving also provides a foundation for creating useful and decorative items from various materials.
Prerequisite/Previous Knowledge
Pupils should have basic knowledge of identifying different materials and have experience with simple craft activities like cutting and pasting.
Lesson Content/Board Summary
Weaving
Meaning of Weaving
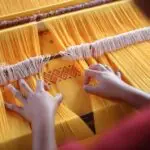
Weaving is the process of making fabric or other woven materials by interlacing two separate sets of threads or strips. One set of threads runs lengthwise (called the warp), and the other set runs crosswise (called the weft).
Types of Weaving
There are different ways to interlace the warp and weft threads, creating various patterns and textures. Some common types include:
- Plain Weave: This is the simplest and most common type of weave. Each weft thread passes over one warp thread and under the next, creating a strong and durable fabric with a checkerboard pattern.
- Twill Weave: In twill weave, the weft thread passes over two or more warp threads, then under one or more, creating a diagonal pattern or rib on the fabric surface. Examples include denim and gabardine.
- Leno Weave: Leno weave is an open, gauze-like weave where two warp threads are twisted around the weft threads. This creates a strong, sheer fabric that prevents thread slippage. It is often used for mosquito nets or fruit bags.
Simple Weaving Methods
A simple method of weaving involves interlacing strips of material in an “over-and-under” pattern. This can be done by hand or with a simple frame.
Tools and Materials for Weaving
Simple weaving can be done with everyday materials and basic tools:
- Materials: Paper strips, raffia, yarn, fabric strips, plastic strips, dried palm fronds.
- Tools: Scissors (for cutting materials), ruler (for measuring), pencil (for marking), simple cardboard loom or frame (to hold warp threads).
Description of a Simple Weaving Method (Over-and-Under)
- First, prepare your warp threads by cutting several strips of material of equal length and width. These will be fixed vertically.
- Next, prepare your weft threads by cutting more strips of material, also of equal length and width. These will be interlaced horizontally.
- To begin weaving, take one weft strip and pass it over the first warp strip, under the second, over the third, and so on, until you reach the end.
- Push this weft strip down firmly.
- Take the next weft strip and reverse the pattern: pass it under the first warp strip, over the second, under the third, and so on.
- Continue alternating the “over-and-under” pattern with each new weft strip, pushing each row down tightly to create a compact woven piece.
Teaching Methods/Instructional Techniques
Discussion, Demonstration, Guided Practice, Question and Answer, Explanation, Practical Activity
Instructional Procedures
Step 1: Introduction
Time: 5 minutes
Teaching Skill: Engaging/Activating prior knowledge
Teacher’s Activity: The teacher displays various woven items like a mat, a small basket, or a piece of fabric. The teacher asks pupils if they know how these items are made and introduces the topic of weaving.
Pupils’ Activity: Pupils observe the items, share their ideas, and listen attentively to the introduction.
Learning Point: Introduction to weaving
Step 2: Meaning of Weaving
Time: 5 minutes
Teaching Skill: Explanation/Definition
Teacher’s Activity: The teacher explains the meaning of weaving, using simple language and showing how two sets of materials (warp and weft) interlace. The teacher writes the definition on the board.
Pupils’ Activity: Pupils listen, ask questions for clarity, and repeat the definition after the teacher.
Learning Point: Meaning of weaving
Step 3: Types of Weaving
Time: 7 minutes
Teaching Skill: Explanation/Illustration
Teacher’s Activity: The teacher uses charts and sample woven materials to explain and show the three types of weaving: plain, twill, and leno. The teacher highlights the unique pattern of each type.
Pupils’ Activity: Pupils observe the charts and samples, identify the different patterns, and try to differentiate between the types.
Learning Point: Types of weaving
Step 4: Materials and Tools for Weaving
Time: 5 minutes
Teaching Skill: Identification/Demonstration
Teacher’s Activity: The teacher displays various simple materials (paper strips, raffia, yarn) and tools (scissors, simple cardboard frame) that can be used for weaving. The teacher asks pupils to identify them.
Pupils’ Activity: Pupils identify the materials and tools, and discuss where they can be found.
Learning Point: Weaving materials and tools
Step 5: Simple Weaving Method Demonstration
Time: 8 minutes
Teaching Skill: Demonstration/Modelling
Teacher’s Activity: The teacher demonstrates the “over-and-under” weaving method using paper strips on a simple cardboard frame or by hand. The teacher explains each step clearly and slowly.
Pupils’ Activity: Pupils observe the demonstration carefully, paying attention to the interlacing pattern and steps.
Learning Point: Over-and-under method
Step 6: Guided Practice
Time: 5 minutes
Teaching Skill: Guided Practice/Supervision
Teacher’s Activity: The teacher distributes pre-cut paper strips or raffia and guides pupils to start their own simple woven article or pattern using the “over-and-under” method. The teacher provides support to those struggling.
Pupils’ Activity: Pupils begin to produce a small woven article/pattern, following the teacher’s guidance.
Learning Point: Practical weaving skills
Step 7: Evaluation/Review
Time: 5 minutes
Teaching Skill: Questioning/Assessment
Teacher’s Activity: The teacher evaluates the learning by asking the following questions:
- What is weaving?
- Mention two types of weaving.
- Name two materials used for weaving.
- Describe in your own words how to do a simple “over-and-under” weave.
Pupils’ Activity: Pupils answer orally and in writing.
Learning Point: Weaving concepts assessed
Step 8: Note-Taking
Time: 4 minutes
Teaching Skill: Guided Writing
Teacher’s Activity: The teacher guides pupils to copy the essential Board Summary notes on the meaning of weaving, its types, materials, and simple method into their notebooks.
Pupils’ Activity: Pupils copy the notes carefully into their notebooks.
Learning Point: Weaving notes copied
Step 9: Conclusion
Time: 1 minute
Teaching Skill: Reinforcement
Teacher’s Activity: The teacher briefly reminds pupils about the importance of weaving as an art and how it is used to create many useful items. The teacher praises their efforts during the practical session.
Pupils’ Activity: Pupils listen and reflect on the lesson.
Learning Point: Weaving concepts reinforced
Continuous Assessment/Further Study
Type: Homework/Practice Exercise
Instruction: Complete the following tasks at home:
- Collect different types of local materials that can be used for weaving (e.g., dry grass, thin plastic bags, old fabric strips).
- Using paper strips, try to create a simple woven mat of at least 10cm by 10cm.
- Ask an adult to show you any woven items in your home and identify their types if possible.
Lesson Keywords
- Weaving – The process of interlacing two sets of threads or strips to make fabric or other materials.
- Warp – The lengthwise threads in weaving.
- Weft – The crosswise threads in weaving.
- Plain weave – A simple weave where threads go over one, under one.
- Twill weave – A weave that creates diagonal patterns.
- Leno weave – An open, gauze-like weave with twisted warp threads.
- Raffia – A strong fibre from palm leaves, used for weaving.
Differentiation
For weaker learners: Provide pre-cut, wider strips of paper or fabric for easier handling. Offer more one-on-one guidance during the practical weaving activity and simplify the explanation of weaving types by focusing only on plain weave.
For faster learners: Challenge them to create a more complex woven pattern or to weave a larger item. Encourage them to identify more examples of woven items in their environment and to experiment with different materials.
Suggested Lesson Videos
Search on YouTube for: “Primary 4 weaving simple methods” or “Kids learn to weave paper”
Teacher Guide for Using This Lesson Plan
Before the lesson, ensure you have all instructional materials ready, including charts, samples of woven items, and sufficient weaving materials (paper strips, raffia, yarn) for each pupil. Pre-cut some materials to save time during the practical session. Begin by engaging pupils with familiar woven objects to spark their interest. Clearly demonstrate the “over-and-under” weaving method step-by-step, allowing pupils to practice immediately after your demonstration. Circulate around the classroom to provide individual support and correct any errors in their weaving technique. Encourage collaboration among pupils. Ensure that pupils copy the Board Summary notes accurately into their notebooks after the practical session and before the conclusion. Check for understanding throughout the lesson by asking questions and observing their practical work. Remind pupils about safety when using scissors.


Community Join the conversation Open discussion +