

Class: Primary Five
Term: First Term
Subject: Cultural & Creative Arts
Topic: weaving Techniques
Previous Lesson: Introduction To Weaving
Content/Learning Area: Weaving with paper strips,Weaving with a frame and yarn,Weaving with palm fronds
Time Allocation: 1 hour
Performance Objectives
By the end of the lesson,pupils should be able to:
- Cognitive domain:
1.Explain the steps involved in weaving with paper strips.
2.Describe the process of weaving with yarn using a frame.
3. Identify the materials needed for each weaving method.
4. Compare and contrast different weaving techniques.
- Psychomotor Domain:
1. Weave using paper strips to create a design.
2. Weave using yarn and a frame to create a design.
3. manipulate palm fronds to create a hand fan.
- Affective Domain:
1. Show interest and enthusiasm in learning weaving techniques.
2. Appreciate the creativity and artistry involved in weaving.
3. Work cooperatively with peers during group activities.
- Social Domain:
1. Share materials and work collaboratively with classmates.
2.Respect the work of others.
3. Follow instructions and participate actively in class discussions.
Reference Materials
- 9 – Years Basic Education Curriculum
- Abuja Educational Resource Center Scheme of Work
- NAPPS National Unified Scheme of Work
- relevant Textbooks
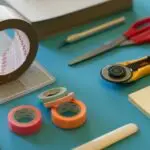
Instructional Materials
To deliver this lesson, the teacher will use the following materials:
- Colored paper or cardstock sheets
- Scissors
- Glue
- Ruler and pencil
- A simple wooden or cardboard frame
- Yarn or wool in different colors
- A blunt needle or a plastic weaving shuttle
- Masking tape or clips
- Fresh palm fronds
- Thread or twine
- Pictures/visual aids of different weaving techniques
Rationale for the Lesson
This lesson introduces pupils to various weaving techniques, fostering creativity and fine motor skills. understanding weaving provides a foundation for future art projects and thankfulness of cultural crafts.
Prerequisite/Previous Knowledge
The teacher will begin by asking pupils about their previous lesson on weaving and showing pictures of various woven items. A brief discussion will follow, leading into the introduction of today’s lesson on different weaving methods.
Lesson Content
Method 1: Weaving with Paper Strips
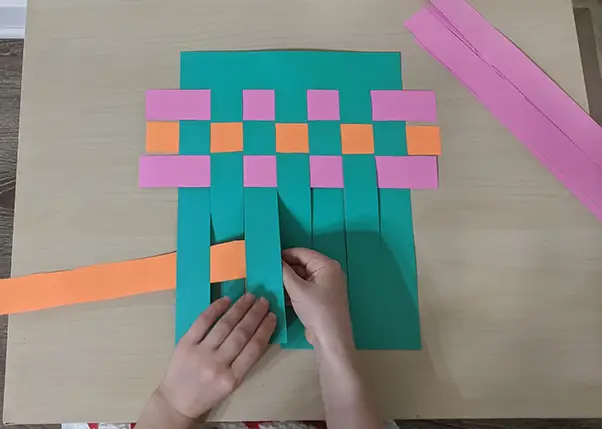
Weaving with paper strips involves interlacing strips of paper to create a pattern or design.
Materials Needed
These include:
- Colored paper or cardstock sheets
- Scissors
- Glue
- Ruler and pencil
Step-by-Step Instructions
The following are the steps to follow:
- Fold a large sheet of paper in half.
- Draw lines across the folded part, leaving space between each line.
- Cut along the lines to create slits.
- Cut another sheet into long strips.
- Weave the strips over and under the slits.
- Secure the edges with glue.
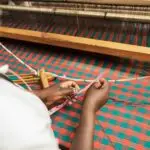
method 2: Weaving with a Frame and Yarn
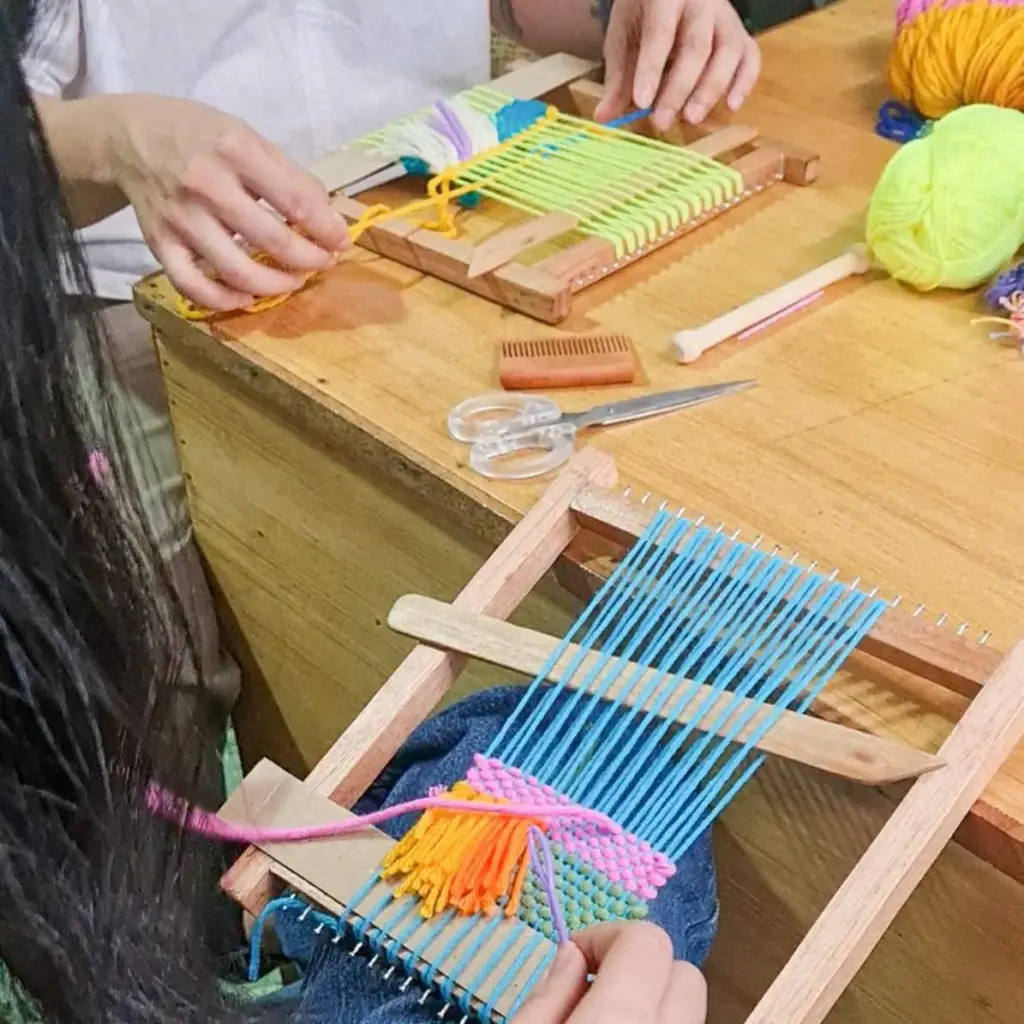
Weaving with a frame and yarn involves using a frame to hold the warp threads and interlacing yarn through them to create a fabric.
Materials Needed
These include:
- A simple wooden or cardboard frame
- Yarn or wool
- Scissors
- A blunt needle or weaving shuttle
- Masking tape or clips
Step-by-Step Instructions
the following are the steps to follow:
- Stretch yarn vertically across the frame.
- Choose a yarn color for weaving.
- Thread the yarn through a needle or shuttle.
- Weave the yarn over and under the warp threads.
- Push the yarn tightly into place.
- Change colors to make patterns.
- Tie off the ends securely.
Method 3: Weaving with Palm Fronds (Hand Fan)
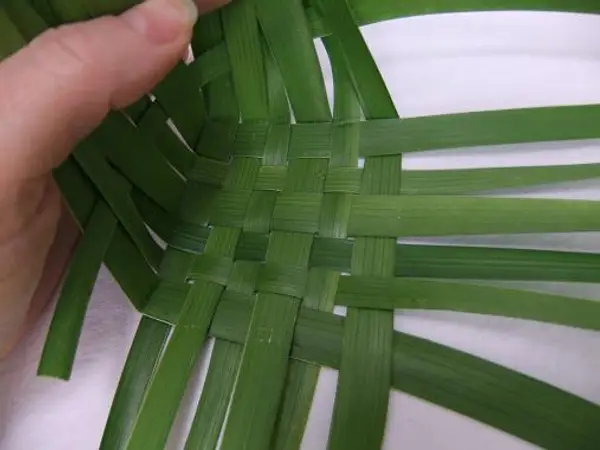
Weaving with palm fronds involves interlacing strips of palm fronds to create a functional or decorative item.
Materials Needed
These include:
- Fresh palm fronds
- Scissors
- Thread or twine
- A flat surface
Step-by-Step Instructions
The following are the steps to follow:
- Choose fresh, flexible palm fronds.
- Trim the fronds and remove rough edges.
- Overlap two fronds and tie them together.
- Weave the fronds over and under each other.
- Adjust the fronds to keep the shape even.
- Create a handle by wrapping and weaving fronds.
- secure the handle with thread or twine.
- Trim excess fronds.
Teaching Methods
To deliver this lesson, the teacher will adopt the following methods: Demonstration, Clarification, Guided Practice, and Self-reliant Practice.
Instructional Procedures
To deliver this lesson, the teacher will adopt the following steps:
Step 1: Introduction
Time: 5 minutes
Teaching Skill: Set Induction
Teacher’s Activity: Review previous lesson, introduce the topic of different weaving methods.
Pupils’ Activity: Participate in discussion, listen attentively.
Step 2: Clarification of Key Concepts
Time: 10 minutes
Teaching Skill: Explanation, Demonstration
Teacher’s Activity: Explain the three weaving methods (paper, yarn, palm fronds), highlighting key steps and differences.
Pupils’ Activity: Listen attentively, ask clarifying questions.
Step 3: Demonstration/Guided Practice
Time: 20 minutes
teaching Skill: Demonstration, Guided Practice
Teacher’s Activity: Demonstrate each weaving method step-by-step. Guide pupils through the initial steps of each method.
Pupils’ Activity: Observe the demonstration, follow along with guided practice.
Step 4: Self-reliant Practice
Time: 20 minutes
Teaching Skill: Monitoring, Support
Teacher’s Activity: Circulate, provide individual assistance, answer questions.
Pupils’ Activity: Complete weaving projects independently.
Step 5: Note-Taking
Time: 5 minutes
Teaching Skill: Note-Taking
Teacher’s Activity: Guide pupils in summarizing key steps of each method.
Pupils’ Activity: Take notes on key steps and materials.
step 6: Evaluation/Review
Time: 10 minutes
Teaching Skill: questioning, Discussion
Teacher’s Activity: Ask evaluation questions, review key concepts.
Pupils’ Activity: Answer questions, participate in discussion.
Objective-aligned checks:
- Explain the steps involved in weaving with paper strips.
- Describe the process of weaving with yarn using a frame.
- Identify the materials needed for each weaving method.
Step 7: Conclusion
Time: 5 minutes
Teaching Skill: Summary, Closure
Teacher’s Activity: Summarize the lesson, praise pupils’ efforts.
Pupils’ Activity: Listen attentively.
Lesson Keywords
- Weaving – The process of interlacing two sets of threads or materials to create fabric or a structure.
- Warp – The set of threads held taut on a frame or loom.
- Weft – The thread or material that is woven over and under the warp threads.
- Palm Fronds – Large, divided leaves of a palm tree, often used for weaving.
- Yarn – A continuous strand of fibers used for knitting or weaving.
- Frame – A structure used to hold warp threads in place during weaving.
Lesson Evaluation
to evaluate the learning, the teacher asks pupils to:
- What materials are needed for paper weaving?
- Explain the “over and under” technique in weaving.
- How do you prepare the paper for weaving?
- What tool is used to pass yarn through the warp threads?
- How can you create patterns in yarn weaving?
- Why is it important to tie the yarn tightly on the frame?
- What are two differences between paper and yarn weaving?
- What is the final step after weaving with yarn?
Assignment/Homework
- Practice weaving with paper strips at home and create a small design.
- collect different types of yarn and describe their textures.
- Find examples of woven items in your home and identify the materials used.
Differentiation
- For slower learners: Provide one-on-one assistance and simplified instructions.
- For advanced learners: Challenge them to create more complex patterns and designs.
- For visual/auditory/kinesthetic learners: Use visual aids, verbal explanations, and hands-on activities to cater to different learning styles.
Note for Teachers
Encourage pupils to explore their creativity and experiment with different weaving techniques. Provide ample support and guidance to ensure all pupils can successfully complete their weaving projects.
Community Join the conversation Open discussion +