

Class: primary Four
Term: First Term
Subject: Cultural & creative Arts
Curriculum Theme:
Previous Lesson: Modelling, Materials, Process, Sculpture and Pottery
Topic: Lines and Shapes
Content/Learning Area: what are Lines?, What are Shapes?
time Allocation: 40 minutes
Performance Objectives
By the end of the lesson, pupils should be able to:
- Cognitive Domain:
– Identify different types of lines (straight, curved).
– Identify different types of shapes (geometric,organic).
– Explain the meaning of lines and shapes in art.
- Affective Domain:
– Show interest in learning about lines and shapes.
– Appreciate the importance of lines and shapes in art and design.
- Psychomotor Domain:
– Draw examples of straight and curved lines.
– Draw examples of geometric and organic shapes.
- Social Domain:
– Participate actively in class discussions.- Work cooperatively with peers during activities.
Reference Materials
- 9 – Years Basic Education Curriculum
- Abuja Educational Resource Center Scheme of Work
- NAPPS National Unified scheme of Work
- Online Details
- Relevant Textbooks
Instructional Materials
To deliver this lesson, the teacher will use the following materials:
- Whiteboard or chart paper
- Markers or crayons
- Pictures showing examples of lines and shapes
- Drawing materials for pupils (pencils, crayons, paper)
Rationale for the Lesson
Understanding lines and shapes is fundamental to art and design.This lesson provides a basic foundation for future lessons on more complex artistic concepts and techniques. It helps develop observation skills and creativity.
Prerequisite/Previous Knowledge
The teacher will begin by asking pupils what they already know about lines and shapes, encouraging them to share their prior knowledge and experiences. A rapid review of basic shapes will be done.
Lesson Content
What are Lines?
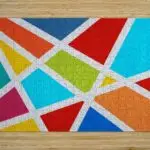
Lines are marks that can be straight or curved. They are used to create shapes,patterns,or show boundaries. Lines can be different lengths, thicknesses, and directions.
Types of lines include:
- Straight lines: These lines don’t bend; they can go across (horizontal), up and down (vertical), or at an angle (diagonal).
- Curved lines: These lines bend; they can be round (circular), wavy, or spiral.
- Dotted lines: These lines are made up of a series of dots, creating a broken line effect.
- Zigzag lines: These lines consist of a series of sharp, angular turns, creating a back-and-forth pattern.
What are Shapes?
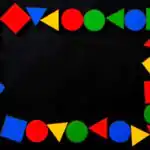
Shapes are areas surrounded by lines. they can be geometric (like squares and circles) or organic (like clouds and leaves).
Examples of shapes include:
- Geometric shapes: These have clear edges and corners, like squares, circles, triangles, and rectangles.
- Organic shapes: these shapes are more natural and uneven, like clouds, leaves, or flowers.
- Abstract shapes: these shapes are non-representational and do not resemble any specific object or form.
- Symmetrical shapes: These shapes have balanced proportions,where one half mirrors the other.
Teaching Methods
To deliver this lesson, the teacher will adopt the following methods: Discussion, Presentation, Guided Practice, Independent Practice
Instructional Procedures
To deliver this lesson, the teacher will adopt the following steps:
Step 1: Introduction
Time: 5 minutes
Teaching Skill: Set Induction
Teacher’s Activity: Introduces the topic, Lines and Shapes, and asks pupils what they already know.
Pupils’ Activity: Share their prior knowledge and listen to the introduction.
Step 2: Description of Key Concepts
Time: 15 minutes
Teaching skill: explaining, illustrating
Teacher’s Activity: Explains the meaning of lines (straight, curved) and shapes (geometric, organic) using examples and visuals.Pupils’ Activity: Listen attentively and ask questions for clarification.
Step 3: Presentation/Guided Practice
Time: 10 minutes
Teaching Skill: Demonstrating, guiding
Teacher’s Activity: Demonstrates how to draw different types of lines and shapes on the board.
Pupils’ Activity: Observe the demonstration and practice drawing lines and shapes with guidance.
Step 4: independent Practice
Time: 5 minutes
Teaching Skill: monitoring, providing feedback
Teacher’s Activity: Guides pupils as they independently draw lines and shapes.
Pupils’ Activity: Draw various lines and shapes on their own.
Step 5: Note-Taking
Time: 2 minutes
Teaching skill: Summarizing, note-taking
Teacher’s Activity: Summarizes key concepts and encourages pupils to take notes.
pupils’ Activity: Take notes on the key concepts.
Step 6: Evaluation/Review
Time: 3 minutes
Teaching Skill: Questioning, assessing
Teacher’s Activity: Asks questions to assess pupils’ understanding.
Pupils’ Activity: Answer questions to demonstrate their understanding.
Step 7: Conclusion
Time: 2 minutes
Teaching Skill: Summarizing, reinforcing
Teacher’s Activity: Reviews the key concepts of lines and shapes, emphasizing their importance in art and design. Praises pupils for their participation and effort.
Pupils’ Activity: Listen to the summary and reflect on what they have learned.
Lesson Keywords
- Lines – Marks that can be straight or curved, used to create shapes and patterns.
- Shapes – Areas surrounded by lines, can be geometric or organic.
- Geometric – Shapes with clear edges and corners, like squares and circles.
- Organic – shapes that are natural and uneven, like clouds and leaves.
- Straight Line – A line that does not bend.
- Curved Line – A line that bends.
Lesson Evaluation
To evaluate the learning, the teacher asks pupils to:
- What is a line? Give an exmaple.
- What is the difference between a straight line and a curved line?
- Name three geometric shapes.
- Name three organic shapes.
- Draw a picture using only straight lines.
- Draw a picture using only curved lines.
Assignment/Homework
- Collect different types of leaves and identify the organic shapes within them.
- Draw a house using only geometric shapes.
- Create a pattern using a combination of straight and curved lines.
Differentiation
- For slower learners: provide one-on-one assistance and use simpler examples.
- For advanced learners: Encourage them to create more complex designs using lines and shapes.
- For visual/auditory/kinesthetic learners: Use visual aids, verbal explanations, and hands-on activities to cater to different learning styles.
Note for Teachers
Encourage pupils to explore different types of lines and shapes in their habitat and incorporate them into their artwork. Provide constructive feedback and praise their efforts to foster creativity and confidence.
Community Join the conversation Open discussion +