

Note for teachers using this lesson plan
Dear teacher, this lesson introduces pupils to the fundamental concepts of drawing. Ensure you have a variety of drawing materials and visual examples of different drawing types ready for display. Emphasise safety when handling sharpeners and encourage pupils to express their creativity through simple line sketches. By the end of the lesson, pupils should clearly understand what drawing is, its various types, and the materials used.
Class: Primary 4
Term: First Term
Week: 4
Age: 9 years
Duration: 45 minutes
Subject: Cultural and Creative Arts
Curriculum Theme: Arts and Crafts
Focal competence: Drawing and making crafts
Key competencies/values: Communication; Creativity and Innovation; ICT and Digital Competencies
Skills:
- Drawing
- Shading
Previous Lesson: Nigerian Art, Selected Traditions, Artworks and Cultural Significance
Topic: Drawing
Subject Matter: Meaning, types and materials for drawing
Specific Objectives
By the end of the lesson, pupils/students should be able to:
Cognitive Domain
- Define drawing.
- State at least three types of drawing.
- List at least four materials used for drawing.
Psychomotor Domain
- Make simple line sketches.
Reference Materials
The following resources were used in planning this lesson:
- 2025 Revised 9 Years Basic Education Curriculum
- Relevant State Unified Scheme of Work
- Cultural and Creative Arts for Primary 4 textbook
- The HeadTeacher Scheme of work
Instructional Materials
The teacher will teach this lesson with the aid of:
- Drawing media (pencils, charcoal, crayons)
- Pencil
- Eraser
- Sharpener
- Drawing paper/sketchpad
- Examples of still-life, life, landscape, nature, and imaginative drawings
- Video clips on stages of drawing (if available)
Rationale for the Lesson
This lesson is important as it introduces pupils to the foundational art form of drawing, fostering their creativity and observation skills. Understanding different drawing types and materials equips them with basic artistic vocabulary and practical knowledge. This foundation is essential for further exploration in cultural and creative arts.
Prerequisite/Previous Knowledge
Pupils have basic knowledge of lines, shapes, and colours from previous art lessons.
Lesson Content/Board Summary
Drawing
Meaning of Drawing
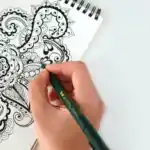
Drawing is the art of making pictures or images on a surface using lines, shapes, and marks. It is a way to express ideas, feelings, or observations using various tools.
Types of Drawing
There are different types of drawing, each focusing on a particular subject or style:
- Still-life Drawing: This involves drawing inanimate (non-living) objects, such as fruits, bottles, books, or flowers arranged in a composition.
- Life Drawing: This type of drawing focuses on capturing the form and movement of living things, like people or animals.
- Landscape Drawing: This is the art of drawing natural outdoor scenes, including mountains, trees, rivers, and skies.
- Nature Drawing: This involves drawing specific elements from nature, such as individual flowers, leaves, insects, or rocks.
- Imaginative Drawing: This type of drawing comes from the artist’s mind, memory, or imagination, creating scenes or figures that may not exist in reality.
Materials for Drawing
Various materials are used to create drawings:
- Pencil: The most common drawing tool, used for sketching, outlining, and shading. Pencils come in different grades of hardness (e.g., HB for general use, 2B/4B for darker lines and shading).
- Eraser: Used to correct mistakes, lighten lines, or create highlights in a drawing.
- Sharpener: Essential for keeping pencils pointed, which helps in making clean and precise lines.
- Drawing Paper/Sketchpad: The surface on which drawings are made. It can vary in texture and thickness.
- Charcoal: A soft drawing material that produces rich, dark lines and tones, often used for expressive and large-scale drawings.
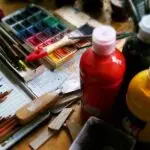
- Crayons/Pastels: Used to add colour to drawings, offering a different texture and visual effect compared to pencils.
Teaching Methods/Instructional Techniques
Discussion, Demonstration, Guided Practice, Question and Answer, Explanation, Observation, Practical Activity
Instructional Procedures
Step 1: Introduction
Time: 5 minutes
Teaching Skill: Engaging/Questioning
Teacher’s Activity: The teacher greets the pupils and asks them what they understand by “art” and if they have ever drawn anything before. The teacher then introduces the topic: Drawing.
Pupils’ Activity: Pupils respond to the questions and listen attentively to the introduction.
Learning Point: Prior art knowledge
Step 2: Explanation of Drawing
Time: 7 minutes
Teaching Skill: Explanation/Definition
Teacher’s Activity: The teacher defines drawing as the art of making pictures using lines, shapes, and marks on a surface. The teacher shows simple examples of drawings.
Pupils’ Activity: Pupils listen, observe the examples, and repeat the definition of drawing.
Learning Point: Definition of drawing
Step 3: Introduction to Types of Drawing
Time: 8 minutes
Teaching Skill: Visual Aid/Categorisation
Teacher’s Activity: The teacher displays various examples of drawings, categorising them into still-life, life, landscape, nature, and imaginative drawings. The teacher briefly names each type.
Pupils’ Activity: Pupils observe the different drawing examples and listen to the names of the types.
Learning Point: Introduction to drawing types
Step 4: Explanation of Drawing Types
Time: 8 minutes
Teaching Skill: Explanation/Clarification
Teacher’s Activity: The teacher explains each type of drawing (still-life, life, landscape, nature, imaginative) using the displayed examples and asks pupils to identify features of each type.
Pupils’ Activity: Pupils listen to the explanations, ask questions, and identify features in the examples.
Learning Point: Understanding drawing types
Step 5: Introduction to Drawing Materials
Time: 5 minutes
Teaching Skill: Demonstration/Identification
Teacher’s Activity: The teacher displays actual drawing materials such as pencils, erasers, sharpeners, and drawing paper. The teacher names each material.
Pupils’ Activity: Pupils identify the materials as the teacher names them.
Learning Point: Introduction to drawing materials
Step 6: Explanation of Drawing Materials
Time: 5 minutes
Teaching Skill: Explanation/Practical Application
Teacher’s Activity: The teacher explains the use of each drawing material and demonstrates how to make simple lines and sketches with a pencil on paper. The teacher guides pupils to make simple line sketches.
Pupils’ Activity: Pupils listen, observe the demonstration, and make simple line sketches on their paper.
Learning Point: Understanding drawing materials
Step 7: Evaluation/Review
Time: 5 minutes
Teaching Skill: Questioning/Assessment
Teacher’s Activity: The teacher evaluates the learning by asking the following questions:
- What is drawing?
- Mention two types of drawing you learned today.
- List three materials used for drawing.
Pupils’ Activity: Pupils answer orally and in writing.
Learning Point: Drawing concepts assessed
Step 8: Note-Taking
Time: 4 minutes
Teaching Skill: Guided Writing
Teacher’s Activity: The teacher guides pupils to copy the essential Board Summary notes on the meaning, types, and materials for drawing into their notebooks.
Pupils’ Activity: Pupils copy the notes carefully into their notebooks.
Learning Point: Notes on drawing
Step 9: Conclusion
Time: 3 minutes
Teaching Skill: Reinforcement
Teacher’s Activity: The teacher summarises the main points of the lesson, reiterating the importance of drawing as a means of expression and encouraging pupils to practice drawing at home.
Pupils’ Activity: Pupils listen and participate in a final brief discussion.
Learning Point: Drawing lesson consolidated
Continuous Assessment/Further Study
Type: Homework
Instruction: Answer the following questions in your notebook and bring them to the next class:
- Draw a simple object you see in your home (e.g., a cup, a chair, a fruit).
- Name two drawing materials you used for your drawing.
- What type of drawing is your sketch (e.g., still-life, imaginative)?
Lesson Keywords
- Drawing – Making pictures using lines and marks.
- Still-life – Drawing inanimate objects.
- Landscape – Drawing outdoor scenes.
- Imaginative – Drawing from mind/memory.
- Pencil – Common drawing tool.
- Eraser – Tool for correcting mistakes.
Differentiation
For weaker learners, the teacher will provide pre-drawn outlines for them to trace or colour, focusing on identifying materials and types. Faster learners will be encouraged to draw more complex objects or combine different drawing types in a single sketch, such as drawing a still-life object within a simple landscape background.
Suggested Lesson Videos
For further understanding, search for these topics on YouTube:
Teacher Guide for Using This Lesson Plan
Before the lesson, gather all necessary instructional materials, including actual drawing tools and clear visual examples of different drawing types. Arrange the classroom to allow for easy viewing of demonstrations and individual sketching. Begin by engaging pupils with questions about their prior experiences with art. When explaining drawing types, use the visual aids to make the concepts concrete and relatable. During the practical activity, circulate around the classroom to provide individual guidance and support, ensuring all pupils are participating and making simple line sketches. Encourage pupils to share their work. The Board Summary should be written clearly and concisely for pupils to copy in Step 8. Ensure pupils understand the homework task and have the necessary materials for it. Emphasise proper handling of drawing tools, especially sharpeners.
Community Join the conversation Open discussion +