

Note for teachers using this lesson plan
This lesson introduces JSS 1 students to the art of modelling. Teachers should prepare the necessary materials like clay, water, and simple modelling tools in advance. Emphasise safety when handling tools and ensure students understand the basic techniques before attempting to mould their own objects. By the end of the lesson, students should be able to define modelling, identify its techniques, list materials and tools, and practically mould a simple item.
Class: JSS 1
Term: First Term
Week: 7
Age: 12 years
Duration: 45 minutes
Subject: Cultural and Creative Arts
Curriculum Theme: Visual Arts and Design
Focal competence: Using appropriate materials, tools and equipment to model art forms
Key competencies/values: Communication; Creativity and innovation; Resilience
Skills:
- Modelling of objects
Previous Lesson: Tie and Dye Materials and Fabric Design
Topic: Modeling
Subject Matter: Meaning of modelling, Identification of the techniques used in modelling, Materials and tools used in modelling
Specific Objectives
By the end of the lesson, pupils/students should be able to:
Cognitive Domain
- define modelling;
- list the materials and tools used in modelling;
- identify the techniques used in modelling.
Psychomotor Domain
- mould a simple cup or pot using clay.
Reference Materials
The following resources were used in planning this lesson:
- 2025 Revised 9 Years Basic Education Curriculum
- Relevant State Unified Scheme of Work
- Cultural and Creative Arts for Junior Secondary Schools, Book 1
- The HeadTeacher Scheme of work
Instructional Materials
The teacher will teach this lesson with the aid of:
- Clay
- Water
- Paper
- Water based glue
- Plasticine
- Modelling tools (e.g., wooden tools, wire loop tools)
- Projector or TV for video playback (if available)
Rationale for the Lesson
This lesson introduces students to modelling as a fundamental art form, fostering their creativity and practical skills. Understanding modelling techniques and materials allows students to express themselves dimensionally. It also lays a foundation for more complex sculptural works in the future.
Prerequisite/Previous Knowledge
Students should have basic knowledge of different art forms and an interest in creating objects with their hands.
Lesson Content/Board Summary
Modeling
Meaning of Modelling
Modelling is the art of creating three-dimensional forms or figures from soft, pliable materials. It involves shaping and manipulating materials to build up or carve out a desired form.
Techniques Used in Modelling
There are several techniques used in modelling, each suitable for different materials and desired outcomes:
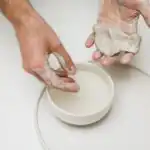
- Pinching: This is a basic technique where a ball of clay is shaped by pinching and pulling with the fingers to create a form, often a pot or a bowl.
- Coiling: This involves rolling clay into long, snake-like coils and then layering and joining them to build up a form. It is commonly used for making pots and vessels.
- Slab Building: This technique uses flat sheets of clay (slabs) that are cut and joined together to construct forms. It allows for more geometric and angular shapes.
- Additive Modelling: This technique involves adding material to build up a form. It is often used with clay, plasticine, or paper mache.
- Subtractive Modelling: This technique involves removing material from a larger block to create a form, similar to carving. While less common with soft materials like clay, it applies when working with plaster or wood.
Materials and Tools Used in Modelling
Various materials and tools are used in modelling, depending on the desired outcome and technique:
- Clay: A natural, earthy material that is pliable when wet and hardens when fired or air-dried. It is widely used for pottery and sculpture.
- Plasticine: A soft, oil-based modelling material that does not dry out, making it reusable and easy to manipulate.
- Paper Mache: A composite material consisting of paper pieces, or pulp, reinforced with an adhesive like glue or starch. It is lightweight and dries hard.
- Plaster of Paris: A white powdery substance that, when mixed with water, forms a paste that quickly hardens. It is used for casting and creating solid forms.
- Water: Essential for keeping clay pliable and for smoothing surfaces.
- Modelling Tools: These include various wooden, plastic, or metal tools used for shaping, cutting, smoothing, and detailing the modelled form.
- Wire Loop Tools: Used for carving and removing excess clay.
- Sponges: Used for dampening and smoothing clay surfaces.
- Water-based glue: Used for paper mache and joining certain materials.
Teaching Methods/Instructional Techniques
Discussion, Demonstration, Guided Practice, Question and Answer, Explanation, Observation, Practical Activity
Instructional Procedures
Step 1: Introduction
Time: 5 minutes
Teaching Skill: Questioning/Engagement
Teacher’s Activity: The teacher greets the students and asks them if they have ever played with clay or plasticine and what they made. The teacher then introduces the topic: Modelling.
Pupils’ Activity: Students respond to the questions and listen attentively to the introduction.
Learning Point: Prior knowledge activation
Step 2: Meaning of Modelling
Time: 8 minutes
Teaching Skill: Group Discussion/Explanation
Teacher’s Activity: The teacher divides students into small groups and instructs them to discuss the meaning of modelling based on their prior experiences. After group discussions, the teacher facilitates a whole-class discussion and then provides a clear definition of modelling.
Pupils’ Activity: Students discuss in groups, share their ideas, and listen to the teacher’s explanation.
Learning Point: Modelling definition
Step 3: Identification of Modelling Techniques
Time: 7 minutes
Teaching Skill: Video Observation/Explanation
Teacher’s Activity: The teacher shows a short video demonstrating different modelling techniques (e.g., pinching, coiling, slab building). After the video, the teacher explains each technique, highlighting how they are used.
Pupils’ Activity: Students watch the video and pay attention to the teacher’s explanations of the techniques.
Learning Point: Modelling techniques identified
Step 4: Materials and Tools Used in Modelling
Time: 7 minutes
Teaching Skill: Demonstration/Listing
Teacher’s Activity: The teacher displays the various modelling materials (clay, plasticine, water) and tools (modelling tools, sponges) to the students. The teacher names each item and briefly explains its use.
Pupils’ Activity: Students observe the materials and tools, listen to their names and uses, and may ask questions.
Learning Point: Modelling materials and tools
Step 5: Demonstration of Simple Moulding
Time: 5 minutes
Teaching Skill: Demonstration
Teacher’s Activity: The teacher demonstrates how to mould a simple shape, like a small ball or a basic cup, using clay and a pinching technique, emphasising safety and basic handling.
Pupils’ Activity: Students carefully observe the teacher’s demonstration.
Learning Point: Basic moulding demonstration
Step 6: Guided Practice – Moulding a Simple Cup or Pot
Time: 6 minutes
Teaching Skill: Guided Practice/Supervision
Teacher’s Activity: The teacher distributes clay to each student and guides them to mould a simple cup or pot using the pinching or coiling technique. The teacher moves around, offering assistance and correcting errors.
Pupils’ Activity: Students actively engage in moulding their own simple cup or pot with the provided clay.
Learning Point: Practical moulding skills
Step 7: Evaluation/Review
Time: 5 minutes
Teaching Skill: Questioning/Assessment
Teacher’s Activity: The teacher evaluates the learning by asking the following questions:
- What is modelling?
- List two materials used in modelling.
- Mention two techniques used in modelling.
- Show your moulded cup/pot.
Pupils’ Activity: Pupils answer orally and in writing.
Learning Point: Lesson understanding assessed
Step 8: Note-Taking
Time: 4 minutes
Teaching Skill: Guided Writing
Teacher’s Activity: The teacher guides pupils/students to copy the essential Board Summary notes on the meaning, techniques, materials, and tools of modelling into their notebooks.
Pupils’ Activity: Pupils/students copy the notes carefully into their notebooks.
Learning Point: Modelling concepts recorded
Step 9: Conclusion
Time: 3 minutes
Teaching Skill: Reinforcement
Teacher’s Activity: The teacher summarises the main points of the lesson, reiterating the importance of modelling as an art form and encouraging students to practice their new skills.
Pupils’ Activity: Students listen to the summary and ask any final questions.
Learning Point: Modelling concept reinforced
Continuous Assessment/Further Study
Type: Homework/Practice Exercise
Instruction: Answer the following questions and try to practice modelling at home.
- Define modelling in your own words.
- Name three materials you can use for modelling.
- Describe one modelling technique you learned today.
- Using any soft material available at home (e.g., mud, dough), try to mould a simple fruit or animal.
Lesson Keywords
- Modelling – The art of creating three-dimensional forms from soft materials.
- Pinching – A modelling technique using fingers to shape clay.
- Coiling – A modelling technique using rolled clay ropes to build forms.
- Slab building – A modelling technique using flat sheets of clay.
- Clay – A natural, pliable material used for modelling.
- Plasticine – A non-drying, oil-based modelling material.
Differentiation
For weaker learners, the teacher will provide more one-on-one guidance during the practical moulding activity and simplify explanations of techniques. Faster learners can be challenged to mould a more complex object or experiment with combining two different techniques to create their form.
Suggested Lesson Videos
For further understanding and visual examples, search on YouTube for: JSS1 meaning of modelling techniques materials
Teacher Guide for Using This Lesson Plan
Before the lesson, ensure all instructional materials, especially clay and water, are readily available and prepared for distribution. If using a video, test the playback equipment beforehand. Begin by engaging students with questions about their experiences with pliable materials to activate prior knowledge. Guide the group discussion on the meaning of modelling, then clearly define it. When introducing techniques and materials, use the video and physical demonstrations to make the concepts concrete. During the practical moulding session, circulate among students, offering encouragement and corrective feedback. Emphasise the importance of careful handling of materials and tools. Students should copy the Board Summary notes after the practical activities and evaluation to consolidate their learning. Conclude by reinforcing the main ideas and encouraging continued practice.

Community Join the conversation Open discussion +