

Note for teachers using this lesson plan
This lesson introduces students to the fundamental aspects of clay in Cultural and Creative Arts, focusing on its sources, uses, and basic handling. Teachers should prepare actual clay samples and tools for demonstration and practical work, ensuring a safe and clean environment. By the end of the lesson, students should be able to identify clay sources, describe its uses, understand preparation and storage, and attempt a simple clay artwork using basic techniques.
Class: JSS 1
Term: First Term
Week: 10
Age: 12 years
Duration: 45 minutes
Subject: Cultural and Creative Arts
Curriculum Theme: Visual Arts and Design
Focal competence: Making meaningful presentation in drama
Key competencies/values: Communication; Creativity and innovation
Skills:
- Creating art work using pinching, coiling and moulding techniques
Previous Lesson: Clay and Its Types
Topic: Clay: Sources Of Clay
Subject Matter: Sources of clay, Uses of clay
Specific Objectives
By the end of the lesson, pupils/students should be able to:
Cognitive Domain
- State the sources of clay.
- State the uses of clay.
- Describe the physical characteristics of clay from its source.
- Explain the process of clay preparation and storage.
- Describe various techniques used in modelling clay artworks.
Affective Domain
- Appreciate clay as a versatile material for artistic expression.
- Demonstrate creativity and innovation in handling clay.
- Participate actively in group brainstorming and practical activities.
Psychomotor Domain
- Create a simple clay work using pinching, moulding, or coiling techniques.
Social Domain
- Communicate ideas effectively during group discussions about clay.
- Collaborate with peers to explore the properties and uses of clay.
Reference Materials
The following resources were used in planning this lesson:
- 2025 Revised 9 Years Basic Education Curriculum
- Relevant State Unified Scheme of Work
- Cultural and Creative Arts for Junior Secondary Schools Book 1
- The HeadTeacher Scheme of work
Instructional Materials
The teacher will teach this lesson with the aid of:
- Clay samples (raw and prepared)
- Water
- Spatula
- Knife
- Bowl
- Video clip on sources of clay
- Pictures or charts showing clay sources and uses
Rationale for the Lesson
This lesson is important for students to understand the origin and applications of clay, a fundamental material in visual arts. It provides practical skills in preparing and working with clay, fostering creativity and an appreciation for traditional art forms. Understanding clay’s properties and handling techniques lays a strong foundation for future artistic endeavors.
Prerequisite/Previous Knowledge
Students should have basic knowledge of natural materials and their uses, as well as an interest in creating simple artworks.
Lesson Content/Board Summary
Clay: Sources Of Clay
Sources of Clay
Clay is a natural earth material that is found in various locations. It is formed from the weathering and decomposition of rocks over a very long period. Common sources of clay include:
- Riverbeds and Stream Banks: Clay is often deposited by flowing water in riverbeds, stream banks, and floodplains.
- Swamps and Marshes: These wet areas can accumulate fine particles of soil, including clay.
- Pits and Quarries: Commercial clay is often mined from specific pits or quarries where large deposits are found.
- Digging from the Earth: In many communities, clay can be found by digging beneath the topsoil in certain areas, especially where the soil is heavy and sticky.
Description of Clay from its Source
When found in its natural state, clay often appears as a dense, earthy material. It can vary in colour from white, grey, brown, red, or even black, depending on the minerals present. Raw clay is usually moist, sticky, and pliable when wet, but becomes hard and brittle when dry. It often contains impurities like sand, pebbles, and organic matter, which need to be removed before use.
Uses of Clay
Clay is a versatile material with numerous uses, especially in arts, crafts, and construction:
- Pottery and Ceramics: Clay is primarily used to make pots, plates, cups, tiles, and other ceramic objects.
- Sculpture and Modelling: Artists use clay to create various sculptures, figures, and decorative items.
- Building Materials: Clay is used to make bricks, roof tiles, and other construction materials.
- Traditional Crafts: In many cultures, clay is used for making traditional crafts, figurines, and ritual objects.
- Industrial Applications: Clay is also used in industries for making cement, paper, and as a filler in various products.
Clay Preparation and Storage
To make clay suitable for modelling and pottery, it needs to be prepared:
- Wedge/Kneading: This involves repeatedly pressing and folding the clay to remove air bubbles and achieve a uniform consistency.
- Removing Impurities: Stones, sand, and other debris are removed by hand or by sieving the clay when it is in a slip (liquid) form.
- Adding Water: Water is added or removed to achieve the desired plasticity (workability) of the clay.
For storage, clay should be kept moist and airtight to prevent it from drying out. It can be stored in:
- Sealed Plastic Bags: This is the most common method to keep clay moist for extended periods.
- Airtight Containers: Buckets or plastic bins with tight-fitting lids are also effective.
- Damp Cloths: Clay can be wrapped in damp cloths before being placed in a sealed container.
Techniques Used in Modelling Clay Artworks
Several basic techniques are used to shape clay into artworks:
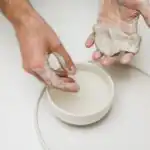
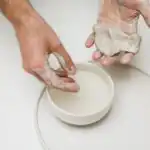
- Pinching: This is the simplest method, involving shaping a ball of clay by pinching and pressing it with the thumb and fingers to create a form, often a small pot or bowl.
- Coiling: This technique involves rolling clay into long, snake-like coils and then stacking and joining them to build up a form.
- Moulding: This involves pressing clay into or over a form (mould) to take its shape. It can also refer to generally shaping clay with hands and tools.
- Slab Building: Clay is rolled out into flat sheets (slabs) which are then cut, joined, and shaped to create forms.
Teaching Methods/Instructional Techniques
Discussion, Demonstration, Guided Practice, Question and Answer, Explanation, Observation, Group Work, Practical Activity
Instructional Procedures
Step 1: Introduction
Time: 5 minutes
Teaching Skill: Activating Prior Knowledge
Teacher’s Activity: The teacher greets the students and asks them to name some natural materials they know and what they are used for. The teacher then introduces clay as a natural material used in art and craft.
Pupils’ Activity: Students respond by naming materials like wood, sand, water, and their uses. They listen attentively to the introduction of clay.
Learning Point: Introduction to clay
Step 2: Sources of Clay
Time: 8 minutes
Teaching Skill: Visual Learning/Explanation
Teacher’s Activity: The teacher shows a video clip on the sources of clay and explains where clay can be found, such as riverbeds, swamps, and pits. The teacher also displays pictures of raw clay in its natural environment.
Pupils’ Activity: Students watch the video and observe the pictures. They identify and state various sources of clay.
Learning Point: Identifying clay sources
Step 3: Uses of Clay
Time: 7 minutes
Teaching Skill: Brainstorming/Discussion
Teacher’s Activity: The teacher divides students into groups and asks them to brainstorm and discuss the different uses of clay. The teacher guides the discussion and lists the uses on the board.
Pupils’ Activity: Students brainstorm in their groups and share their ideas on the uses of clay. They listen as the teacher compiles the uses.
Learning Point: Listing clay uses
Step 4: Description of Clay Source
Time: 5 minutes
Teaching Skill: Description/Observation
Teacher’s Activity: The teacher presents samples of raw clay and describes its physical characteristics (colour, texture, impurities) as found in its natural source. The teacher explains how these characteristics can vary.
Pupils’ Activity: Students observe the clay samples and listen to the teacher’s description. They ask questions for clarification.
Learning Point: Describing raw clay
Step 5: Clay Preparation and Storage
Time: 6 minutes
Teaching Skill: Explanation/Demonstration
Teacher’s Activity: The teacher explains and demonstrates how clay is prepared for use (wedging/kneading, removing impurities) and how it should be stored to maintain its workability. The teacher uses a small amount of clay to show wedging.
Pupils’ Activity: Students observe the demonstration and listen to the explanation. They understand the importance of proper clay preparation and storage.
Learning Point: Clay handling techniques
Step 6: Modelling Techniques and Practical
Time: 9 minutes
Teaching Skill: Demonstration/Guided Practice
Teacher’s Activity: The teacher describes and briefly demonstrates basic clay modelling techniques such as pinching, coiling, and moulding. The teacher then guides students to create a simple clay work (e.g., a small pot, ball, or animal shape) using one of these techniques.
Pupils’ Activity: Students observe the demonstrations and then, with guidance, attempt to create a simple clay artwork using pinching, coiling, or moulding.
Learning Point: Practising clay modelling
Step 7: Evaluation/Review
Time: 5 minutes
Teaching Skill: Questioning/Assessment
Teacher’s Activity: The teacher evaluates the learning by asking the following questions:
- Mention two sources of clay.
- State three uses of clay.
- How would you describe raw clay from its source?
- What is one way to prepare clay for use?
- Name one technique used for modelling clay.
Pupils’ Activity: Pupils answer orally and in writing.
Learning Point: Assessing lesson understanding
Step 8: Note-Taking
Time: 4 minutes
Teaching Skill: Guided Writing
Teacher’s Activity: The teacher guides pupils/students to copy the essential Board Summary notes on sources, uses, preparation, storage, and techniques of clay into their notebooks.
Pupils’ Activity: Pupils/students copy the notes carefully into their notebooks.
Learning Point: Recording lesson notes
Step 9: Conclusion
Time: 1 minute
Teaching Skill: Summarisation
Teacher’s Activity: The teacher briefly summarises the main points of the lesson, emphasizing the importance of clay as an art material and its various applications. The teacher encourages students to explore more about clay.
Pupils’ Activity: Students listen and reflect on the lesson’s key takeaways.
Learning Point: Consolidating clay knowledge
Continuous Assessment/Further Study
Type: Homework/Practical Exercise
Instruction: Answer the questions and complete the practical task.
- Research and write down two other local names for clay in your community.
- Draw and label two items that can be made from clay.
- Using a small amount of clay (if available) or play-dough, create a simple object (e.g., a small animal, a fruit, or a miniature pot) and bring it to class.
Lesson Keywords
- Clay – A natural earthy material that is plastic when wet and hard when fired.
- Sources – Places where something originates or can be found.
- Pinching – A clay modelling technique using fingers to shape a form.
- Coiling – A clay modelling technique using rolled clay ropes to build up a form.
- Moulding – The process of shaping clay, often by hand or using a mould.
- Wedge – To knead clay to remove air bubbles and achieve uniform consistency.
Differentiation
For weaker learners, the teacher will provide more direct guidance during the practical activity, focusing on simple shapes and one technique. Visual aids will be used extensively. Faster learners will be encouraged to experiment with combining different techniques or creating more complex forms. They can also research different types of clay and their properties.
Suggested Lesson Videos
For further understanding, search on YouTube for: “Sources of clay for kids” or “Basic clay modelling techniques JSS 1”
Teacher Guide for Using This Lesson Plan
Before the lesson, ensure you have collected various clay samples (if possible, raw and prepared), water, and basic tools like a spatula and knife. Prepare a short, engaging video on clay sources and have pictures or charts ready. During the lesson, emphasize the hands-on aspect of CCA. Guide students through the brainstorming activity, encouraging all to participate. When demonstrating clay preparation and modelling techniques, ensure all students can see clearly. Allow ample time for the practical activity in Step 6, providing individual support as needed. Students should copy the Board Summary notes in Step 8 after the practical activities and evaluation. Pay attention to common errors such as not wedging clay properly or making forms too thin. Encourage creativity and careful handling of materials throughout the lesson.
Community Join the conversation Open discussion +