

Note for teachers using this lesson plan
This lesson introduces students to the art of carving, focusing on its meaning, essential materials, tools, and the step-by-step procedure. Prepare various carving materials like dried clay and soap, along with suitable tools, to allow students hands-on experience. Emphasise safety when handling carving tools and ensure students demonstrate the ability to define carving, identify tools, discuss the procedure, and carve simple objects by the end of the lesson.
Class: JSS 1
Term: First Term
Week: 8
Age: 12 years
Duration: 45 minutes
Subject: Cultural and Creative Arts
Curriculum Theme: Visual Arts and Design
Focal competence: Using appropriate carving materials, tools and equipment to create unique artworks
Key competencies/values: Collaboration; Creativity and innovation
Skills:
- Carving objects
Previous Lesson: Modelling, Techniques, Materials and Tools
Topic: Carving
Subject Matter: Meaning of carving, Materials and tools, Procedure for carving
Specific Objectives
By the end of the lesson, pupils/students should be able to:
Cognitive Domain
- define carving;
- identify materials and tools used in carving;
- discuss the procedure for carving.
Affective Domain
- appreciate the creative process involved in carving;
- collaborate effectively in group discussions about carving.
Psychomotor Domain
- carve simple objects using dried clay and soap as materials.
Reference Materials
The following resources were used in planning this lesson:
- 2025 Revised 9 Years Basic Education Curriculum
- Relevant State Unified Scheme of Work
- Cultural and Creative Arts for Junior Secondary Schools, Book 1
- The HeadTeacher Scheme of work
Instructional Materials
The teacher will teach this lesson with the aid of:
- Dried clay
- Bars of soap
- Small pieces of wood
- Small stones
- Carving tools (e.g., small chisels, knives, blunt objects, plastic carving tools)
- Pictures or charts showing various carved objects and tools
- Safety gloves (optional, for demonstration)
Rationale for the Lesson
This lesson introduces students to the fundamental art form of carving, which develops their creativity and fine motor skills. Understanding carving materials, tools, and procedures provides a foundation for appreciating sculptural arts and encourages practical application in creating three-dimensional artworks. It also fosters collaboration and innovative thinking through hands-on activities.
Prerequisite/Previous Knowledge
Students should have basic knowledge of different art forms and some common art materials.
Lesson Content/Board Summary
Carving
Meaning of Carving
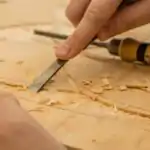
Carving is the art of shaping a material by scraping away portions of it. It involves cutting, chiselling, or scraping away unwanted parts of a solid block of material to create a desired form or design. This process transforms raw materials into sculptures or decorative objects.
Materials and Tools for Carving
Various materials can be used for carving, each requiring specific tools. Common materials and their corresponding tools include:
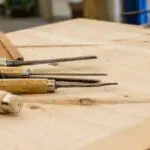
- Wood: Chisels, gouges, mallets, wood rasps, sandpaper, carving knives.
- Stone: Chisels (point, claw, flat), mallets, hammers, files, abrasives.
- Clay (dried): Clay tools, loop tools, wire cutters, modelling tools, blunt objects.
- Soap: Small knives, blunt objects, toothpicks, plastic carving tools.
- Ivory: Specialised sharp knives, files, drills (historically used, but now largely restricted due to ethical concerns).
- Bone: Files, saws, drills, abrasive materials.
Procedure for Carving
The general procedure for carving involves several steps, though specific details may vary depending on the material:
- Select Material: Choose a suitable block of material (e.g., wood, stone, clay, soap) based on the desired artwork.
- Conceive Design: Decide on the object or form to be carved. This might involve sketching the design on paper or directly on the material.
- Roughing Out: Begin by removing large, unwanted portions of the material to get the basic shape. This is often done with larger, more aggressive tools.
- Shaping: Gradually refine the form by removing smaller pieces, paying attention to the contours and proportions of the design.
- Detailing: Add fine details, textures, and features using smaller, more precise tools.
- Finishing: Smooth the surface using sandpaper, files, or abrasives. For some materials like wood, polishing, painting, or varnishing may be applied.
Teaching Methods/Instructional Techniques
Discussion, Demonstration, Guided Practice, Question and Answer, Explanation, Observation, Group Work, Practical Activity.
Instructional Procedures
Step 1: Introduction
Time: 5 minutes
Teaching Skill: Activating Prior Knowledge
Teacher’s Activity: The teacher greets the students and asks them if they know what carving is or if they have seen any carved objects around them (e.g., wooden doors, sculptures, soap carvings). The teacher then introduces the topic: Carving.
Pupils’ Activity: Students respond to the teacher’s questions and listen attentively to the introduction of the topic.
Learning Point: Introduction to carving
Step 2: Meaning of Carving
Time: 7 minutes
Teaching Skill: Explanation/Discussion
Teacher’s Activity: The teacher leads a group discussion on the meaning of carving, guiding students to understand it as shaping material by removing parts. The teacher then provides a clear definition of carving.
Pupils’ Activity: Students work in groups to discuss the meaning of carving and then share their ideas. They listen to the teacher’s explanation and definition.
Learning Point: Definition of carving
Step 3: Materials and Tools for Carving
Time: 8 minutes
Teaching Skill: Identification/Demonstration
Teacher’s Activity: The teacher displays various carving materials (clay, soap, wood, stone) and tools (chisels, knives, blunt objects). The teacher identifies each material and tool, explaining its use in carving. The teacher also guides students to create an infographic (simple drawing or chart) on the materials and tools.
Pupils’ Activity: Students observe the materials and tools. They identify them as the teacher explains and work individually or in pairs to create a simple infographic on materials and tools.
Learning Point: Carving materials and tools
Step 4: Procedure for Carving (Part 1)
Time: 6 minutes
Teaching Skill: Explanation
Teacher’s Activity: The teacher explains the initial steps of the carving procedure: selecting material, conceiving design, and roughing out the basic shape. The teacher uses simple examples to illustrate each step.
Pupils’ Activity: Students listen and ask questions to clarify their understanding of the initial carving steps.
Learning Point: Initial carving steps
Step 5: Procedure for Carving (Part 2)
Time: 5 minutes
Teaching Skill: Explanation
Teacher’s Activity: The teacher continues to explain the remaining steps of the carving procedure: shaping, detailing, and finishing. The teacher emphasises the importance of patience and precision.
Pupils’ Activity: Students listen and take mental notes on the later stages of the carving process.
Learning Point: Advanced carving steps
Step 6: Practical Carving Activity
Time: 5 minutes
Teaching Skill: Guided Practice
Teacher’s Activity: The teacher distributes dried clay and soap, along with simple carving tools (e.g., blunt objects, plastic tools). The teacher guides students to carve simple objects, such as basic shapes or figures, following the discussed procedure. The teacher circulates to offer assistance and ensure safety.
Pupils’ Activity: Students engage in carving simple objects from dried clay and soap, applying the learned procedures under the teacher’s guidance.
Learning Point: Hands-on carving practice
Step 7: Evaluation/Review
Time: 5 minutes
Teaching Skill: Questioning/Assessment
Teacher’s Activity: The teacher evaluates the learning by asking the following questions:
- What is carving?
- Mention two materials used in carving.
- Name two tools used for carving.
- Briefly explain one step in the carving procedure.
Pupils’ Activity: Pupils answer orally and in writing.
Learning Point: Understanding carving concepts
Step 8: Note-Taking
Time: 4 minutes
Teaching Skill: Guided Writing
Teacher’s Activity: The teacher guides pupils/students to copy the essential Board Summary notes on the meaning, materials, tools, and procedure for carving into their notebooks.
Pupils’ Activity: Pupils/students copy the notes carefully into their notebooks.
Learning Point: Recording lesson notes
Step 9: Conclusion
Time: 2 minutes
Teaching Skill: Consolidation
Teacher’s Activity: The teacher summarises the main points of the lesson, reiterating the definition of carving, the importance of using appropriate materials and tools, and the basic steps involved. The teacher encourages students to continue exploring carving as an art form.
Pupils’ Activity: Students listen to the summary and prepare for the next lesson.
Learning Point: Carving concept reinforcement
Continuous Assessment/Further Study
Type: Homework/Practice Exercise
Instruction: Answer the following questions and continue practicing carving at home with safe materials like soap or soft clay.
- List three materials that can be carved.
- Identify two tools that can be used for carving wood.
- Describe the “roughing out” stage in carving.
- Draw and label one carved object you have seen or would like to create.
- Using a bar of soap, try to carve a simple animal shape or a letter of the alphabet.
Lesson Keywords
- Carving – The art of shaping material by cutting or scraping away parts of it.
- Chisel – A tool with a characteristically shaped cutting edge (blade) on its end, for carving or cutting hard materials.
- Gouge – A chisel with a concave blade, used for cutting grooves or channels in wood.
- Mallet – A hammer with a large head, usually made of wood or rubber, used for striking chisels.
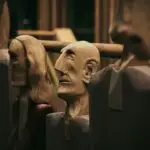
- Sculpture – The art of making two- or three-dimensional representative or abstract forms, especially by carving stone or wood or by casting metal or plaster.
Differentiation
For weaker learners: Provide pre-drawn outlines on the clay or soap to guide their carving. Focus on identifying materials and tools through matching exercises. Offer simpler shapes for carving.
For faster learners: Encourage them to attempt more complex designs or add intricate details to their carvings. Challenge them to research different carving styles or famous carvers.
Suggested Lesson Videos
For videos on carving meaning, materials, tools, and procedures, search on YouTube for:
meaning of carving materials tools jss1
simple soap carving for beginners
Teacher Guide for Using This Lesson Plan
Before the lesson, gather all necessary instructional materials, especially a variety of carving materials like dried clay, soap, and simple tools. Prepare visual aids such as pictures of carved objects and tools. Start by engaging students with questions about carving to gauge their prior knowledge. Guide the group discussion on the meaning of carving, ensuring all students participate. During the identification of materials and tools, physically demonstrate each item and its potential use. When explaining the carving procedure, break it down into simple, manageable steps, using gestures or drawing to illustrate. For the practical activity, ensure a safe environment for students to handle tools, even blunt ones. Circulate among students to provide individual assistance and encouragement. The Board Summary should be copied after the practical activity to reinforce learning. Conclude by reiterating the main concepts and encouraging further exploration of carving.

Community Join the conversation Open discussion +