

Note for teachers using this lesson plan
This lesson introduces Primary 1 pupils to the basic concept of measuring. Prepare simple examples of rulers, weighing scales, and clocks, along with various classroom objects, to make the concepts of length, weight, and time concrete and relatable. Emphasise hands-on demonstration and allow pupils to observe and interact safely with the measuring tools. By the end of the lesson, pupils should be able to explain what measuring means and identify common things we measure like length, weight, and time.
Class: Primary One
Term: Third Term
Week: 4
Age: 6 years
Duration: 45 minutes
Subject: Basic Science
Curriculum Theme: Science, Technology and Development
Focal competence: Using technology products to measure weight, length and time
Key competencies/values: Communication; Creativity and Innovation
Skills:
- Identifying length, weight and time
Previous Lesson: Uses and safe handling of familiar technology products
Topic: Measuring Things
Subject Matter: Meaning of measuring, common things we measure
Specific Objectives
By the end of the lesson, pupils should be able to:
Cognitive Domain
- Explain measuring as finding how long, heavy or when something is.
- Identify length, weight and time as things that can be measured.
Affective Domain
- Appreciate the importance of measuring in everyday life.
- Show interest in using simple measuring tools.
Psychomotor Domain
- Point to objects that can be measured for length, weight, or time.
Reference Materials
The following resources were used in planning this lesson:
- 2025 Revised 9 Years Basic Education Curriculum
- Relevant State Unified Scheme of Work
- Basic Science Textbook for Primary 1
- The HeadTeacher Scheme of work
Instructional Materials
The teacher will teach this lesson with the aid of:
- Ruler
- Clock (wall clock or toy clock)
- Simple weighing scale (kitchen scale or balance scale)
- Different classroom objects (e.g., pencil, book, eraser, stone, feather)
- Chart showing pictures of various measuring tools
Rationale for the Lesson
This lesson introduces pupils to the fundamental concept of measurement, which is essential for understanding the world around them. It helps them develop basic scientific observation skills and appreciate how we quantify different aspects of objects and events. Understanding measurement is a foundational skill for future learning in science and mathematics.
Prerequisite/Previous Knowledge
Pupils can identify different objects and understand basic concepts of “big” and “small” or “long” and “short”.
Lesson Content/Board Summary
Measuring Things
Meaning of Measuring
Measuring means finding out how long, how heavy, or when something is. It helps us know the exact size or amount of things.
Common Things We Measure
We measure different things to understand them better. The main things we measure are:
- Length: This tells us how long or short something is. We can measure the length of a pencil, a table, or a road.
- Weight: This tells us how heavy or light something is. We can measure the weight of a book, a person, or a bag of rice.
- Time: This tells us when things happen or how long they take. We can measure the time for school, for playing, or for how long a day is.
Why Measurement is Useful
Measurement is useful for many reasons:
- It helps us compare things accurately (e.g., knowing which pencil is longer).
- It helps us know the exact amount of something we need (e.g., how much water to drink).
- It helps us plan our day (e.g., when to wake up or go to school).
- It helps us understand if something is too big or too small for a space.
Familiar Measuring Tools
We use different tools to measure different things:
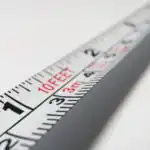
- For Length: We use a ruler, tape measure, or metre rule.
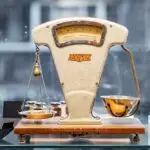
- For Weight: We use a weighing scale or balance.
- For Time: We use a clock or a watch.
Comparing Objects Before Measuring
Before we measure, we can often compare objects by just looking at them. For example, we can see that one book is bigger than another, or one pencil is longer. Measuring helps us to know exactly how much bigger or longer it is.
Teaching Methods/Instructional Techniques
Discussion, Demonstration, Guided Practice, Question and Answer, Explanation, Observation, Practical Activity
Instructional Procedures
Step 1: Introduction
Time: 5 minutes
Teaching Skill: Storytelling/Engagement
Teacher’s Activity: The teacher begins by asking pupils simple questions like, “How do you know if your friend is taller than you?” or “How do you know if it’s time to go home?” The teacher then introduces the idea of finding out “how much” or “when” using examples from the classroom.
Pupils’ Activity: Pupils listen, share their ideas, and respond to the teacher’s questions.
Learning Point: Introduction to measuring
Step 2: Meaning of Measuring
Time: 7 minutes
Teaching Skill: Explanation/Demonstration
Teacher’s Activity: The teacher explains in simple terms that measuring means finding out how long, how heavy, or when something is. The teacher uses a ruler to show “how long” a book is, a weighing scale to show “how heavy” an eraser is, and points to a clock to show “what time” it is.
Pupils’ Activity: Pupils listen attentively and observe the teacher’s demonstrations with the measuring tools.
Learning Point: Definition of measuring
Step 3: Measuring Length
Time: 7 minutes
Teaching Skill: Demonstration/Guided Practice
Teacher’s Activity: The teacher focuses on length. Holding up a ruler, the teacher explains that it helps us measure how long things are. The teacher measures the length of a pencil and a book, showing pupils how to read the numbers simply. The teacher asks pupils to identify other things in the classroom that can be measured for length.
Pupils’ Activity: Pupils observe the teacher measuring, identify things that can be measured for length, and state whether they are long or short.
Learning Point: Understanding length measurement
Step 4: Measuring Weight
Time: 7 minutes
Teaching Skill: Demonstration/Observation
Teacher’s Activity: The teacher introduces the weighing scale and explains it helps us find out how heavy things are. The teacher places different objects (e.g., a stone and a feather) on the scale, demonstrating which is heavier or lighter. The teacher asks pupils to name things they know are heavy or light.
Pupils’ Activity: Pupils watch the demonstration, compare the weight of objects, and name heavy or light items.
Learning Point: Understanding weight measurement
Step 5: Measuring Time
Time: 7 minutes
Teaching Skill: Explanation/Visual Aid
Teacher’s Activity: The teacher points to a clock and explains that it helps us measure time – when things happen or how long they take. The teacher talks about familiar times like “time for school” or “time for break” and shows how the clock hands move. The teacher asks pupils what they do at certain times of the day.
Pupils’ Activity: Pupils observe the clock, listen to explanations about time, and share their daily routines.
Learning Point: Understanding time measurement
Step 6: Usefulness of Measuring and Comparing
Time: 4 minutes
Teaching Skill: Discussion/Application
Teacher’s Activity: The teacher leads a brief discussion on why measuring is useful, linking it to daily activities like knowing how much food to eat or knowing when to sleep. The teacher also asks pupils to compare two objects (e.g., two different-sized books) and say which is bigger before explaining that measuring tells us exactly how much bigger.
Pupils’ Activity: Pupils contribute ideas on why measuring is important and practice comparing objects by sight.
Learning Point: Importance of measurement
Step 7: Evaluation/Review
Time: 5 minutes
Teaching Skill: Questioning/Assessment
Teacher’s Activity: The teacher evaluates the learning by asking the following questions:
- What does it mean to measure something?
- Name one thing we measure that tells us how long something is.
- Name one thing we measure that tells us how heavy something is.
- Name one thing we measure that tells us when something happens.
Pupils’ Activity: Pupils answer orally and in writing.
Learning Point: Identifying measurement concepts
Step 8: Note-Taking
Time: 4 minutes
Teaching Skill: Guided Writing
Teacher’s Activity: The teacher guides pupils to copy the essential Board Summary notes about the meaning of measuring and common things we measure into their notebooks.
Pupils’ Activity: Pupils copy the notes carefully into their notebooks.
Learning Point: Recording key concepts
Step 9: Conclusion
Time: 3 minutes
Teaching Skill: Summarization
Teacher’s Activity: The teacher briefly reminds pupils that measuring helps us understand how long, how heavy, and when things are. The teacher encourages them to look for measuring tools at home and observe how they are used.
Pupils’ Activity: Pupils listen and acknowledge the importance of measuring.
Learning Point: Reinforcing measurement basics
Continuous Assessment/Further Study
Type: Homework / Practice Exercise
Instruction: Answer the following questions in your notebook:
- What does a ruler help us to measure?
- What does a weighing scale help us to measure?
- What does a clock help us to measure?
- Draw a picture of a ruler and a clock.
- Name two things in your house that you can measure for length.
Lesson Keywords
- Measure – To find out how long, heavy, or when something is.
- Length – How long or short something is.
- Weight – How heavy or light something is.
- Time – When things happen or how long they take.
- Ruler – A tool for measuring length.
- Scale – A tool for measuring weight.
- Clock – A tool for measuring time.
Differentiation
For weaker learners: Provide more one-on-one demonstrations with the measuring tools. Use larger, more distinct objects for comparison. Focus on identifying just one measuring tool for each concept (e.g., ruler for length).
For faster learners: Encourage them to name more examples of things to measure. Ask them to think about why different tools are needed for different types of measurement. Allow them to briefly try using the simple tools under supervision.
Suggested Lesson Videos
For a better understanding of measuring, search on YouTube for “Primary 1 Basic Science measuring length weight time” or “What is measurement for kids”.
Teacher Guide for Using This Lesson Plan
Before the lesson, gather all the instructional materials, ensuring they are safe and easily visible to all pupils. Arrange the classroom to allow for easy demonstration and pupil observation. Begin by making the concept of measurement relatable through everyday examples. When explaining each type of measurement (length, weight, time), use the actual tools to demonstrate. Allow pupils to come forward and observe the tools closely, even gently touching them under strict supervision, to make the learning concrete. Encourage active participation through questions and by asking pupils to identify objects for measurement. Ensure the Board Summary is clear and concise for Primary 1 pupils to copy. During note-taking, move around the classroom to check that pupils are copying correctly. Provide extra support to those struggling with the concepts or copying the notes.
Community Join the conversation Open discussion +