

Class: Primary 3
Term: 1st Term
Week: 7
Age: 8 years
Duration: 40 minutes
Subject: Cultural And Creative Arts
Curriculum Theme: Cultural And Creative Arts
Previous Lesson: Animal Drawing And Painting
Topic: Uses Of Lines In Designs
Content/Learning Area: Introduction to line
Definition of lines, Types of line-broken lines, curved line…….
Performance Objectives
By the end of the lesson, pupils should be able to:
- Cognitive Domain: Define a line and mention the types of lines.
- Affective Domain: Appreciate the beauty of lines in designs and drawings.
- Psychomotor Domain: Draw different types of lines correctly.
- Social Domain: Work together in groups to practice line drawing.
Reference Materials
The following resources were used in planning this lesson:
- 9 Years Basic Education Curriculum
- Abuja Educational Resource Centre Scheme of Work
- NAPPS National Unified Scheme of Work
- Online information from: Britannica – Line Definition & Meaning
- Relevant Textbooks
Instructional Materials
The teacher will teach this lesson with the aid of:
- Chart showing different types of lines
- Ruler and pencils
- Whiteboard and markers
- Drawing paper
- Art textbook
Rationale for the Lesson
Understanding lines helps pupils to improve their drawing skills and use them creatively in designs and artworks.
Prerequisite/Previous Knowledge
Pupils can already recognize simple shapes and patterns around them and have drawn basic straight lines before.
Lesson Content
Uses of Lines in Designs
A line is a mark made on a surface that connects two points. It can be straight, curved, or broken. They help us form shapes and create beautiful designs. We can use lines to make patterns and pictures.
Types of Line
The following are types of lines:
- Straight line
- Curved line
- Zigzag line
- Broken line
- Wavy line
- Dotted line
Uses of Lines in Design
These include:
- To draw shapes
- To form patterns
- To decorate objects
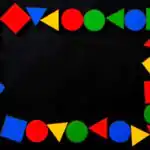
- To create borders
- To design artworks
Practical Uses of Lines
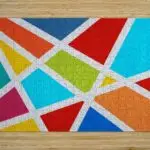
Artists and designers use lines to outline shapes, divide spaces, create patterns, show direction and suggest movement or texture. Horizontal lines may suggest calm, vertical lines height or strength, diagonal lines movement, and curved lines softness or flow; these effects depend on how the lines are combined.
Thick, thin, broken, wavy and zigzag lines can produce different visual emphasis. Pupils can create a border design by repeating two line types and should keep spacing and rhythm consistent.
Teaching Methods
Discussion, Lecture, Explanation, Demonstration, Group Work, Visual Aids
Instructional Procedures
To deliver this lesson, the teacher will adopt the following steps:
Step 1: Introduction
Time: 5 mins
Teaching Skill: Set Induction
Teacher’s Activity: Teacher shows pupils a chart of different lines and asks them to describe what they see.
Pupils’ Activity: Pupils observe and answer questions.
Learning Point: Pupils become curious and ready to learn about lines.
Step 2: Definition of Line
Time: 5 mins
Teaching Skill: Explanation
Teacher’s Activity: Teacher explains what a line is and gives simple examples.
Pupils’ Activity: Pupils listen and repeat the definition.
Learning Point: Pupils understand the meaning of a line.
Step 3: Types of Lines
Time: 10 mins
Teaching Skill: Demonstration
Teacher’s Activity: Teacher draws different types of lines (straight, curved, zigzag, broken, wavy, dotted) on the board.
Pupils’ Activity: Pupils watch, identify, and try to copy the lines.
Learning Point: Pupils learn to recognize types of lines.
Step 4: Uses of Lines in Designs
Time: 10 mins
Teaching Skill: Discussion & Demonstration
Teacher’s Activity: Teacher explains how lines can be used to draw shapes, patterns, and designs, showing examples.
Pupils’ Activity: Pupils observe, discuss, and give more examples of use.
Learning Point: Pupils discover how lines are used in art.
Step 5: Group Drawing Practice
Time: 5 mins
Teaching Skill: Group Work
Teacher’s Activity: Teacher guides pupils to practice drawing different lines in groups.
Pupils’ Activity: Pupils draw lines together in groups.
Learning Point: Pupils practice drawing and learn cooperation.
Step 6: Note Taking
Time: 2 mins
Teaching Skill: Writing
Teacher’s Activity: Teacher dictates or writes notes on the board.
Pupils’ Activity: Pupils copy notes into their books.
Learning Point: Pupils keep records of the lesson.
Step 7: Evaluation
Time: 2 mins
Teaching Skill: Questioning
Teacher’s Activity: Teacher asks pupils questions on definition, types, and uses of lines.
Pupils’ Activity: Pupils respond to questions.
Learning Point: Teacher checks pupils’ understanding.
Objective-aligned checks:
- Define a line and mention the types of lines.
- Draw different types of lines correctly.
Step 8: Closure/Conclusion
Time: 1 min
Teaching Skill: Instructional & Cognitive Closure
Teacher’s Activity: Teacher revises key points and reminds pupils of the importance of lines in art.
Pupils’ Activity: Pupils listen and respond.
Learning Point: Pupils are motivated to use lines in their designs.
Lesson Keywords
- Line: A mark that connects two points.
- Straight line: A line without bends or curves.
- Curved line: A line that bends smoothly.
- Zigzag line: A line with sharp turns.
- Broken line: A line made of short separate marks.
Lesson Evaluation
To evaluate the learning, the teacher asks pupils to:
- Define a line.
- Mention three types of lines.
- Draw a straight line and a curved line.
- State two uses of lines in designs.
- Work in groups to draw at least four types of lines.
Differentiation
The teacher will support slower learners with step-by-step drawing while faster learners create patterns with different lines.
Note for teachers using this lesson plan
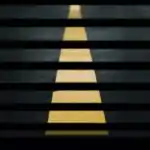
Ensure pupils practice drawing on paper. Use real-life examples like clothes patterns, road markings, or decorations to help them connect learning with their environment.
Community Join the conversation Open discussion +