

Class: Primary One
Term: First Term
Subject: Cultural & Creative Arts
Curriculum Theme:
Previous Lesson: Functional Art Works Found at Home
Topic: Painting Carved Objects (Calabash Painting)
Content/Learning Area: Identifying a calabash, Understanding the purpose of painting a calabash, Learning how to paint a simple design on a calabash
Time Allocation: 40 minutes
Performance Objectives
By the end of the lesson, pupils should be able to:
- Cognitive Domain:
1. Identify a calabash and its uses.
2. Explain the purposes of calabash painting.
3. Describe the steps involved in painting a calabash.
- Affective Domain:
1. Show thankfulness for traditional art forms.
2.Express creativity through calabash painting.
- Psychomotor Domain:
1. Demonstrate the ability to paint a simple design on a calabash.
- Social Domain:
1.Work cooperatively with peers during painting activities.
Reference Materials
- 9 – Years Basic Education Curriculum
- Abuja Educational Resource Center Scheme of Work
- NAPPS National Unified Scheme of Work
- Relevant Textbooks
Instructional Materials
To deliver this lesson, the teacher will use the following materials:
- Calabashes
- Paints
- Brushes
- Clean surfaces
- Pictures of calabash paintings
Rationale for the Lesson
This lesson introduces pupils to a traditional art form, fostering creativity and appreciation for cultural heritage. Understanding calabash painting provides a foundation for future art projects and enhances thier understanding of different art techniques.
Prerequisite/Previous Knowledge
Pupils have basic knowledge of colors and simple drawing.
Lesson Content
Painting of carved Objects
What is a Calabash?
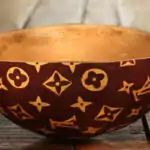
A calabash is a type of gourd, often used as a container. They come in various shapes and sizes and are frequently decorated with colorful designs.
Calabash Painting
Calabash painting is a traditional art form with a long history.People paint calabashes for several reasons:
These include:
- Decoration: To make them visually appealing.
- ceremony: For special events and rituals.
- Utility: To identify the contents.
- Cultural Expression: To showcase cultural symbols and stories.
- Preservation: To protect the calabash from wear and tear.
How to Paint a Calabash
To paint a calabash, you will need some materials and follow these steps:
Materials needed:
- A calabash
- Safe paints
- Brushes
- A clean work surface
- Pencils for sketching
- Water for cleaning brushes
Steps:
- Clean the calabash thoroughly.
- Choose a design (simple shapes or complex patterns).
- Lightly sketch the design with a pencil.
- Paint the design using brushes and various colors.
- Let the paint dry entirely.
- Apply a sealant (optional) to protect the paint.
- Display or use the painted calabash.
Teaching Methods
To deliver this lesson, the teacher will adopt the following methods: Demonstration, Explanation, Question and Answer, and Practical Activity.
Instructional Procedures
To deliver this lesson, the teacher will adopt the following steps:
Step 1: Introduction
Time: 5 minutes
Teaching Skill: Set Induction
Teacher’s Activity: Show pictures of calabashes and initiate a discussion about their uses and appearance.
Pupils’ activity: Observe pictures,participate in discussion,and share their observations.
Step 2: Explanation of Key concepts
Time: 10 minutes
Teaching Skill: Explanation, Definition
Teacher’s Activity: Explain what a calabash is and its cultural meaning. Discuss the purposes of calabash painting (decoration, ceremony, utility).
Pupils’ activity: Listen attentively, ask clarifying questions, and take notes.
Step 3: Demonstration/Guided Practice
Time: 15 minutes
Teaching Skill: Demonstration, Modeling
Teacher’s Activity: Demonstrate the steps involved in painting a calabash, emphasizing cleanliness, design choice, and careful request of paint.
pupils’ Activity: Observe the demonstration, ask questions, and participate in guided practice with teacher assistance.
Step 4: Autonomous Practice
Time: 5 minutes
Teaching Skill: Monitoring, Feedback
Teacher’s Activity: Supervise pupils as they paint their own calabashes, providing individual assistance as needed.
Pupils’ Activity: Independently paint their calabashes, applying the steps demonstrated by the teacher.
Step 5: Note-Taking
Time: 2 minutes
Teaching Skill: Note-Taking, Summarizing
Teacher’s Activity: Guide pupils in summarizing the key steps of calabash painting.
Pupils’ activity: Write down key points and steps in their notebooks.
Step 6: Evaluation/Review
Time: 3 minutes
Teaching Skill: Questioning, Feedback
Teacher’s Activity: Ask evaluation questions to assess understanding.
Pupils’ Activity: Answer questions, participate in class discussion.
Objective-aligned checks:
- Identify a calabash and its uses.
- Explain the purposes of calabash painting.
- Describe the steps involved in painting a calabash.
Step 7: Conclusion
Time: 2 minutes
Teaching Skill: Summarizing,Encouragement
Teacher’s Activity: Review the key points,praise pupils’ efforts,and display the completed calabash paintings. encourage pupils to continue practicing their painting skills at home.
Pupils’ Activity: Participate in the review, appreciate their artwork, and express interest in further practice.
Lesson Keywords
- Calabash – A type of gourd used as a container.
- Painting – Applying color to a surface for decoration.
- Design – A plan or drawing used to create something.
- Decoration – making something look more attractive.
- Traditional Art – Art forms passed down through generations.
lesson evaluation
To evaluate the learning,the teacher asks pupils to:
- What is a calabash?
- Why do people paint calabashes?
- List the materials needed for calabash painting.
- Describe the steps in painting a calabash.
- What are some design ideas for painting a calabash?
Assignment/Homework
- Find different pictures of painted calabashes and describe the designs.
- Practice drawing simple designs that can be painted on a calabash.
- List three uses of a calabash in your community.
Differentiation
- for slower learners: Provide one-on-one assistance and simpler designs.
- For advanced learners: Encourage more complex designs and explore different painting techniques.
- For visual/auditory/kinesthetic learners: Use visual aids, verbal instructions, and hands-on activities to cater to different learning styles.
Note for Teachers
Ensure all materials are readily available before the lesson. Provide clear and concise instructions, and encourage creativity and self-expression. Supervise pupils closely during the painting activity to ensure safe use of materials.

Community Join the conversation Open discussion +