

Class: Primary One
Term: First Term
Subject: Cultural & Creative Arts
Curriculum theme:
Previous Lesson: Preparation of Clay for Moulding
Topic: Moulding
Content/Learning Area: What is Moulding?, Steps Involved in Moulding a Pot
Time Allocation: 40 minutes
Performance Objectives
By the end of the lesson, pupils should be able to:
- Cognitive Domain:
1. Define moulding.2. List the steps involved in moulding a pot.
3. Explain the importance of each step in the moulding process.
- Affective Domain:
1. Show interest in the moulding process.
2. Appreciate the value of patience and precision in crafting.
- Psychomotor Domain:
1. Demonstrate the basic steps of moulding clay.
- Social Domain:
1. Work cooperatively with peers during activities.
Reference Materials
- 9 – Years Basic Education Curriculum
- abuja Educational Resource Center Scheme of Work
- NAPPS National Unified Scheme of Work
- relevant Textbooks
Instructional Materials
To deliver this lesson, the teacher will use the following materials:
- Clay
- Water
- pottery tools (optional)
- Whiteboard or chart paper
- Markers
Rationale for the Lesson
This lesson introduces pupils to the basic process of moulding, a fundamental skill in various crafts. Understanding moulding helps develop fine motor skills and creativity, laying a foundation for future art and design projects.
Prerequisite/Previous Knowledge
The teacher will begin by asking pupils what they know about shaping clay or other materials. The teacher will then show pictures of different molded objects, sparking curiosity and setting the stage for the lesson on moulding.
Lesson Content
Moulding
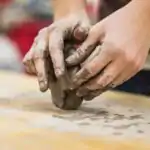
Moulding is the process of shaping materials like clay into a desired form. It’s a key skill in pottery and sculpture.
What is Moulding?
Moulding is a technique for making 3D objects by shaping a material (like clay) into a specific form, either by hand or using molds.
Steps Involved in Moulding a Pot
Moulding a pot involves several key steps to achieve the desired shape and durability. These include:
- Gather moist,pliable clay and water.
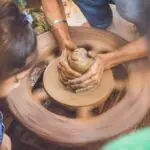
- Shape the clay into a pot using your hands or tools.
- Smooth the surface of the pot.
- Let the pot dry fully (this might take several days).
- Fire the pot in a kiln for durability and waterproofing (if needed).
Teaching Methods
to deliver this lesson, the teacher will adopt the following methods: Presentation, Clarification, Guided practice.
Instructional Procedures
To deliver this lesson, the teacher will adopt the following steps:
Step 1: Introduction
Time: 5 minutes
Teaching Skill: Set Induction
Teacher’s Activity: introduce the topic of moulding and engage pupils with a brief discussion about shaping materials.
Pupils’ Activity: Participate in the discussion and share their prior knowledge.
Step 2: Clarification of Key Concepts
Time: 10 minutes
Teaching Skill: Explanation, Presentation
Teacher’s Activity: Explain the concept of moulding and demonstrate the steps involved in moulding a pot.
Pupils’ Activity: Listen attentively and observe the demonstration.
Step 3: Demonstration/Guided Practice
Time: 15 minutes
Teaching Skill: Guided Practice, Monitoring
Teacher’s Activity: Guide pupils through the steps of moulding a small clay object, providing assistance as needed.
Pupils’ Activity: Follow the teacher’s instructions and attempt to mould their own clay objects.
Step 4: Independent Practice
Time: 5 minutes
Teaching Skill: Monitoring, Feedback
Teacher’s Activity: Observe pupils as they work independently, providing feedback and support.Pupils’ Activity: Continue moulding their clay objects independently.
Step 5: Note-Taking
Time: 2 minutes
Teaching Skill: Note-Taking
Teacher’s Activity: Guide pupils in taking notes on the key steps of moulding.
Pupils’ Activity: Write down the key steps of moulding.
Step 6: Evaluation/Review
Time: 3 minutes
teaching Skill: Questioning, Feedback
Teacher’s Activity: Review the lesson by asking questions and providing feedback.
Pupils’ Activity: Answer questions and participate in the review.
Objective-aligned checks:
- Define moulding.
- List the steps involved in moulding a pot.
- Explain the importance of each step in the moulding process.
Step 7: Conclusion
Time: 2 minutes
Teaching Skill: Summarizing
Teacher’s Activity: summarize the key steps of moulding and encourage pupils to continue practicing their new skills. Answer any remaining questions.
Pupils’ activity: Listen to the summary and ask any remaining questions.
Lesson Keywords
- Moulding – Shaping materials into a desired form.
- Clay – A natural material used for moulding.
- Pottery – The art of making objects from clay.
- Kiln – An oven used for firing clay objects.
- Sculpture – The art of creating three-dimensional forms.
Lesson Evaluation
To evaluate the learning, the teacher asks pupils to:
- What materials do we need to mould a pot?
- List the steps in making a clay pot.
- Why is it crucial to let the clay dry fully?
- Name some other things you can mould.
- Describe the process of moulding a pot in your own words.
Assignment/Homework
- Gather different types of clay or playdough.
- Practice moulding simple shapes like balls, snakes, and cups.
- Draw a picture of something you would like to mould.
- Write a short paragraph about what you learned about moulding today.
- Ask a family member if they have ever moulded anything and share their experience in class next time.
Differentiation
- For slower learners: Provide one-on-one assistance and simplify the steps.
- for advanced learners: Encourage them to experiment with different moulding techniques and designs.
- For visual/auditory/kinesthetic learners: Use visual aids, verbal instructions, and hands-on activities to cater to different learning styles.
Note for Teachers
Ensure that the clay is moist and pliable before the lesson. Supervise pupils closely during the moulding process to prevent accidents. Encourage creativity and experimentation while maintaining a focus on the basic steps of moulding.
Community Join the conversation Open discussion +