

Class: Primary Three
Term: Second Term
Subject: Cultural & Creative Arts
Curriculum theme:
Previous Lesson:
Topic: Moulding
Content/Learning Area: Defining moulding, appreciating the importance of moulding, demonstrating basic moulding skills, participating in group discussions
Time Allocation: 40 minutes
Performance Objectives
By the end of the lesson, pupils should be able to:
- Cognitive Domain:
1. Define moulding.
2. Identify different media used for moulding.3. Explain the importance of moulding in creative expression.
- Psychomotor Domain:
1. Demonstrate basic moulding skills using at least one medium.
2.Create simple shapes and designs using moulding techniques.
- Affective Domain:
1. Show appreciation for the art of moulding.
2. Express creativity through moulding activities.
- Social Domain:
1. Participate in group discussions about moulding.2. Share ideas and techniques with classmates.
Reference Materials
- 9 – years Basic Education Curriculum
- Abuja Educational Resource Center Scheme of Work
- NAPPS National unified Scheme of Work
- Relevant textbooks
Instructional Materials
To deliver this lesson, the teacher will use the following materials:
- Clay
- Plasticine
- Paper mache materials
- Play-doh
- Whiteboard or chart paper
- markers or crayons
Rationale for the lesson
This lesson introduces pupils to the art of moulding, fostering creativity and fine motor skills. Understanding moulding provides a foundation for future art projects and encourages self-expression.
Prerequisite/Previous Knowledge
Pupils have basic knowledge of creating things with their hands.
Lesson Content
Moulding
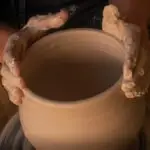
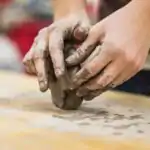
Moulding is the art of shaping and creating objects using various materials. It’s like playing with clay, but with a purpose! You can use your hands to form different shapes and designs, letting your inventiveness run wild.
What is Moulding?
Moulding is a creative process where you use materials like clay, plasticine, or paper mache to shape and form objects. It’s like sculpting, but often with a more playful and less formal approach.
Media for Moulding
ther are many materials you can use for moulding, each with its unique properties.
These include:
- clay: This natural material is soft and pliable, making it easy to shape. It can be dried and hardened, allowing you to create permanent sculptures. examples include terracotta clay, earthenware clay, and stoneware clay.
- Plasticine: This synthetic material is similar to clay but doesn’t harden. It’s perfect for temporary creations and can be reused over and over again. Common brands include modeling clay and polymer clay.
- Paper mache: This material is made by mixing paper pulp with glue or paste. It’s lightweight and can be molded into intricate shapes. You can even paint it to add colour and detail. Different types include customary paper mache and fast-drying paper mache.
- Play-Doh: This colorful and non-toxic material is a favorite among children. It’s soft and easy to work with,making it ideal for imaginative creations.Various colors and themed sets are available.
- Beeswax: A natural wax that can be softened and molded, often used for making candles or small sculptures.
- Salt Dough: A simple mixture of flour, salt, and water that hardens when baked, perfect for creating ornaments and decorations.
Teaching Methods
To deliver this lesson, the teacher will adopt the following methods: presentation, Explanation, Discussion, Hands-on Activity.
Instructional Procedures
To deliver this lesson, the teacher will adopt the following steps:
Step 1: Introduction
Time: 5 minutes
Teaching skill: Set Induction
Teacher’s Activity: Introduce the topic of moulding and engage pupils with a brief discussion about creating things with their hands.
Pupils’ Activity: Participate in the discussion and share their prior knowledge.
Step 2: Explanation of Key Concepts
Time: 10 minutes
Teaching Skill: Explanation, Demonstration
Teacher’s activity: Explain what moulding is and demonstrate basic moulding techniques using different media.
Pupils’ Activity: Listen attentively and observe the demonstration.
Step 3: Demonstration/Guided Practice
Time: 10 minutes
Teaching Skill: Guided Practice, Feedback
Teacher’s Activity: Guide pupils through a simple moulding activity, providing individual assistance and feedback.
Pupils’ Activity: Participate in the guided practice and create their own moulded objects.
Step 4: Autonomous Practice
Time: 5 minutes
Teaching Skill: Monitoring, Support
Teacher’s activity: Monitor pupils as they work independently, providing support as needed.
Pupils’ Activity: Continue moulding objects independently, experimenting with different techniques.
Step 5: Note-Taking
time: 5 minutes
Teaching Skill: Note-taking, Summarizing
Teacher’s Activity: Guide pupils in summarizing key concepts and taking notes.
Pupils’ Activity: Take notes and summarize key concepts.
Step 6: Evaluation/Review
Time: 5 minutes
Teaching Skill: Questioning, Feedback
Teacher’s Activity: Review the lesson by asking questions and providing feedback.
Pupils’ Activity: Answer questions and reflect on their learning.
Objective-aligned checks:
- Define moulding.
- Identify different media used for moulding.
- Explain the importance of moulding in creative expression.
Step 7: Conclusion
Time: 5 minutes
Teaching Skill: Summarizing, Encouragement
Teacher’s Activity: Summarize the key concepts and encourage pupils to continue practicing their moulding skills at home.
Pupils’ Activity: Listen to the summary and ask any remaining questions.
Lesson Keywords
- Moulding – The art of shaping materials to create objects.
- Clay – A natural, pliable material used for moulding.
- Plasticine – A synthetic, reusable material for moulding.
- Paper mache – A lightweight material made from paper pulp and glue.
- Play-Doh – A colorful, non-toxic material for moulding.
Lesson Evaluation
To evaluate the learning, the teacher asks pupils to:
- What is moulding?
- Name three media for moulding.
- What are some things you can create using moulding?
- Why is learning about moulding important?
- How can you use moulding to express your creativity?
assignment/Homework
- Create a simple moulded object using any available material at home.
- Write a short paragraph about what you enjoyed most about the moulding activity.
- Research and list three additional materials that can be used for moulding.
Differentiation
- For slower learners: Provide one-on-one assistance and simpler moulding activities.
- For advanced learners: Encourage them to create more complex shapes and designs.
- For visual/auditory/kinesthetic learners: Use visual aids, verbal instructions, and hands-on activities to cater to different learning styles.
note for Teachers
Ensure that all materials are safe and non-toxic. Provide ample supervision during the hands-on activities. Encourage creativity and self-expression.
Community Join the conversation Open discussion +