

Class: Primary two
Term: Second Term
Subject: Basic Science and Technology
Curriculum Theme: Basic Technology
Previous Lesson: Preparing Clay For Moulding
Topic: Moulding With Clay
Content/Learning Area: preparing the Clay, Moulding Techniques, Creating Objects, Sharing and Displaying
Time Allocation: 40 minutes
Performance Objectives
By the end of the lesson, pupils should be able to:
- Cognitive Domain:
– Understand the process of molding with clay.
– Identify different molding techniques.
– Explain the importance of preparing clay before molding.
- Affective Domain:
– Appreciate the creative possibilities of working with clay.
– Show enthusiasm for working with clay.
– Share their creations with others.
- Psychomotor Domain:
– Prepare clay for molding.
– Mold clay into different shapes and objects.
– Use modeling tools effectively.
- Social Domain:
– Work cooperatively with classmates.
– Share materials and resources.
– Respect the work of others.
Reference Materials
- 9 – Years Basic Education Curriculum
- abuja Educational Resource Center Scheme of Work
- NAPPS National Unified Scheme of work
- Relevant Textbooks
Instructional Materials
To deliver this lesson, the teacher will use the following materials:
- Clay
- Modeling tools
- Table cover
- Whiteboard or chart paper
Rationale for the Lesson
This lesson introduces pupils to the art of molding with clay, fostering creativity and fine motor skills. understanding the properties of clay and mastering molding techniques will be valuable in future art and craft activities.
Prerequisite/Previous Knowledge
Pupils have likely played with sand or mud before and have some basic understanding of shaping materials.
Lesson Content
Moulding With Clay
Moulding with clay is a fun and creative activity where we use clay to shape different objects. Clay is a natural material that can be easily molded and shaped when wet.
What is Moulding?
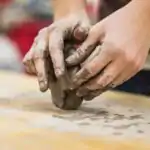
Moulding is the process of shaping clay into different forms using our hands and tools. We can create various objects like animals, shapes, and even sculptures.
Preparing the Clay
Preparing the clay is an essential step in the molding process. It ensures the clay is soft, pliable, and free of air bubbles, making it easier to work with. The following are the steps to preparing the clay:
- Gather your materials: You will need clay, a table cover, and modeling tools.
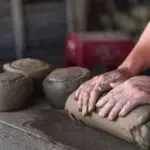
- Knead the clay: Kneading is like squeezing and pushing the clay to make it soft and pliable. This helps remove any air bubbles and makes it easier to mold.
- Clean your hands: it’s crucial to wash your hands before and after working with clay to keep everything clean.
Moulding Techniques
Moulding techniques are the different ways we can shape and form clay into various objects. Mastering thes techniques allows for greater creativity and control in the molding process. These include:
- Rolling: Roll the clay into a long, thin shape like a snake.
- Pinching: Use your fingers to pinch and shape the clay.
- Shaping: Use your hands and tools to create different forms.
- Coiling: Roll the clay into long, thin coils and then join them together to create a form.
- Slab Building: Flatten the clay into flat sheets and then join them together to create a form.
Creating Objects
Creating objects involves using the prepared clay and molding techniques to bring your ideas to life. It’s a process of experimentation, creativity, and problem-solving. These include:
- Start with simple shapes: Begin by making basic shapes like balls, coils, or slabs.
- Combine shapes: You can combine different shapes to create more complex objects.
- Add details: Use modeling tools to add details to your creations.
- Make animals: Use clay to create animals like snails, tortoise, or birds.
- Make household items: use clay to create household items like plates, cups, or pots.
Sharing and Displaying
Sharing and displaying your creations is a great way to showcase your hard work and inspire others. It also fosters a sense of community and thankfulness for art. These include:
- Show off your creations: Once you’ve finished molding, share your creations with your classmates.
- Display your work: you can display your molded objects in the classroom or at home.
- Organize an exhibition: Organize an exhibition to showcase the molded objects in the school.
- Take pictures: Take pictures of the molded objects and share them with friends and family.
- Gift your creations: Gift your creations to friends and family as a token of appreciation.
Teaching Methods
To deliver this lesson, the teacher will adopt the following methods: Presentation, Description, Guided Practice, and Independent Practice.
Instructional Procedures
To deliver this lesson, the teacher will adopt the following steps:
Step 1: Introduction
Time: 5 minutes
Teaching skill: Set Induction
Teacher’s Activity: Engage pupils with questions about clay and its uses. Show examples of clay objects.Pupils’ Activity: Respond to questions, observe examples.
Step 2: Clarification of Key Concepts
Time: 10 minutes
Teaching Skill: Explanation
Teacher’s Activity: Explain the process of preparing clay and different molding techniques.
Pupils’ Activity: Listen attentively, ask clarifying questions.
Step 3: Demonstration/Guided Practice
Time: 10 minutes
Teaching Skill: Demonstration, Guided Practice
Teacher’s Activity: Demonstrate the molding process, guiding pupils through each step.
Pupils’ Activity: Observe the demonstration, participate in guided practice.
Step 4: Independent Practice
Time: 10 minutes
Teaching Skill: Monitoring, Feedback
Teacher’s Activity: Supervise pupils as they independently mold clay.
Pupils’ Activity: Mold clay, apply learned techniques.
Step 5: note-Taking
Time: 2 minutes
Teaching Skill: Note-Taking
Teacher’s Activity: Guide pupils in summarizing key points.
Pupils’ Activity: Take notes.
Step 6: Evaluation/Review
Time: 3 minutes
Teaching Skill: Questioning, Feedback
Teacher’s Activity: ask evaluation questions, provide feedback.
Pupils’ Activity: Answer questions, reflect on learning.
Step 7: Conclusion
Time: 2 minutes
Teaching skill: Summarizing
Teacher’s Activity: Summarize the lesson and highlight key takeaways.
Pupils’ Activity: Listen and ask any remaining questions.
Lesson Keywords
- Moulding – Shaping clay into different forms.
- Clay – A natural material used for molding.
- Kneading – Preparing clay by squeezing and pushing.
- Techniques – Methods used to shape clay.
- Objects – Items created from clay.
Lesson Evaluation
to evaluate the learning, the teacher asks pupils to:
- What are some things you can make with clay?
- How do you prepare clay for molding?
- Name three molding techniques.
- Why is cleanliness important when working with clay?
- What did you enjoy most about working with clay?
Assignment/Homework
- Find different types of clay in your environment.
- Practice kneading clay at home.
- Create a simple object using clay and bring it to the next class.
Differentiation
- For slower learners: Provide one-on-one assistance and simpler molding tasks.
- For advanced learners: Challenge them to create more complex objects and explore different techniques.
- For visual/auditory/kinesthetic learners: Use visual aids, verbal instructions, and hands-on activities to cater to different learning styles.
Note for Teachers
Ensure that the clay is properly prepared before the lesson.Provide ample space for pupils to work and encourage creativity. Supervise pupils closely to ensure safety and provide guidance as needed.
Community Join the conversation Open discussion +