

Class: Primary Two
Term: First Term
Subject: Basic Science and Technology
Curriculum Theme: Basic Technology
Previous Lesson:
Topic: Digging Clay
Content/Learning Area: What is Clay?, Methods of digging Clay, steps in Digging clay
Time Allocation: 40 minutes
Performance Objectives
By the end of the lesson, pupils should be able to:
- Cognitive Domain:
1. Identify the methods involved in digging clay.
2. Understand the steps involved in digging clay.
3. Explain what clay is and its uses.
- Affective Domain:
1. Show recognition for the natural resource of clay.
2. Develop an interest in learning about different materials.
- Psychomotor Domain:
1. Demonstrate the proper use of a shovel (if applicable).
- Social Domain:
1. Work cooperatively in group activities (if applicable).
Reference materials
- 9 – Years Basic Education curriculum
- Abuja Educational Resource Center Scheme of Work
- NAPPS National Unified Scheme of Work
- Online Details
- Relevant Textbooks
Instructional Materials
To deliver this lesson, the teacher will use the following materials:
- Whiteboard or chart paper
- Markers or chalk
- pictures or illustrations of clay and digging tools
- (Optional) Real clay sample and digging tools (shovel, pickaxe – for presentation only)
Rationale for the Lesson
Understanding the process of digging clay helps pupils appreciate the origins of materials used in everyday objects. This lesson connects classroom learning to real-world applications and fosters an understanding of natural resources.
Prerequisite/Previous Knowledge
Pupils have a basic understanding of soil and its components.
Lesson Content
What is Clay?
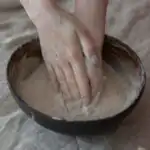
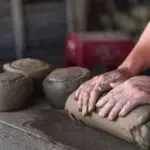
Clay is a natural material made of tiny rock and mineral particles. It is frequently found near water sources like rivers and lakes.
Methods of Digging Clay
There are different ways to dig clay. Thes include:
- Using a shovel: This is the most common method for digging clay. A shovel is used to loosen the soil, and then the clay is scooped up and placed into a container.
- Using a pickaxe: A pickaxe is used to break up hard clay. This is harder than using a shovel but sometimes necessary.
- Using a backhoe: A backhoe is a large machine used to dig up large amounts of clay, frequently in construction.
- using a spade: A spade is useful for cutting into the ground and lifting out chunks of clay, especially in softer soils.
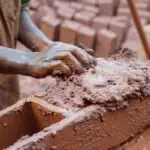
- Using manual labor: In certain specific cases, especially for small quantities, clay can be dug manually using hands and small tools.
The best method depends on how hard the clay is and how much you need.
Steps in Digging Clay
The process of digging clay involves several steps. These include:
- Getting ready: Gather tools like a shovel, container, and gloves.
- Finding clay: Look for clay in areas with lots of water.
- Digging: Use a shovel or othre tools to remove the clay.
- Collecting clay: Put the clay into a container.
- Cleaning: Remove any dirt or other things from the clay.
- Sorting: Separate the clay based on its type and quality for different uses.
- Storing: Keep the collected clay in a cool, dry place to maintain its properties.
Teaching Methods
To deliver this lesson, the teacher will adopt the following methods: Discussion, Question and answer, Visual aids, Demonstration.
Instructional Procedures
To deliver this lesson, the teacher will adopt the following steps:
Step 1: Introduction (Set Induction)
Time: 5 minutes
Teaching Skill: Questioning, Discussion
Teacher’s Activity: Engage students with questions about clay and its uses. Show pictures of clay and objects made from it.
Pupils’ Activity: Participate in the discussion,share their prior knowledge.
step 2: Description of Key Concepts
time: 10 minutes
Teaching Skill: Description, Visual Aids
Teacher’s Activity: Explain what clay is, where it’s found, and its properties. Show pictures of different types of clay and digging methods.
Pupils’ Activity: Listen attentively, ask clarifying questions.
Step 3: Demonstration/Guided Practice
Time: 10 minutes
Teaching skill: Demonstration, Guided Practice
Teacher’s Activity: (Optional) Demonstrate the use of a shovel to dig clay (if materials are available). Guide pupils through the steps involved.
Pupils’ Activity: Observe the demonstration, participate in guided practice (if applicable).
Step 4: Autonomous Practice
Time: 5 minutes
Teaching Skill: Independent Work
Teacher’s activity: Supervise pupils as they complete a short activity related to the lesson.
Pupils’ Activity: Complete the activity independently.
Step 5: Note-Taking
Time: 5 minutes
Teaching Skill: Note-Taking
Teacher’s Activity: Guide pupils in taking notes on the key concepts of the lesson.
Pupils’ Activity: Take notes on the key concepts.
Step 6: Evaluation/Review
Time: 5 minutes
Teaching Skill: Questioning, Review
Teacher’s Activity: Ask review questions to assess understanding.
Pupils’ Activity: Answer the review questions.
Objective-aligned checks:
- Identify the methods involved in digging clay.
- Explain what clay is and its uses.
- Show recognition for the natural resource of clay.
Step 7: Conclusion
Time: 2 minutes
Teaching Skill: summarizing
Teacher’s Activity: Summarize the key points of the lesson and assign homework.
Pupils’ activity: Listen to the summary and note the homework assignment.
Lesson Keywords
- Clay – A natural material made of tiny rock and mineral particles.
- Shovel – A tool used for digging and moving soil or clay.
- Pickaxe – A tool used for breaking up hard or rocky ground.
- Digging – The act of removing earth or clay from the ground.
- natural Resource – Materials or substances that occur in nature and can be used for economic gain.
Lesson Evaluation
to evaluate the learning, the teacher asks pupils to:
- What tool is commonly used to dig clay?
- List the steps involved in digging clay.
- Name some things made from clay.
- Why is clay a useful material?
- Explain the differences between using a shovel and a pickaxe to dig clay.
Assignment/Homework
- Draw a picture of the steps involved in digging clay.
- List three uses of clay in your home or community.
- Research and wriet a short paragraph about different types of clay found in Nigeria.
Differentiation
- For slower learners: Provide one-on-one assistance and use simpler language.
- For advanced learners: Encourage them to research different types of clay and their uses.
- For visual/auditory/kinesthetic learners: Use visual aids, verbal explanations, and hands-on activities to cater to different learning styles.
Note for Teachers
Ensure to have all materials ready before the lesson. If possible, demonstrate the digging process with real clay to enhance understanding. Encourage pupils to ask questions and participate actively in discussions.

Community Join the conversation Open discussion +