

Class: Primary Two
Term: Second Term
Subject: Basic Science and Technology
Curriculum Theme: Basic Technology
Previous Lesson: Moulding With Clay
Topic: Drying Moulded Objects
content/Learning area: Drying moulded objects with the sun, What is drying?, Description, importance
Time Allocation: 40 minutes
Performance Objectives
By the end of the lesson, pupils should be able to:
- Cognitive Domain:
– Explain the concept of drying moulded objects with the sun.
– Understand the importance of arranging objects under the sun for drying.
- Affective Domain:
– Appreciate the importance of using natural resources.
- Psychomotor Domain:
– Demonstrate the proper way to arrange moulded objects for sun drying.
- Social Domain:
– Work cooperatively with peers during activities.
Reference Materials
- 9 – Years Basic Education Curriculum
- Abuja Educational Resource Center Scheme of Work
- NAPPS National Unified Scheme of Work
- Relevant Textbooks
Instructional Materials
To deliver this lesson, the teacher will use the following materials:
- Moulded clay objects
- Pictures showing sun drying
- Whiteboard or chart paper
- Markers
Rationale for the Lesson
This lesson teaches pupils a practical skill using natural resources and introduces basic technological concepts. Understanding sun drying is useful for various applications and promotes environmental awareness.
prerequisite/Previous Knowledge
Pupils are familiar with the concept of the sun and its heat.
Lesson Content
Drying Moulded Objects With Sun
Drying moulded objects with the sun uses sunlight to remove water from shaped objects.
What is Drying?
Drying removes moisture from a substance using heat and air, naturally (like the sun) or artificially (like an oven).
Clarification
These include:
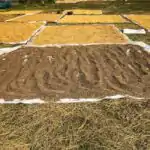
- Arranging Objects: Place molded objects in an open sunny area so sunlight reaches all sides for even drying.
- Sunlight as a Natural Dryer: Sunlight’s heat evaporates water from the objects.
- Importance:
1. practical Skill: it teaches using natural resources.
2. Understanding Basic Technology: Shows how the habitat can perform a technological function.
Drying a Moulded Object
Drying removes moisture so a clay or papier-mâché object becomes firmer. Place the object on a clean flat board in a safe airy place. Turn it only when firm enough and protect it from rain, dust and animals.
Very strong direct sun can dry the outside too quickly and cause cracks. Thin, even parts dry more evenly than very thick parts. Pupils should not use an oven or open fire.
Teaching Methods
To deliver this lesson, the teacher will adopt the following methods: Discussion, Presentation, Question and Answer.
Instructional Procedures
To deliver this lesson, the teacher will adopt the following steps:
Step 1: Introduction
time: 5 minutes
Teaching Skill: Set induction
Teacher’s Activity: Ask pupils about their experiences with drying clothes or othre items in the sun.
Pupils’ Activity: Share their experiences and observations.
Step 2: Explanation of Key Concepts
Time: 10 minutes
Teaching Skill: Explanation
Teacher’s Activity: Explain the concept of drying and how the sun helps in the process.
Pupils’ Activity: Listen attentively and ask clarifying questions.
Step 3: exhibition/Guided Practice
Time: 10 minutes
Teaching skill: Demonstration
Teacher’s Activity: Demonstrate the proper way to arrange moulded objects for sun drying.
Pupils’ Activity: Observe the demonstration and participate in arranging the objects.
Step 4: Self-reliant Practice
Time: 5 minutes
Teaching Skill: Monitoring
Teacher’s Activity: Supervise pupils as they arrange their own moulded objects for drying.
Pupils’ Activity: Arrange their objects, applying what they learned.
Step 5: Note-Taking
Time: 5 minutes
Teaching Skill: Note-taking
teacher’s Activity: Guide pupils in taking notes on key concepts.
Pupils’ Activity: Write down vital points in their notebooks.
Step 6: Evaluation/Review
Time: 5 minutes
Teaching Skill: Questioning
Teacher’s Activity: Ask review questions to assess understanding.
Pupils’ Activity: Answer the questions.
Step 7: Conclusion
Time: 5 minutes
Teaching Skill: Summarizing
Teacher’s Activity: summarize the key points of the lesson and assign homework.Pupils’ Activity: Listen to the summary and note the homework assignment.
Lesson Keywords
- Drying – Removing moisture from an object.
- Moulded Objects – Objects shaped from clay or other materials.
- Sun Drying – Using sunlight to dry objects.
- Evaporation – The process of a liquid turning into a gas.
Lesson Evaluation
To evaluate the learning, the teacher asks pupils to:
- What is the main reason for sun drying moulded objects?
- Why is it meaningful to arrange objects so sunlight reaches all sides?
- Name other ways to dry moulded objects besides using the sun?
Assignment/Homework
- Draw a picture showing how to properly dry a moulded object in the sun.
- List three items you have seen being dried in the sun.
Differentiation
- For slower learners: Provide one-on-one assistance and simplified instructions.
- For advanced learners: Advanced pupils can research other methods of drying objects.
- For visual/auditory/kinesthetic learners: Use visual aids, verbal explanations, and hands-on activities to cater to different learning styles.
Note for Teachers
Ensure pupils understand the importance of even drying and the role of sunlight in the process.Supervise the practical activity closely to ensure safety and proper arrangement of objects.



Community Join the conversation Open discussion +