

Class: primary Two
term: Second Term
Subject: Basic Science and Technology
Curriculum Theme: Basic Technology
Previous Lesson: Drying Moulded Objects, Drying With Fire
Topic: Exhibiting Moulded Objects
Content/Learning Area: Preserving Moulded Objects, Exhibiting Moulded Objects
Time Allocation: 40 minutes
Performance Objectives
By the end of the lesson, pupils should be able to:
- Cognitive Domain:
1. Mention two ways of preserving moulded objects.
2. Explain the importance of preserving moulded objects.
- Affective Domain:
1. Show thankfulness for the craftsmanship of moulded objects.
2. develop a sense of responsibility in preserving cultural heritage.
- Psychomotor domain:
1. Demonstrate the proper handling of moulded objects.
- Social Domain:
1. Work collaboratively in group activities.
Reference Materials
- 9 – Years Basic Education Curriculum
- Abuja Educational Resource Center Scheme of Work
- NAPPS National Unified Scheme of Work
- Relevant Textbooks
instructional Materials
to deliver this lesson, the teacher will use the following materials:
- Chart showing different methods of preserving moulded objects
- Examples of moulded objects (clay, wax, plaster)
- varnish, paint, plastic wrap
- Whiteboard or chart paper
- Markers
Rationale for the Lesson
This lesson is crucial for understanding the importance of preserving cultural artifacts and appreciating the value of handmade objects. Learning about preservation techniques helps students develop responsible attitudes towards handling and caring for objects.
Prerequisite/Previous Knowledge
The teacher will begin by asking pupils to share examples of moulded objects they have seen,sparking curiosity and setting the stage for the lesson on preservation techniques. A brief review of the previous lesson will also be conducted.
Lesson Content
Exhibiting Moulded Objects
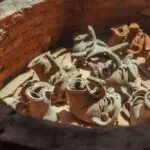
Moulded objects are three-dimensional items made from materials like clay, wax, or plaster. They can be art, tools, or ancient items.
What is Preservation?
Preservation protects and maintains moulded objects to stop them from getting damaged. This keeps them looking good for a long time.
Preserving Moulded Objects
Preserving moulded objects involves several methods to protect them from damage and ensure their longevity.
The following are ways to preserve moulded objects:
- Varnishing: Applying varnish protects moulded objects from dust, moisture, and scratches. It makes them last longer and look better.
- painting: Painting adds color and acts as a protective layer,preventing damage from the habitat and improving the objectS look.
- Keeping in a dry Place: Storing moulded objects in a dry place prevents mold and mildew, which can damage them.
- Wrapping in Plastic: Wrapping in plastic protects them from dust and other things in the air.
- Displaying in a Cabinet: Displaying them in a cabinet protects them from damage while still letting people see them.
- applying Sealants: Sealants create a barrier against moisture and pollutants, preserving the integrity of the moulded object.
- Regular Cleaning: Gently cleaning the objects with appropriate materials removes dust and dirt, preventing buildup that can cause damage.
Teaching Methods
To deliver this lesson, the teacher will adopt the following methods: Discussion, Exhibition, question and Answer.
Instructional Procedures
To deliver this lesson, the teacher will adopt the following steps:
Step 1: Introduction
Time: 5 minutes
Teaching Skill: Set induction
Teacher’s Activity: Review previous lesson and introduce the topic of exhibiting moulded objects.Ask pupils to share examples of moulded objects.
Pupils’ Activity: Share examples and participate in brainstorming session.
Step 2: clarification of Key Concepts
Time: 10 minutes
Teaching Skill: Explanation
Teacher’s Activity: Explain the concept of preservation and its importance. Define key terms like varnish,paint,and display.
Pupils’ Activity: Listen attentively and take notes.
Step 3: Presentation/guided Practice
Time: 10 minutes
Teaching Skill: Demonstration
Teacher’s Activity: Demonstrate the methods of preserving moulded objects using the instructional materials. Guide pupils in practicing the techniques.
Pupils’ Activity: Observe the demonstration and participate in guided practice.
Step 4: Autonomous Practice
Time: 5 minutes
Teaching Skill: Monitoring
Teacher’s Activity: Allow pupils to independently practice preserving small moulded objects.
Pupils’ Activity: Practice preserving moulded objects under teacher supervision.
Step 5: Note-Taking
Time: 5 minutes
Teaching Skill: Summarizing
Teacher’s Activity: Guide pupils in summarizing key points and taking notes.Pupils’ Activity: Take notes and summarize key concepts.
Step 6: Evaluation/Review
Time: 5 minutes
Teaching Skill: Questioning
Teacher’s Activity: Ask evaluation questions and provide feedback.
Pupils’ Activity: Answer evaluation questions.
Objective-aligned checks:
- Mention two ways of preserving moulded objects.
- Explain the importance of preserving moulded objects.
- Show thankfulness for the craftsmanship of moulded objects.
Step 7: Conclusion
Time: 5 minutes
Teaching Skill: Summarizing
Teacher’s Activity: Summarize the lesson and assign homework.
Pupils’ Activity: Listen to the summary and note the assignment.
Lesson Keywords
- Moulded Objects – Three-dimensional items made from materials like clay, wax, or plaster.
- Preservation – Protecting and maintaining objects to prevent damage.
- Varnishing – Applying a protective coating to prevent damage from dust, moisture, and scratches.
- Painting – Adding color and a protective layer to prevent environmental damage.
- Display – Exhibiting objects in a way that protects them from damage.
Lesson Evaluation
To evaluate the learning, the teacher asks pupils to:
- Name two ways to preserve moulded objects.
- Why is it vital to preserve moulded objects?
- What are some things that can harm moulded objects?
- How can we protect moulded objects when we show them to others?
- Give examples of moulded objects you have seen.
Assignment/Homework
- Find a small moulded object at home.
- write down two ways you can preserve it.
- Explain why it is indeed vital to preserve it.
Differentiation
- For slower learners: Provide one-on-one assistance and simplified instructions.
- For advanced learners: Encourage them to research additional preservation methods and present their findings to the class.
- For visual/auditory/kinesthetic learners: Use visual aids, verbal explanations, and hands-on activities to cater to different learning styles.
Note for Teachers
Ensure to provide practical demonstrations and hands-on activities to reinforce the concepts. Encourage pupils to ask questions and share their experiences with moulded objects.

Community Join the conversation Open discussion +