

Class: Primary Two
Term: First Term
Subject: Basic Science and Technology
Curriculum Theme: Basic Technology
Previous Lesson: Meaning and Methods of Digging Clay
Topic: Mixing Clay
Content/Learning Area: What is Clay?,steps in Mixing Clay
Time Allocation: 40 minutes
Performance Objectives
By the end of the lesson,pupils should be able to:
- Cognitive Domain:
1. Mention the methods involved in digging clay.
2. Explain the steps involved in mixing clay.
- Psychomotor Domain:
1. Demonstrate the ability to mix clay properly.
- Affective Domain:
1. Show interest in learning about clay and its uses.
- Social Domain:
1.Work cooperatively with others during group activities.
Reference Materials
- 9 – Years Basic Education Curriculum
- Abuja Educational Resource Center Scheme of Work
- NAPPS National Unified Scheme of Work
- Relevant Textbooks
Instructional Materials
To deliver this lesson, the teacher will use the following materials:
- Clay
- Water
- Mixing bowls
- Mixing sticks
- Pictures of clay objects
Rationale for the Lesson
Understanding how to mix clay is a basic skill in many crafts and artistic endeavors. This lesson provides a foundation for future lessons on pottery and other clay-based activities, fostering creativity and practical skills.
Prerequisite/Previous knowledge
The teacher will start by asking pupils what they know about clay and showing pictures of objects made from clay. A brief discussion will follow to gauge prior knowledge and generate excitement for the lesson.
Lesson Content
What is Clay?
Clay is a type of soil made of very small particles. It’s found in many places and used to make things like pottery, bricks, and tiles.Clay is flexible; you can shape it into many forms, and it can be painted and decorated.
Steps in Mixing Clay
Mixing clay involves a series of actions to achieve the desired consistency for various applications. These include:
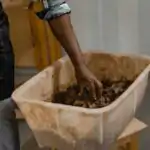
- Adding Clay: Begin by putting the clay into a mixing bowl. Break it into smaller pieces using your hands.
- Adding Water: Next, add water to the clay. It’s vital to add water slowly because too much water makes the clay too wet and hard to use.
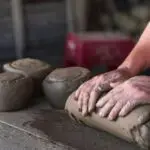
- Mixing Clay: Mix the clay and water together. You can use your hands or a stick to mix until it’s smooth.
Teaching Methods
To deliver this lesson, the teacher will adopt the following methods: Presentation, Explanation, Question and Answer, Practical Activity.
Instructional Procedures
To deliver this lesson,the teacher will adopt the following steps:
Step 1: Introduction
Time: 5 minutes
Teaching Skill: Set Induction
Teacher’s Activity: Ask pupils what they know about clay. Show pictures of clay objects.
pupils’ Activity: Respond to teacher’s questions and observe the pictures.
Step 2: Explanation of Key Concepts
Time: 10 minutes
Teaching Skill: Explanation, Discussion
Teacher’s Activity: Explain what clay is and its uses.
Pupils’ Activity: Listen attentively and ask questions.
Step 3: Demonstration/Guided Practice
Time: 15 minutes
Teaching Skill: Demonstration, Guided practice
Teacher’s Activity: Demonstrate the steps in mixing clay.
Pupils’ Activity: Observe the demonstration and participate in guided practice.
Step 4: Independent Practice
time: 5 minutes
Teaching Skill: Monitoring, Feedback
Teacher’s Activity: Supervise pupils as they mix clay independently.
Pupils’ Activity: Mix clay independently,following the demonstrated steps.
Step 5: Note-Taking
Time: 2 minutes
teaching Skill: Note-Taking
Teacher’s Activity: Guide pupils in taking notes on the key steps.
Pupils’ Activity: Take notes on the key steps.
Step 6: Evaluation/Review
Time: 3 minutes
Teaching Skill: Questioning, feedback
Teacher’s Activity: Ask evaluation questions.
Pupils’ Activity: Answer the evaluation questions.
Objective-aligned checks:
- Mention the methods involved in digging clay.
- Explain the steps involved in mixing clay.
- Demonstrate the ability to mix clay properly.
Step 7: Conclusion
Time: 2 minutes
Teaching Skill: Summarizing
Teacher’s Activity: Summarize the key steps in mixing clay and encourage pupils to continue practicing their skills at home. Answer any remaining questions.
Pupils’ Activity: Listen to the summary and ask any remaining questions.
Lesson Keywords
- Clay – A type of soil made of very small particles, used for making pottery, bricks, and tiles.
- Mixing – Combining different substances to create a uniform mixture.
- Pottery – Objects made from clay that are hardened by firing.
- Water – A clear, odorless, tasteless liquid essential for mixing clay to the right consistency.
- Soil – The upper layer of earth in which plants grow, composed of organic and inorganic materials.
Lesson Evaluation
to evaluate the learning, the teacher asks pupils to:
- What are the three steps involved in mixing clay?
- why is it critically important to add water gradually when mixing clay?
- What are some things that can be made from clay?
- What are some safety precautions to take when working with clay?
- What are some methods involved in digging clay?
Assignment/Homework
- Find different types of clay in your environment.
- List five objects that can be made from clay.
- Describe the process of mixing clay in your own words.
Differentiation
- For slower learners: Provide one-on-one assistance and simplified instructions.
- For advanced learners: Encourage them to experiment with different techniques and create their own clay designs.
- For visual/auditory/kinesthetic learners: Use visual aids, verbal explanations, and hands-on activities to cater to different learning styles.
Note for Teachers
Ensure that pupils understand the importance of adding water gradually to avoid making the clay too wet. Supervise the practical activity closely to ensure safety and proper technique. Encourage creativity and experimentation while adhering to the basic steps.

Community Join the conversation Open discussion +