

Class: Primary Two
Term: First Term
Subject: Basic Science and technology
Curriculum Theme: basic Technology
Previous Lesson: Meaning and Steps in Mixing Clay
Topic: Kneading of Clay
content/Learning Area: Defining kneading, Explaining the importance of kneading clay, Describing the process of kneading clay
Time Allocation: 40 minutes
Performance Objectives
By the end of the lesson, pupils should be able to:
- Cognitive Domain:
1. Define kneading.
2. Explain the importance of kneading clay.
3. describe the process of kneading clay.
- Psychomotor Domain:
1. Demonstrate the process of kneading clay.
- Affective Domain:
1. Show interest in learning about clay work.
- Social Domain:
1. Work cooperatively with peers during activities.
Reference Materials
- 9 – Years Basic Education Curriculum
- Abuja Educational Resource center Scheme of Work
- NAPPS National Unified Scheme of Work
- Relevant Textbooks
Instructional Materials
To deliver this lesson, the teacher will use the following materials:
- Clay
- Water
- Whiteboard or chart
- Markers
- Pictures of kneaded clay
Rationale for the Lesson
This lesson is crucial for developing pupils’ basic technology skills. Understanding kneading techniques is essential for various crafts and lays the foundation for more advanced clay work in future lessons.
Prerequisite/Previous Knowledge
The teacher will start by asking pupils what they know about clay and showing pictures of different clay objects.A brief discussion will follow, leading into the topic of kneading clay.
Lesson Content
kneading of Clay
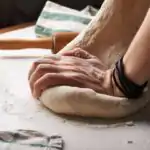
Kneading clay is a very important step in pottery and sculpting.It means working and pressing the clay with your hands to make it soft,easy to shape,and ready for making things.
What is Kneading?
Kneading is a way to work with clay by repeatedly folding, pressing, and stretching it. This gets rid of air bubbles, makes the clay even, and makes it easier to use.
Why is kneading Important?
Kneading is important because it prepares the clay for use by making it pliable and removing air bubbles. The following are reasons why kneading is critically important:
- Softness and pliability: Kneading makes the clay soft and easy to shape into different things.
- Air Removal: Kneading gets rid of air bubbles, which stops cracks in the finished item.
- Uniform Consistency: Kneading makes the clay even, so it’s easier to work with and dries evenly.
- Improved Workability: Kneaded clay is easier to mold and manipulate, allowing for finer details in the final product.
- Enhanced Durability: Removing air pockets through kneading results in a stronger and more durable clay structure after firing.
The process of kneading Clay
Kneading clay involves several steps to ensure it is properly prepared for use.These include:
- Start with a lump of clay: Make sure it’s not too dry or too wet.
- Add water if needed: If the clay is too dry, add a little water and knead it in.
- fold and press: Fold the clay in half and press down firmly with your hands.
- Repeat: Keep folding, pressing, and stretching until it’s smooth and easy to shape.
- check for air bubbles: As you knead, check for air bubbles and gently press them out.
- Continue kneading: Continue until the clay is consistent and free of lumps.
Examples of Kneading
Kneading is used in various applications to prepare clay for different purposes.Examples are:
- Pottery: Kneading is essential for making things like bowls and vases.
- Sculpting: Sculptors knead clay to get the right consistency for their art.
- ceramics: Kneading is a key step in making ceramics, getting the clay ready for shaping and baking.
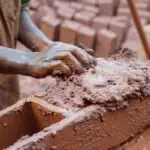
- Brick Making: Kneading ensures the clay is uniform and free of air pockets, resulting in stronger bricks.
- Tile Production: Kneading prepares the clay for molding into tiles, ensuring they are durable and resistant to cracking.
Teaching Methods
To deliver this lesson, the teacher will adopt the following methods: Discussion, Exhibition, Practical Activity
Instructional Procedures
To deliver this lesson, the teacher will adopt the following steps:
Step 1: Introduction
Time: 5 minutes
Teaching Skill: Set Induction
Teacher’s Activity: introduces the topic, asks pupils what they know about clay.
Pupils’ Activity: Respond to teacher’s questions, share their prior knowledge.
Step 2: Explanation of Key Concepts
Time: 10 minutes
Teaching Skill: Explanation
teacher’s Activity: Explains the definition and importance of kneading clay.
Pupils’ Activity: Listen attentively, ask clarifying questions.
Step 3: Demonstration/Guided practice
Time: 15 minutes
Teaching Skill: Demonstration
Teacher’s Activity: Demonstrates the process of kneading clay, guiding pupils through each step.
Pupils’ activity: Observe the demonstration, participate in guided practice.
Step 4: Self-Reliant Practice
Time: 5 minutes
Teaching Skill: Monitoring
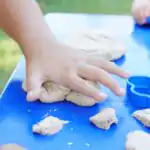
Teacher’s Activity: Supervises pupils as they independently knead clay.
Pupils’ Activity: Practice kneading clay, apply what they have learned.
Step 5: Note-Taking
Time: 2 minutes
Teaching Skill: Note-taking
Teacher’s Activity: Guides pupils in taking notes on key concepts.
Pupils’ Activity: Write down important points.
Step 6: Evaluation/Review
Time: 3 minutes
Teaching Skill: questioning
Teacher’s Activity: Asks evaluation questions, provides feedback.
Pupils’ Activity: Answer questions, reflect on their learning.
Objective-aligned checks:
- Define kneading.
- Explain the importance of kneading clay.
- describe the process of kneading clay.
Step 7: Conclusion
Time: 2 minutes
Teaching Skill: Summarizing
Teacher’s activity: Summarizes the key points about kneading clay and encourages pupils to continue practicing at home.
Pupils’ Activity: Listen to the summary and ask any remaining questions.
Lesson Keywords
- Kneading – working clay with hands to make it soft and pliable.
- Pliability – The quality of being easily shaped or molded.
- Air Bubbles – Pockets of air trapped within the clay.
- Consistency – The uniformity of the clay’s texture.
- Pottery – The art of making objects from clay.
Lesson Evaluation
To evaluate the learning, the teacher asks pupils to:
- What is kneading?
- Why is it critically important to knead clay?
- What are the steps in kneading clay?
- Give an example of where kneading is used.
Assignment/Homework
- Practice kneading clay at home with the help of a parent or guardian.
- Write a short paragraph explaining the importance of kneading clay.
- Draw a picture of an object made from kneaded clay.
Differentiation
- For slower learners: Provide one-on-one assistance during the practical activity.
- For advanced learners: Introduce more complex shaping techniques after the basic kneading process.
- For visual/auditory/kinesthetic learners: Use visual aids, verbal instructions, and hands-on activities to cater to different learning styles.
Note for Teachers
Ensure that pupils have access to clean water and clay. Supervise the practical activity closely to prevent accidents. Encourage pupils to ask questions and explore the properties of clay.
Community Join the conversation Open discussion +