

Class: primary Six
Term: First Term
Subject: Pre-vocational Studies
Curriculum Theme: Home Economics
Previous Lesson: Steps In Making Permanent Stitches
Topic: Steps in Making Decorative Stitches
Content/Learning Area: steps in Making Decorative Stitches
Time Allocation: 40 minutes
Performance Objectives
By the end of the lesson, pupils should be able to:
- Cognitive Domain:
1. List the steps involved in making decorative stitches.
- Affective Domain:
1. Appreciate the value of using decorative stitches in home crafts and sewing.
- Psychomotor Domain:
1.Demonstrate the steps in making decorative stitches on fabric.
- Social Domain:
1. Work collaboratively to share materials and ideas during the sewing activity.
Reference Materials
- 9 – Years Basic Education Curriculum
- Abuja Educational Resource Center scheme of work
- NAPPS National Unified Scheme of Work
- online Data from Quilters Select – 6 Tips to Sew Beautiful Decorative Stitches
- Relevant Textbooks
Instructional Materials
To deliver this lesson, the teacher will employ the help of the following materials:
- Sample of decorative stitches
- Fabric pieces
- Needle and thread
- Scissors
- Chalk or pencil for marking
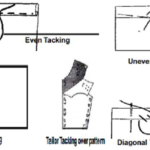
- Diagram of decorative stitches
Rationale for the Lesson
This lesson is crucial for developing practical sewing skills. Knowing how to create decorative stitches enhances creativity and allows pupils to personalize their projects, improving their overall craft skills.
Prerequisite/Previous Knowledge
Pupils have prior knowledge of basic sewing techniques.
Lesson Content
Steps in Making Decorative Stitches
Decorative stitches add beautiful designs to fabric. They make your work more attractive and unique. Here’s how to make them:
- Mark the fabric: Use chalk or a fabric pencil to mark where you want your stitches.
- Thread the needle: Choose your thread and thread the needle.
- Start the stitch: Insert the needle from the back, leaving a small tail.
- Maintain the pattern: Follow the marked pattern, keeping stitches even.
- Finish the stitch: Secure the thread at the back with a knot.
Making Decorative Stitches
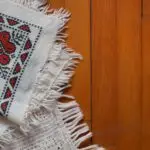
Decorative stitches add pattern while sometimes also securing an edge. Examples include chain, cross and blanket stitches. Transfer or mark a simple design, choose thread and spacing, work from one direction and check the reverse side for tangles.
Decoration should not weaken the fabric or make the item uncomfortable. Practise first on scrap material and handle needles under supervision.
Teaching Methods
to deliver this lesson, the teacher will adopt the following methods: Questioning, Explanation, Demonstration, hands-on practice, Note-taking, and Oral questioning/discussion.
Instructional Procedures
to deliver this lesson, the teacher will adopt the following steps:
Step 1: Introduction
Time: 5 mins
Teaching Skill: Set Induction
Teacher’s Activity: Teacher asks pupils if they have seen decorative designs on fabrics and their purpose.
Pupils’ Activity: Pupils respond by sharing their experiences with decorated fabrics.
Learning Point: Pupils gain awareness of the use of decorative stitches on fabrics.
Step 2: Explaining the Importance of Decorative stitches
Time: 5 mins
Teaching skill: Explanation
Teacher’s Activity: Teacher shows sample fabrics with decorative stitches and explains how they enhance the beauty of clothing and household items.Pupils’ Activity: Pupils observe the samples and listen to the explanation.Learning Point: Understanding the aesthetic and practical use of decorative stitches.
Step 3: Demonstrating the Steps Involved
Time: 10 mins
Teaching Skill: Demonstration
Teacher’s Activity: Teacher demonstrates each step in making a decorative stitch (e.g., marking, threading needle, starting stitch, maintaining pattern, and finishing).
Pupils’ Activity: Pupils observe and take notes on the steps demonstrated.
Learning point: Pupils understand the practical process of creating decorative stitches.
Step 4: pupils’ Practical Session
Time: 10 mins
Teaching skill: Hands-on practice
Teacher’s Activity: Teacher guides pupils to practice decorative stitching on their fabric pieces using the steps demonstrated.
Pupils’ Activity: Pupils practice making decorative stitches on their fabric pieces under teacher’s supervision.
Learning Point: Practical experience in applying decorative stitches.
step 5: Note-Taking
Time: 5 mins
Teaching Skill: Note-taking
Teacher’s Activity: Teacher writes the steps of making decorative stitches on the board for pupils to copy.
Pupils’ Activity: Pupils copy the classroom notes in their exercise books.
Learning Point: Pupils solidify their understanding by copying notes.
Step 6: Evaluation/Review
Time: 3 mins
Teaching skill: Questioning
Teacher’s Activity: Teacher asks questions to assess pupils’ understanding of the topic and how well they applied the stitches.
Pupils’ Activity: Pupils answer the questions and show their completed work.
Learning Point: Assessing pupils’ understanding of the steps in making decorative stitches.
Objective-aligned checks:
- List the steps involved in making decorative stitches.
- Demonstrate the steps in making decorative stitches on fabric.
Step 7: Conclusion
time: 2 mins
Teaching Skill: Summary
Teacher’s Activity: teacher summarizes the key points and reinforces the importance of practicing decorative stitching to improve their sewing skills.
Pupils’ Activity: Pupils listen attentively to the summary.Learning Point: Pupils leave with a clearer understanding of the steps involved in making decorative stitches.
Lesson Keywords
- Decorative Stitches – Stitches used to add designs and beauty to fabric.
- Marking – Using chalk or pencil to indicate where stitches should be placed.
- Threading – Passing thread through the eye of a needle.
- Pattern – A design or sequence of stitches to be followed.
- Securing – Fastening the thread to prevent unraveling.
Lesson Evaluation
To evaluate the learning, the teacher asks pupils to:
- What is the first step in making decorative stitches?
- Why is it critically significant to mark the fabric before stitching?
- Can you describe how to start a decorative stitch?
- What should you do to maintain an even pattern?
- How do you finish a decorative stitch to prevent it from unraveling?
Assignment/Homework
- Practice making different decorative stitches on a piece of fabric.
- Bring examples of items with decorative stitches to the next class.
- Wriet down the steps for creating a specific decorative stitch pattern.
Differentiation
- For slower learners: Provide simplified stitch patterns and one-on-one assistance.
- For advanced learners: Introduce more complex stitch patterns and encourage independent design.
- For visual/auditory/kinesthetic learners: Use visual aids, verbal instructions, and hands-on practice to cater to different learning styles.
Note for Teachers
Ensure all pupils have the necessary materials and provide clear, step-by-step instructions. Encourage creativity and patience during the practical session.


Community Join the conversation Open discussion +