

Class: Primary Two
Term: Third Term
Subject: Basic Science and Technology
Curriculum Theme: Basic Technology
previous Lesson: Gathering And Cutting Of Local Instruments
Topic: Making of Local Instruments
Content/Learning Area: Steps involved in making local instruments, Importance of creating local instruments, Process of making a simple local instrument, Collaboration in creating a local instrument
Time Allocation: 40 minutes
Performance Objectives
By the end of the lesson, pupils should be able to:
- Cognitive Domain:
1. List the steps involved in making local instruments.
2. Identify materials used in making local instruments.
- Psychomotor Domain:
1. Demonstrate the process of making a simple local instrument.
- Affective Domain:
1. Appreciate the importance of creating local instruments.
- Social Domain:
1. Collaborate with peers to create a local instrument.
Reference Materials
- 9 – Years Basic Education Curriculum
- abuja educational Resource Center Scheme of Work
- NAPPS National Unified Scheme of Work
- Relevant Textbooks
Instructional Materials
To deliver this lesson, the teacher will employ the help of the following materials:
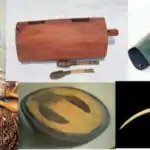
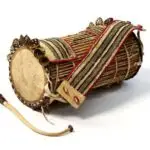
- Pictures of various local instruments
- Materials for making a simple instrument (e.g., bamboo, calabash, wood, strings)
- Tools (e.g., knife, saw)
- Whiteboard or chart paper
Rationale for the Lesson
This lesson helps pupils understand the process of creating musical instruments from locally sourced materials, fostering creativity and thankfulness for cultural heritage. It connects classroom learning to practical skills and cultural understanding.
Prerequisite/Previous Knowledge
The teacher will begin by asking pupils what musical instruments they know. The teacher will then show pictures of various local instruments, sparking curiosity and leading into a discussion about their origins and construction.
Lesson Content
Making of Local Instruments
Local instruments are musical instruments made using materials found locally. They are often unique to a specific region or culture.
Materials for Making Local Instruments
These include:
- Bamboo
- Calabash
- Wood
- Animal skin
- Strings
- Gourd
- Clay
Steps in making Local Instruments
The following are the steps involved in making local instruments:
- Gathering Materials: Collect necessary materials from the surroundings or local sources.
- Cutting and Shaping: Cut and shape the materials to the required size and form using appropriate tools.
- Assembling the Parts: Join the different parts of the instrument together.
- Decorating the Instrument: Decorate the instrument to enhance its visual appeal.
- Testing and Tuning: Test the instrument to ensure it produces the desired sounds and adjust as needed.
- Finishing: Apply any necessary finishes or protective coatings to the instrument.
- Refining: Make any final adjustments or refinements to improve the instrument’s sound and playability.
Teaching Methods
To deliver this lesson, the teacher will adopt the following methods: Discussion, Exhibition, Group Activity
Instructional Procedures
To deliver this lesson, the teacher will adopt the following steps:
step 1: Introduction
Time: 5 minutes
Teaching Skill: Set Induction
Teacher’s Activity: Introduces the topic, asks pupils about their prior knowledge of musical instruments.
Pupils’ Activity: Respond to teacher’s questions, share their knowledge.
Step 2: Explanation of Key Concepts
Time: 10 minutes
Teaching skill: Explanation, Demonstration
Teacher’s Activity: Explains what local instruments are and shows pictures of examples.
Pupils’ Activity: Listen attentively, observe pictures.
Step 3: Demonstration/Guided practice
Time: 15 minutes
Teaching Skill: demonstration,Guided Practice
Teacher’s Activity: Demonstrates the steps involved in making a simple local instrument.Pupils’ Activity: Observe the demonstration, ask questions.
step 4: Independent Practice
Time: 5 minutes
Teaching Skill: Monitoring, Feedback
Teacher’s Activity: Guides pupils as they work in groups to make their own instruments.
Pupils’ Activity: Work collaboratively, apply the steps learned.
Step 5: Note-Taking
Time: 2 minutes
Teaching Skill: Note-Taking
Teacher’s Activity: Guides pupils in summarizing key points.
Pupils’ Activity: Write down key points.
Step 6: Evaluation/Review
Time: 3 minutes
Teaching Skill: Questioning, Feedback
Teacher’s Activity: Asks evaluation questions.
Pupils’ Activity: Answer questions.
Objective-aligned checks:
- List the steps involved in making local instruments.
- Identify materials used in making local instruments.
- Demonstrate the process of making a simple local instrument.
Step 7: Conclusion
Time: 2 minutes
teaching Skill: Summarizing
Teacher’s Activity: Summarizes the lesson and highlights key points.
pupils’ Activity: Listen and ask any remaining questions.
Lesson keywords
- Local Instruments – Musical instruments made from locally sourced materials.
- Bamboo – A type of grass often used in making instruments.
- Calabash – A gourd-like fruit used as a resonator in instruments.
- Craftsmanship – The skill of making things by hand.
- Cultural Heritage – The traditions, skills, and arts of a particular culture.
Lesson Evaluation
to evaluate the learning, the teacher asks pupils to:
- What are some materials used to make local instruments?
- List the five main steps in making a local instrument.
- How would you decorate a local instrument?
- Why is making local instruments crucial?
- Name some examples of local instruments.
Assignment/Homework
- Research and write about a local instrument from your community.
- Collect materials to start making a simple local instrument at home.
Differentiation
- for slower learners: Provide one-on-one assistance and simplified instructions.
- For advanced learners: Challenge them to design and create more complex instruments.
- For visual/auditory/kinesthetic learners: Use visual aids,verbal explanations,and hands-on activities to cater to different learning styles.
note for Teachers
Encourage pupils to explore their creativity and cultural heritage through the making of local instruments. provide ample support and guidance during the hands-on activities to ensure a triumphant learning experiance.
Community Join the conversation Open discussion +