

Class: Primary 6
Term: Third Term
Subject: Basic Science & Technology
Curriculum Theme: Basic Technology
Previous Lesson:
Topic: Simple machines
content/Learning Area: Definition of Simple Machines; Types of Simple Machines (Lever, Pulley, Screws, Wedges)
Time Allocation: 40 Minutes
Performance Objectives
By the end of the lesson, pupils should be able to:
- Cognitive Domain: Define simple machines.
- Affective Domain: Show interest in learning about simple machines and their uses.
- Psychomotor Domain: Identify different types of simple machines.
- Social Domain: Collaborate with peers in discussing simple machines.
Reference Materials
- 9 Years Basic Education Curriculum
- Abuja Educational Resource Centre scheme of work
- NAPPS National Unified Scheme of Work
- Basic Science and Technology for Primary Schools, Book 6
- Nigerian Educational Research and development Council (NERDC) Curriculum
Instructional Materials
To deliver this lesson, the teacher will use the following materials: real-life examples of simple machines (e.g., a seesaw for lever, a flagpole for pulley, a screw, a wedge), charts illustrating simple machines, and textbooks.
Rationale for the Lesson
Understanding simple machines helps pupils appreciate how work is made easier, fostering interest in technology and problem-solving skills applicable in everyday life.
Prerequisite/Previous Knowledge
Pupils have prior knowledge of work and energy.
Lesson Content
Simple Machines
Simple machines are basic mechanical devices that make work easier by changing the direction or magnitude of a force. They reduce the amount of force needed to perform a task, although the distance over which the force is applied may increase.
Types of Simple Machines
There are several types of simple machines, each with unique characteristics and applications:
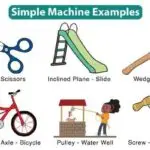
- lever – A rigid bar that pivots on a fixed point (fulcrum) to multiply the mechanical force applied to another object.
- Pulley – A wheel with a grooved rim around which a rope passes, used to lift or move objects by changing the direction of the force.
- Screw – an inclined plane wrapped around a cylinder, used to fasten objects or convert rotational motion into linear motion.
- Wedge – A triangular-shaped tool used to separate or split objects by applying force to a narrow area.
- Inclined Plane – A flat surface set at an angle, used to raise or lower objects with less force than lifting them vertically.
- Wheel and Axle – A wheel attached to a central rod (axle), used to multiply force or distance.
- Gear – A toothed wheel that meshes with another toothed wheel to transmit rotational motion and force.
- Hydraulic Jack – A device that uses fluid pressure to lift heavy objects.
Teaching Methods
To deliver this lesson, the teacher will adopt the following methods: Discussion, Explanation, Demonstration, Visual Aids, Question and Answer.
Instructional Procedures
To deliver this lesson, the teacher will adopt the following steps:
Step 1: introduction
Time: 5 Minutes
Teaching Skill: Set Induction
teachers Activity: The teacher revises the previous lesson on work and energy and introduces the concept of simple machines by asking pupils if they have ever used a tool to make a task easier.
Pupils’ Activity: Pupils respond to the teacher’s questions and share their experiences.
Step 2: Defining Simple Machines
Time: 10 Minutes
teaching Skill: Explanation
Teacher’s Activity: The teacher explains what simple machines are and their purpose in making work easier.
Pupils’ Activity: Pupils listen attentively and ask questions for clarification.
Step 3: Exploring Levers
Time: 10 Minutes
Teaching Skill: Demonstration
Teacher’s Activity: The teacher explains and demonstrates how a lever works using a seesaw or a similar example.
Pupils’ Activity: Pupils observe the demonstration and participate in a discussion about levers.
Step 4: Examining Pulleys, Screws, and Wedges
Time: 10 Minutes
Teaching Skill: Explanation
Teacher’s Activity: The teacher explains the functions of pulleys, screws, and wedges, providing real-life examples.
Pupils’ Activity: Pupils listen,observe,and ask questions to understand the different types of simple machines.
Step 5: note-Taking
Time: 2 Minutes
Teaching Skill: Summarization
Teacher’s Activity: The teacher guides pupils to write down the key points discussed in the lesson.
Pupils’ Activity: Pupils write the notes in their notebooks.
Step 6: evaluation/Review
Time: 3 Minutes
Teaching Skill: Assessment
Teacher’s Activity: The teacher asks questions to assess pupils’ understanding of the lesson.
Pupils’ Activity: Pupils answer the questions asked by the teacher.
Step 7: Conclusion
Time: 2 Minutes
Teaching Skill: Closure
Teacher’s Activity: The teacher summarizes the lesson and previews the next topic.
Pupils’ Activity: Pupils listen to the summary and take note of the next topic.
Lesson Keywords
- Simple Machine – A basic mechanical device that makes work easier.
- Lever – A rigid bar that pivots on a fulcrum.
- Pulley – A wheel with a grooved rim used to lift objects.
- Screw – An inclined plane wrapped around a cylinder.
- Wedge – A triangular-shaped tool used to separate objects.
Lesson Evaluation
To evaluate the learning, the teacher asks pupils to:
- Define simple machines.
- List and explain three types of simple machines.
- Give examples of where each type of simple machine is used in everyday life.
Assignment/Homework
- Research and write about another type of simple machine not discussed in class.
- Find examples of simple machines in your home and describe how they work.
Differentiation
- For slower learners: Provide simplified explanations and hands-on activities with real objects.
- For advanced learners: Challenge them to design a complex machine using a combination of simple machines.
- For visual/auditory/kinesthetic learners: Use visual aids, verbal explanations, and hands-on activities to cater to different learning styles.
Note for Teachers
Ensure to use real-life examples and demonstrations to make the lesson more engaging and understandable for the pupils. Encourage active participation and questioning throughout the lesson.

Community Join the conversation Open discussion +