

Class: Senior Secondary School 2 (SS2 / SSS2)
Term: Second Term
Week: 9
Age: 16 years
Duration: 45 minutes
Subject: Building Construction
Curriculum Theme: Building Components
Previous Lesson: Ground Floor: Problems related to basement, Detailed drawing required.
Topic: WALL OPENINGS
Subject Matter: Meaning of WALL OPENINGS, Definition of openings in wall (doors and windows), Methods of constructing wall openings (site practice).
Specific Objectives
By the end of the lesson, pupils should be able to:
Cognitive Domain:
- Define wall openings in building construction.
- Explain the functional requirements of wall openings.
- Describe different methods of constructing wall openings.
Affective Domain:
- Appreciate the importance of correctly constructed wall openings.
- Show interest in observing construction details during site visits.
Psychomotor Domain:
- Identify various types of wall openings on a construction site.
- Sketch basic details of a wall opening.
Social Domain:
- Participate actively in discussions about site observations.
- Collaborate with peers during a simulated or actual site visit.
Reference Materials
The following resources were used in planning this lesson:
- Senior Secondary Schools Education Curriculum
- State Unified Scheme of Work
- Oyebande, L. A. (2018). Building Construction for Senior Secondary Schools. Evans Brothers (Nigeria Publishers) Limited.
Instructional Materials
The teacher will teach this lesson with the aid of:
- Drawings of wall openings (doors and windows)
- Access to a construction site (actual or simulated)
- Tape measure
Rationale for the Lesson
This lesson helps pupils understand the essential role of openings in walls for light, ventilation, and access in buildings. It enables them to identify and appreciate the practical methods used in constructing these vital building elements, linking classroom theory to real-world application.
Prerequisite/Previous Knowledge
Pupils have prior knowledge of basic building components such as walls, foundations, and roofs.
Lesson Content/Board Summary
WALL OPENINGS
Meaning of Wall Openings
Wall openings are spaces provided within a wall structure to accommodate elements like doors, windows, and ventilators. These openings are essential for the functionality and usability of a building, allowing for passage, natural light, and ventilation.
Functional Requirements of Wall Openings
The following are the functional requirements of wall openings:
- Admission of Light: Windows allow natural light into rooms, reducing the need for artificial lighting during the day.
- Ventilation: Openings facilitate the circulation of fresh air, improving indoor air quality and comfort.
- Access and Egress: Doors provide entry and exit points for occupants and goods.
- View and Aesthetics: Windows offer views of the exterior and contribute to the architectural appearance of a building.
- Emergency Exit: Some openings, particularly doors and certain windows, serve as emergency escape routes.
- Security: Openings must be designed to provide adequate security against unauthorized entry.
- Thermal Insulation: Openings should minimize heat loss in cold climates and heat gain in hot climates.
- Sound Insulation: Openings should help reduce the transmission of external noise.
Methods of Constructing Wall Openings
The construction of wall openings involves careful planning and execution to ensure structural integrity and proper installation of doors and windows. Common methods include:
- Setting Out: Accurately marking the position, width, and height of the opening on the wall before construction begins.
- Providing Lintels: A lintel is a horizontal structural member placed over an opening to support the wall above it. Lintels can be made of reinforced concrete, steel, or timber.
- Cast-in-situ Concrete Lintels: Formwork is erected, reinforcement bars are placed, and concrete is poured directly on site.
- Precast Concrete Lintels: Lintels are manufactured off-site and then lifted into position.
- Steel Lintels: Steel sections (e.g., angles, rolled steel joists) are used for wider openings or heavy loads.
- Forming Jambs and Reveals: The vertical sides of the opening (jambs) and the recess created for the window/door frame (reveal) are carefully formed using bricks, blocks, or concrete, ensuring they are plumb and true.
- Creating Sills: A sill is the horizontal member at the bottom of a window opening, designed to shed water away from the wall. Sills can be made of concrete, stone, or precast units.
- Bonding of Masonry: The masonry (bricks or blocks) around the opening must be properly bonded to the main wall to prevent cracks and ensure stability. Special bonding patterns or reinforcement may be used.
- Installation of Frames: Door and window frames are fixed securely into the prepared openings, ensuring they are level, plumb, and square before the finishing works.
- Provision for Services: Any electrical conduits, plumbing pipes, or other services passing through or near the opening must be considered during construction.
Teaching Methods/Instructional Techniques
Discussion, Lecture, Demonstration, Question and Answer, Visual Aids, Site Visit
Instructional Procedures
Step 1: Introduction
Time: 5 minutes
Teaching Skill: Set Induction
Teacher’s Activity: The teacher greets the pupils and asks them to identify the parts of the classroom that allow light and air to enter or enable movement in and out.
Pupils’ Activity: Pupils identify windows and doors in the classroom.
Learning Point: Pupils recall prior knowledge of basic building components.
Step 2: Meaning of Wall Openings
Time: 7 minutes
Teaching Skill: Explanation
Teacher’s Activity: The teacher defines wall openings as spaces for doors, windows, and other elements, explaining their purpose in a building. The teacher uses diagrams or real-life examples.
Pupils’ Activity: Pupils listen attentively, ask questions, and contribute to the definition.
Learning Point: Pupils understand the meaning of wall openings.
Step 3: Functional Requirements of Wall Openings
Time: 8 minutes
Teaching Skill: Discussion/Elucidation
Teacher’s Activity: The teacher explains the various functional requirements of wall openings, such as light, ventilation, access, and aesthetics, using examples.
Pupils’ Activity: Pupils listen, take notes, and state the functions of wall openings.
Learning Point: Pupils can list and explain the purposes of wall openings.
Step 4: Methods of Constructing Wall Openings
Time: 10 minutes
Teaching Skill: Demonstration/Lecture
Teacher’s Activity: The teacher explains and illustrates different methods of constructing wall openings, focusing on lintels, jambs, sills, and proper bonding, possibly using drawings.
Pupils’ Activity: Pupils observe the drawings, listen to the explanations, and take notes on the construction methods.
Learning Point: Pupils understand the practical steps involved in creating wall openings.
Step 5: Site Practice/Observation
Time: (Integrated – can be a separate field trip or simulated within class with visuals)
Teaching Skill: Observation/Field Study
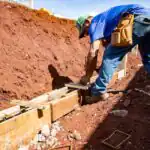
Teacher’s Activity: The teacher guides pupils (either physically to a construction site if available and safe, or through detailed visual aids/videos) to observe existing wall openings, identifying lintels, jambs, and sills.
Pupils’ Activity: Pupils observe the different types and construction details of wall openings, noting key features.
Learning Point: Pupils connect theoretical knowledge with practical application.
Step 6: Discussion of Site Observations
Time: 5 minutes
Teaching Skill: Questioning/Facilitation
Teacher’s Activity: The teacher facilitates a brief discussion on the observations made during the site practice, asking pupils to describe what they saw and understood.
Pupils’ Activity: Pupils share their observations and discuss the construction details they identified.
Learning Point: Pupils consolidate their understanding through shared experiences and discussion.
Step 7: Evaluation/Review
Time: 5 minutes
Teaching Skill: Questioning/Assessment
Teacher’s Activity: The teacher evaluates the learning by asking the following questions:
- Define wall openings.
- State three functional requirements of wall openings.
- Mention two common methods used in constructing wall openings.
- What is the purpose of a lintel in a wall opening?
Pupils’ Activity: Pupils answer orally and in writing.
Learning Point: Pupils demonstrate understanding of the lesson.
Step 8: Conclusion
Time: 5 minutes
Teaching Skill: Summarization
Teacher’s Activity: The teacher summarizes the key points of the lesson, re-emphasizing the importance of proper wall opening construction. The teacher gives pupils an assignment to draw a simple wall opening detail.
Pupils’ Activity: Pupils listen to the summary and copy the assignment.
Learning Point: Pupils reinforce their understanding and prepare for further study.
Lesson Keywords
- Wall Openings – Spaces provided in walls for doors, windows, and ventilators.
- Doors – Movable barriers that provide access and egress through an opening.
- Windows – Openings in walls that allow light and ventilation, often fitted with glass.
- Lintel – A horizontal structural member placed over an opening to support the wall above it.
- Jamb – The vertical side member of a door or window frame.
- Sill – The horizontal member at the bottom of a window opening, designed to shed water.
- Reveal – The part of a jamb or sill that is exposed beyond the frame.
Differentiation
For pupils who grasp concepts quickly, the teacher can encourage them to research different types of lintels or complex opening designs. For pupils needing more support, the teacher can provide simplified diagrams and focus on identifying basic parts of an opening, offering one-on-one guidance during observation.
Note for teachers using this lesson plan
Teachers should ensure the safety of pupils if conducting an actual site visit. If a site visit is not feasible, use high-quality photographs, videos, or virtual tours to illustrate the construction methods and features of wall openings. Emphasize the importance of accuracy in setting out and the structural role of lintels.


Community Join the conversation Open discussion +