

Class: Senior Secondary School 2 (SS2 / SSS 2)
Term: 3rd Term
Week: 5
Age: 16 years
Duration: 45 minutes
Subject: Building Construction
Curriculum Theme: Building Services
Previous Lesson: Roofs: Types of roofs, Problems of roof.
Topic: DRAINAGE INSTALLATION
Subject Matter: Meaning of DRAINAGE INSTALLATION, Setting out and excavation of trenches for drainage (lines and gradient), Types of drainage pipes (common pipe types), and methods of testing drainage systems.
Specific Objectives
By the end of the lesson, pupils should be able to:
Cognitive Domain:
- Define drainage installation.
- Explain the process of setting out and excavation of trenches for drainage.
- Identify different types of drainage pipes.
- State methods for testing drainage systems.
Affective Domain:
- Appreciate the importance of proper drainage systems in buildings.
- Value safety precautions during excavation.
- Show interest in learning about various drainage pipe materials.
Psychomotor Domain:
- Participate in a simulated setting out exercise for a drainage trench.
- Sketch different types of drainage pipes.
- Demonstrate understanding of how gradient affects water flow in drainage.
Social Domain:
- Collaborate with peers during practical discussions on drainage installation.
Reference Materials
The following resources were used in planning this lesson:
- Senior Secondary Schools Education Curriculum
- State Unified Scheme of Work
- Building Construction for Senior Secondary Schools, Book 2
Instructional Materials
The teacher will teach this lesson with the aid of:
- Shovel
- Digger
- Head pan
- Lines and pegs (pias)
- Measuring tape
- Spirit level
- Diagrams of drainage pipes and trench excavation
Rationale for the Lesson
This lesson helps pupils understand how wastewater is removed from buildings, which is essential for sanitation and maintaining healthy living environments. It provides practical knowledge about the steps involved in installing a drainage system and the materials used.
Prerequisite/Previous Knowledge
Pupils have basic knowledge of site preparation, foundations, and simple building materials.
Lesson Content/Board Summary
DRAINAGE INSTALLATION
Meaning of Drainage Installation
Drainage installation refers to the process of designing, installing, and maintaining systems that remove wastewater, stormwater, and other liquid waste from buildings and surrounding areas. This ensures sanitation, prevents water damage, and maintains a healthy environment.
Setting Out and Excavation of Trenches for Drainage
Setting Out: This involves marking the precise lines and levels on the ground where the drainage trenches will be dug. It uses pegs, lines, and measuring tools to ensure accuracy according to the building plan.
Excavation: This is the process of digging the trenches according to the set-out lines and specified depths. It is important to maintain a consistent gradient (fall) to ensure efficient flow of wastewater by gravity.
Gradient: This is the slope or fall given to a drainage pipe or trench to allow wastewater to flow by gravity. A common gradient for drainage is 1:40 to 1:80, meaning for every 40 or 80 units of horizontal distance, there is one unit of vertical fall.
Types of Drainage Pipes
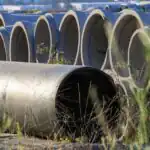
Drainage pipes are essential for conveying wastewater away from buildings. Common types include:
- Unplasticized Polyvinyl Chloride (uPVC) Pipes: These are lightweight, durable, corrosion-resistant, and easy to install. They are commonly used for residential and commercial drainage systems.
- Cast Iron Pipes: These pipes are strong, durable, and fire-resistant. They are often used for main drain lines and in industrial applications, but they are heavier and more expensive than uPVC pipes.
- Vitrified Clay Pipes (VCP): These pipes are highly resistant to chemical corrosion and are very durable. They have been traditionally used for underground drainage but are brittle and heavy.
- High-Density Polyethylene (HDPE) Pipes: These are flexible, chemical-resistant, and suitable for underground and industrial drainage applications.
Methods of Testing Drainage Systems
After installation, drainage systems must be tested to ensure they are watertight and free from leaks. Common methods include:
- Water Test: This involves plugging all outlets and filling the drainage system with water to a specific head. The system is then observed for any drop in water level over a specified period, which would indicate a leak.
- Air Test: This method involves sealing the drainage system and introducing compressed air to a specific pressure. A pressure gauge is used to monitor for any pressure drops, indicating a leak.
- Smoke Test: Non-toxic smoke is introduced into the drainage system. Any smoke escaping from pipes, joints, or fittings indicates a leak that needs to be sealed.
Teaching Methods/Instructional Techniques
Discussion, Lecture, Demonstration, Question and Answer, Visual Aids
Instructional Procedures
Step 1: Introduction
Time: 5 minutes
Teaching Skill: Set Induction
Teacher’s Activity: The teacher welcomes the pupils, reviews the previous lesson on building site preparation, and introduces the topic of drainage installation by asking pupils about how waste water leaves their homes.
Pupils’ Activity: Pupils respond to greetings, recall the previous lesson, and share their ideas about waste water removal.
Learning Point: Pupils connect previous knowledge to the new topic and understand the relevance of drainage.
Step 2: Meaning of Drainage Installation
Time: 7 minutes
Teaching Skill: Explanation
Teacher’s Activity: The teacher defines drainage installation, explaining its purpose in removing wastewater and ensuring sanitation.
Pupils’ Activity: Pupils listen attentively, ask clarifying questions, and take notes on the definition.
Learning Point: Pupils understand the fundamental concept and importance of drainage installation.
Step 3: Setting Out Trenches
Time: 8 minutes
Teaching Skill: Demonstration/Explanation
Teacher’s Activity: The teacher explains the process of setting out trenches using pegs, lines, and measuring tapes, possibly demonstrating with diagrams or real tools if available.
Pupils’ Activity: Pupils observe the demonstration, ask questions about the steps, and discuss the importance of accuracy in setting out.
Learning Point: Pupils learn how to mark the precise lines for drainage trenches.
Step 4: Excavation of Trenches and Gradient
Time: 8 minutes
Teaching Skill: Explanation/Illustration
Teacher’s Activity: The teacher explains the excavation process, emphasizing the importance of digging to the correct depth and maintaining a consistent gradient for efficient water flow.
Pupils’ Activity: Pupils pay attention to the explanation, discuss the practical implications of gradient, and understand its role in drainage.
Learning Point: Pupils understand the practical aspects of trench excavation and the concept of gradient.
Step 5: Types of Drainage Pipes
Time: 7 minutes
Teaching Skill: Listing/Description
Teacher’s Activity: The teacher describes various types of drainage pipes (e.g., uPVC, cast iron, vitrified clay, HDPE), highlighting their materials, characteristics, and typical applications.
Pupils’ Activity: Pupils listen, identify different pipe types, and note their properties and uses.
Learning Point: Pupils learn about the common materials used for drainage pipes.
Step 6: Methods of Testing Drainage Systems
Time: 5 minutes
Teaching Skill: Explanation
Teacher’s Activity: The teacher explains the common methods used for testing drainage systems after installation, such as water tests, air tests, and smoke tests.
Pupils’ Activity: Pupils listen to the explanations and understand why testing is important for ensuring a leak-free system.
Learning Point: Pupils learn about the procedures for verifying the integrity of drainage installations.
Step 7: Evaluation/Review
Time: 5 minutes
Teaching Skill: Questioning/Assessment
Teacher’s Activity: The teacher evaluates the learning by asking the following questions:
- Define drainage installation.
- Explain the importance of setting out in drainage trench excavation.
- What is gradient in drainage systems, and why is it important?
- List three common types of drainage pipes.
- Mention two methods used for testing drainage systems.
Pupils’ Activity: Pupils answer orally and in writing.
Learning Point: Pupils demonstrate understanding of the lesson.
Step 8: Conclusion
Time: 2 minutes
Teaching Skill: Summarization
Teacher’s Activity: The teacher summarizes the key points of the lesson on drainage installation, emphasizing its importance in building construction, and assigns homework.
Pupils’ Activity: Pupils listen to the summary and copy down the homework assignment.
Learning Point: Pupils consolidate their understanding of the topic.
Lesson Keywords
- Drainage Installation – The process of setting up systems to remove wastewater from buildings.
- Setting Out – Marking the exact lines and levels on the ground for construction.
- Excavation – The process of digging earth for trenches or foundations.
- Gradient – The slope or fall given to a pipe or surface to allow gravitational flow.
- uPVC Pipes – Lightweight, durable plastic pipes used for drainage.
- Water Test – A method of checking for leaks in a drainage system by filling it with water.
Differentiation
For pupils who grasp concepts quickly, the teacher can provide additional challenges such as researching local building codes for drainage or designing a simple drainage layout for a small building. For pupils who need more support, the teacher will provide simplified diagrams, re-explain concepts using different examples, and offer one-on-one guidance during practical activities or discussions.
Note for teachers using this lesson plan
Teachers should ensure practical demonstrations, even if simulated, are clear and engage pupils. Emphasize safety precautions during any discussion of excavation. Encourage pupils to relate the concepts to drainage systems they observe in their communities.

Community Join the conversation Open discussion +