

Class: Senior Secondary School 1 (SS1 / SSS 1)
Term: 1st Term
Week: 8
Age: 15 years
Duration: 45 minutes
Subject: Dying and Bleaching
Curriculum Theme: Trade
Previous Lesson: Tie and Dye Theory: Techniques and Dye Bath Process.
Topic: TIE AND DYE (PRACTICAL)
Subject Matter: preparing fabric for tie and dye, applying tie and fold techniques, mixing dye bath with reactive dye and chemicals, dyeing process and timing, rinsing and drying finished fabric
Specific Objectives
By the end of the lesson, pupils should be able to:
Cognitive Domain:
- Identify the materials and chemicals used in tie and dye.
- Explain the steps involved in preparing fabric for dyeing.
- Describe different tie and fold techniques.
Affective Domain:
- Appreciate the artistic value of tie and dye.
- Follow safety precautions when handling dyes and chemicals.
- Show interest in creating tie and dye patterns.
Psychomotor Domain:
- Prepare fabric correctly for tie and dye.
- Apply various tie and fold techniques to fabric.
- Mix a reactive dye bath accurately.
- Carry out the dyeing, rinsing, and drying processes effectively.
Social Domain:
- Work cooperatively with classmates during the practical session.
- Share materials and tools responsibly.
Reference Materials
The following resources were used in planning this lesson:
- 9 Years Basic Education Curriculum for Cultural and Creative Arts (CCA) / Business Studies.
- State Unified Scheme of Work for Senior Secondary Schools.
- Textile Arts and Crafts for Senior Secondary Schools by A. O. Okoro.
- https://www.google.com/search?q=tie+and+dye+process+nigeria
- https://www.youtube.com/watch?v=example_video_link
Instructional Materials
The teacher will teach this lesson with the aid of:
- Cotton fabric
- Reactive dye (e.g., Dylon, Procion MX)
- Caustic soda (sodium hydroxide)
- Sodium hydrosulphate (reducing agent)
- Table salt (sodium chloride)
- Plastic basins
- Plastic spoons
- Raffia twine or rubber bands
- Gloves
- Apron
- Nose mask
- Water
Rationale for the Lesson
This lesson helps pupils understand the practical steps of creating tie and dye patterns, which is a valuable skill in textile decoration. It enables them to appreciate traditional crafts and provides a foundation for potential entrepreneurial activities in textile design.
Prerequisite/Previous Knowledge
Pupils should have basic knowledge of different types of fabrics and some understanding of colour mixing.
Lesson Content/Board Summary
TIE AND DYE (PRACTICAL)
1. Preparation of Fabric for Tie and Dye
Fabric preparation is the first step to ensure the dye adheres properly and results in clear patterns. It involves cleaning the fabric to remove any impurities.
The following are steps for fabric preparation:
- Wash the cotton fabric thoroughly with soap and water to remove starch, dirt, or oil.
- Rinse the fabric clean to remove all soap.
- Wring out excess water, leaving the fabric damp. This allows for easier manipulation and better dye absorption.
2. Applying Tie and Fold Techniques
These techniques involve manipulating the fabric to create resists, preventing the dye from reaching certain areas and forming patterns.
The following are common tie and fold techniques:
- Knotting: Tying knots directly into the fabric to create circular patterns.
- Folding: Folding the fabric into pleats, squares, or triangles.
- Gathering/Stitching: Bunching up fabric and tying it with raffia or rubber bands. Stitching can also be used to create specific resist lines.
- Twisting: Twisting the fabric tightly before tying.
3. Mixing Dye Bath
The dye bath is prepared by dissolving the dye and chemicals in water. Reactive dyes are commonly used for cotton as they form a permanent bond with the fabric.
The following are general steps for mixing a reactive dye bath:
- Measure the required amount of reactive dye powder into a plastic basin.
- Add a small amount of warm water and stir to dissolve the dye completely, forming a paste.
- Add the measured amount of caustic soda (alkali) and stir carefully until dissolved. Caustic soda helps the dye react with the fabric.
- Add the measured amount of sodium hydrosulphate (reducing agent) and stir until dissolved. This helps to reduce the dye, making it soluble.
- Add table salt (sodium chloride) to the mixture. Salt helps the dye to absorb better into the fabric.
- Add the remaining water to achieve the desired dye bath volume and stir well.
4. Dyeing Process and Timing
The dyeing process involves immersing the prepared fabric in the dye bath for a specific duration to allow the dye to penetrate and react with the fibres.
The following are steps for the dyeing process:
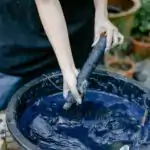
- Carefully immerse the tied or folded fabric into the prepared dye bath.
- Ensure the fabric is fully submerged and gently agitated to allow even dye penetration.
- Leave the fabric in the dye bath for the recommended time (e.g., 30-60 minutes), depending on the desired colour intensity and dye type.
- Periodically stir the fabric to ensure uniform dyeing.
5. Rinsing and Drying Finished Fabric
After dyeing, the fabric needs to be rinsed to remove excess dye and then dried.
The following are steps for rinsing and drying:
- Remove the fabric from the dye bath using gloves.
- Rinse the fabric under running cold water until the water runs clear. This removes unreacted dye.
- Carefully untie or unfold the fabric.
- Wash the fabric with mild soap and warm water to remove any remaining surface dye.
- Rinse again thoroughly.
- Wring out excess water and hang the fabric to dry in a shaded area to prevent colour fading.
- Iron the fabric once dry to set the colours fully.
Teaching Methods/Instructional Techniques
Discussion, Lecture, Demonstration, Question and Answer, Visual Aids, Practical Work
Instructional Procedures
Step 1: Introduction
Time: 5 minutes
Teaching Skill: Set Induction
Teacher’s Activity: The teacher greets the pupils, reviews the previous lesson briefly, and then introduces the topic “Tie and Dye (Practical)” by showing examples of tie and dye fabrics or pictures. The teacher asks pupils if they have seen such patterns before and where.
Pupils’ Activity: Pupils respond to the greetings, recall the previous lesson, observe the examples, and answer the teacher’s questions.
Learning Point: Pupils are introduced to the topic and relate it to real-life examples.
Step 2: Fabric Preparation
Time: 5 minutes
Teaching Skill: Explanation/Demonstration
Teacher’s Activity: The teacher explains the importance of preparing the fabric and demonstrates how to wash and wring out a piece of cotton fabric, ensuring it is damp but not dripping wet. The teacher emphasizes safety precautions for handling chemicals later.
Pupils’ Activity: Pupils listen attentively, observe the demonstration, and ask questions for clarification.
Learning Point: Pupils understand the initial step of fabric preparation.
Step 3: Tie and Fold Techniques
Time: 10 minutes
Teaching Skill: Demonstration/Guidance
Teacher’s Activity: The teacher demonstrates various tie and fold techniques (e.g., knotting, simple pleats, gathering with raffia/rubber bands) on different pieces of damp fabric. The teacher guides pupils to practice these techniques on their own fabric pieces.
Pupils’ Activity: Pupils observe the demonstrations and practice applying different tie and fold techniques to their fabrics under the teacher’s supervision.
Learning Point: Pupils learn and practice different methods of creating resist patterns.
Step 4: Dye Bath Preparation and Dyeing Process
Time: 10 minutes
Teaching Skill: Demonstration/Supervision
Teacher’s Activity: The teacher, wearing gloves and a nose mask, demonstrates how to safely mix the reactive dye, caustic soda, sodium hydrosulphate, and salt in a plastic basin with water. The teacher then demonstrates how to carefully immerse the tied fabric into the dye bath and explains the timing.
Pupils’ Activity: Pupils observe the teacher’s demonstration of dye mixing and immersion, noting the safety measures. They prepare their dye baths under strict teacher supervision, wearing protective gear.
Learning Point: Pupils learn to safely prepare a dye bath and initiate the dyeing process.
Step 5: Rinsing and Drying
Time: 5 minutes
Teaching Skill: Explanation/Supervision
Teacher’s Activity: The teacher explains and demonstrates the correct procedure for removing the fabric from the dye bath, rinsing it thoroughly until the water runs clear, untying the fabric, and then washing it with mild soap before the final rinse and drying.
Pupils’ Activity: Pupils follow the teacher’s instructions, assisting with the rinsing process for their dyed fabrics.
Learning Point: Pupils learn the proper post-dyeing care for the fabric.
Step 6: Practical Application/Teacher Supervision
Time: 5 minutes
Teaching Skill: Observation/Feedback
Teacher’s Activity: The teacher moves around the classroom, observing pupils’ practical work, providing individual assistance, correcting errors, and ensuring safety measures are followed. The teacher encourages pupils to complete their dyeing processes.
Pupils’ Activity: Pupils continue with their practical work, applying the learned techniques and processes, and seeking assistance from the teacher as needed.
Learning Point: Pupils gain hands-on experience and refine their practical skills in tie and dye.
Step 7: Evaluation/Review
Time: 5 minutes
Teaching Skill: Questioning/Assessment
Teacher’s Activity: The teacher evaluates the learning by asking the following questions:
- Mention three materials needed for tie and dye.
- State two reasons why fabric needs to be prepared before dyeing.
- Describe one tie and fold technique you applied today.
- Explain the purpose of caustic soda in the dye bath.
Pupils’ Activity: Pupils answer orally and in writing.
Learning Point: Pupils demonstrate understanding of the lesson.
Step 8: Conclusion
Time: 5 minutes
Teaching Skill: Summarisation
Teacher’s Activity: The teacher summarizes the key steps of the tie and dye practical lesson, commends the pupils for their efforts, and assigns homework to research other types of dyeing techniques.
Pupils’ Activity: Pupils listen to the summary and copy down the homework.
Learning Point: Pupils consolidate their learning and are encouraged to explore further.
Lesson Keywords
- Tie and Dye – A method of creating patterns on fabric by tying, folding, or gathering sections to resist dye penetration.
- Resist Dyeing – Any method that prevents dye from reaching certain areas of a fabric.
- Reactive Dye – A type of dye that forms a chemical bond with the fabric fibres, resulting in permanent colour.
- Caustic Soda – (Sodium hydroxide) An alkali used in reactive dyeing to help the dye react with cellulose fibres.
- Sodium Hydrosulphate – A reducing agent used in some dyeing processes to make certain dyes soluble.
- Raffia Twine – A natural fibre used for tying fabric in tie and dye.
Differentiation
For pupils who grasp the concepts quickly, the teacher can challenge them to experiment with more complex tie and fold patterns or to mix secondary colours. For pupils who need more support, the teacher can provide pre-tied fabric samples or guide them step-by-step through simpler techniques, ensuring they have sufficient time to complete each stage.
Note for teachers using this lesson plan
Ensure all materials, especially chemicals, are pre-measured and handled safely. Emphasize the use of protective gear (gloves, apron, nose mask) throughout the practical session. Adequate ventilation is important. Supervise pupils closely during dye mixing and handling. Prepare a dedicated area for rinsing and drying to avoid spills and mess. The practical aspect may extend beyond a single period; consider splitting it if necessary.


Community Join the conversation Open discussion +