

Class: Senior Secondary School 1 (SS1 / SSS 1)
Term: 2nd Term
Week: 8 – 10
Age: 15 years
Duration: 45 minutes
Subject: Dying and Bleaching
Curriculum Theme: Trade
Previous Lesson: Bolting Method: Using Wood or Iron to Create Patterns.
Topic: PRACTICALS ON TIE AND DYE.
Subject Matter: Practical project work on tie and dye techniques discussed, preparing materials and boiling water, forming designs before dyeing, dyeing, rinsing and drying away from hot sun, cleaning up work area after practical.
Specific Objectives
By the end of the lesson, pupils should be able to:
Cognitive Domain:
- Identify the materials required for a tie and dye practical.
- Recall the safety precautions for working with hot water and dyes.
Affective Domain:
- Appreciate the aesthetic value of tie and dye products.
- Demonstrate carefulness and patience during the dyeing process.
Psychomotor Domain:
- Prepare fabrics and dye solutions for tie and dye.
- Form various designs on fabric using tying techniques.
- Execute the dyeing, rinsing, and drying processes correctly.
Social Domain:
- Collaborate effectively with peers during the practical work.
- Maintain a clean and organised work environment.
Reference Materials
The following resources were used in planning this lesson:
- 9 Years Basic Education Curriculum for Cultural and Creative Arts (Senior Secondary School).
- State Unified Scheme of Work for Cultural and Creative Arts (SS1).
- Cultural and Creative Arts for Senior Secondary Schools 1 by J.K. Adeyemi et al.
- https://www.youtube.com/watch?v=examplelink1 (Illustrative video on tie and dye techniques)
- https://www.tie-dye-instructions.com/examplelink2 (Online guide for tie and dye)
Instructional Materials
The teacher will teach this lesson with the aid of:
- Cotton cloth samples
- Assorted fabric dyes
- Basins or buckets
- Hot water source (e.g., kettle, stove)
- Protective gloves
- Aprons
- Nose masks
- Strings, raffia, rubber bands
- Sticks or pebbles for design
- Cleaning materials (soap, sponges, water)
- Sample tie and dye fabrics.
Rationale for the Lesson
This lesson enables pupils to apply theoretical knowledge of tie and dye techniques in a practical setting. It helps them develop hands-on skills in fabric decoration and fosters an understanding of the processes involved in creating patterns on textiles, which can be useful for personal creativity or entrepreneurial ventures.
Prerequisite/Previous Knowledge
Pupils have prior knowledge of different tie and dye techniques and have discussed the materials and basic steps involved in the process.
Lesson Content/Board Summary
PRACTICALS ON TIE AND DYE
1. Introduction to Tie and Dye Practicals
Tie and dye is a method of creating patterns on fabric by tying, folding, or crumpling it before applying dye. The tied areas resist the dye, resulting in unique designs. This practical session focuses on executing these techniques.
2. Materials Required for Tie and Dye
The following materials are essential for a tie and dye practical:
- Cotton fabric (e.g., old white t-shirts, bedsheets)
- Fabric dyes (cold water dyes are common)
- Basins or buckets for dyeing and rinsing
- Source of hot water (for dissolving dyes, if required)
- Protective gear: gloves, apron, nose mask
- Tying materials: string, raffia, rubber bands
- Design elements: sticks, pebbles, marbles
- Cleaning supplies: soap, water, sponges
3. Preparation for Dyeing
Proper preparation is important for a successful practical. This involves:
- Fabric Preparation: Wash and damp-dry the fabric to ensure it absorbs dye evenly.
- Work Area Setup: Choose a well-ventilated area, cover surfaces with newspaper or plastic sheets to prevent staining.
- Dye Solution Preparation: Follow dye instructions to dissolve dye powder in hot water, then dilute as needed in cold water in basins. Ensure different dye colours are in separate basins.
- Safety Precautions: Wear gloves, aprons, and nose masks to protect skin, clothing, and respiratory system from dyes and chemicals.
4. Forming Designs Before Dyeing
Designs are created by manipulating the fabric to resist dye penetration. Common techniques include:
- Folding: Folding the fabric into pleats, squares, or triangles.
- Tying: Using string, raffia, or rubber bands to tie sections of the fabric tightly.
- Crumpling: Balling up the fabric and securing it with rubber bands.
- Stitching: Sewing lines or patterns and pulling the thread tight to gather the fabric.
5. The Dyeing Process
This is the stage where colour is applied to the fabric:
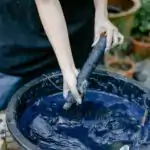
- Immersion: Carefully immerse the tied fabric into the prepared dye bath.
- Soaking: Allow the fabric to soak in the dye for the recommended time (usually 30-60 minutes), turning occasionally for even colour distribution.
- Colour Intensity: Longer soaking times generally result in deeper, more vibrant colours.
6. Rinsing and Drying
After dyeing, proper rinsing and drying are necessary:
- Initial Rinse: Remove the fabric from the dye bath and rinse it thoroughly under cold running water while still tied, until the water runs clear.
- Untying: Carefully untie the fabric to reveal the patterns.
- Final Rinse: Rinse again, gently washing with mild soap if necessary, until all excess dye is removed.
- Drying: Hang the dyed fabric to dry away from direct hot sunlight to prevent fading.
7. Cleaning Up the Work Area
After the practical, it is important to clean up:
- Dispose of Dyes: Safely dispose of leftover dye solutions according to environmental guidelines.
- Clean Tools and Surfaces: Wash all basins, gloves, and other tools. Wipe down all work surfaces to remove any dye spills.
- Organise: Store materials properly for future use.
Teaching Methods/Instructional Techniques
Discussion, Lecture, Demonstration, Question and Answer, Visual Aids
Instructional Procedures
Step 1: Introduction
Time: 5 minutes
Teaching Skill: Set Induction/Recap
Teacher’s Activity: The teacher welcomes pupils and quickly recaps the theoretical aspects of tie and dye techniques discussed in previous lessons. The teacher then introduces the practical session, outlining the activities for the day.
Pupils’ Activity: Pupils listen attentively and recall previous knowledge about tie and dye.
Learning Point: Pupils are prepared for the practical session and connect it to prior learning.
Step 2: Material Review and Safety Briefing
Time: 5 minutes
Teaching Skill: Explanation/Demonstration
Teacher’s Activity: The teacher displays all necessary instructional materials and briefly explains their use. The teacher also gives a safety briefing, emphasizing the importance of wearing protective gear and handling hot water and dyes carefully.
Pupils’ Activity: Pupils observe the materials and listen to the safety instructions, asking questions for clarification.
Learning Point: Pupils identify the materials and understand safety protocols for the practical.
Step 3: Forming Designs
Time: 10 minutes
Teaching Skill: Demonstration/Guidance
Teacher’s Activity: The teacher demonstrates one or two tying techniques (e.g., folding and tying, crumpling) on a sample fabric. The teacher then guides pupils to choose their desired designs and begin tying their own fabrics using strings, rubber bands, or raffia.
Pupils’ Activity: Pupils observe the demonstration, then work individually or in groups to form designs on their fabric samples.
Learning Point: Pupils apply tying techniques to create patterns on their fabrics.
Step 4: Dye Bath Preparation and Dyeing
Time: 15 minutes
Teaching Skill: Supervision/Instruction
Teacher’s Activity: The teacher supervises pupils as they prepare the dye baths (if not pre-prepared), ensuring correct dye-to-water ratios and safety in handling hot water. The teacher then instructs pupils to carefully immerse their tied fabrics into the chosen dye solutions, ensuring full saturation.
Pupils’ Activity: Pupils prepare dye baths under supervision and immerse their tied fabrics, allowing them to soak.
Learning Point: Pupils correctly prepare dye solutions and initiate the dyeing process.
Step 5: Initial Rinsing and Observation
Time: 5 minutes
Teaching Skill: Guidance/Observation
Teacher’s Activity: The teacher guides pupils to carefully remove their fabrics from the dye baths and perform an initial rinse under cold running water while the fabric is still tied, until excess dye is largely washed off.
Pupils’ Activity: Pupils rinse their fabrics carefully, observing the initial removal of loose dye.
Learning Point: Pupils learn the initial rinsing step to set the dye and prevent bleeding.
Step 6: Evaluation/Review
Time: 5 minutes
Teaching Skill: Questioning/Assessment
Teacher’s Activity: The teacher evaluates the learning by asking the following questions:
- List four materials needed for a tie and dye practical.
- Mention two safety precautions to observe when working with dyes and hot water.
- Describe one method of forming a design on fabric before dyeing.
- Explain the importance of rinsing the fabric after dyeing.
Pupils’ Activity: Pupils answer orally and in writing.
Learning Point: Pupils demonstrate understanding of the lesson.
Step 7: Conclusion
Time: 5 minutes
Teaching Skill: Summarization/Assignment
Teacher’s Activity: The teacher summarizes the main steps of the practical covered. The teacher instructs pupils to untie their fabrics, perform a final rinse with mild soap, and hang them to dry away from direct sunlight, emphasizing the importance of a clean finish. The teacher also reminds pupils to clean up their work areas thoroughly.
Pupils’ Activity: Pupils listen to the summary, note the instructions for completing the drying process and cleanup.
Learning Point: Pupils understand the complete process and importance of post-dyeing care and cleanup.
Lesson Keywords
- Tie and Dye – A method of creating patterns on fabric by tying, folding, or crumpling it before applying dye.
- Dye Bath – A solution of water and dye in which fabric is immersed for colouring.
- Immersion – The act of dipping or submerging something completely into a liquid.
- Rinsing – The process of washing something with clean water to remove soap or impurities.
- Resist Dyeing – Any of several methods of dyeing textiles in which parts of the fabric are treated to resist the dye.
Differentiation
For pupils who grasp concepts quickly, the teacher can encourage them to experiment with more complex tying techniques or colour combinations. For pupils needing more support, the teacher will provide closer supervision and step-by-step guidance, focusing on one simple tying method and ensuring safety measures are followed. Group work will also allow peer support.
Note for teachers using this lesson plan
This lesson plan covers the practical steps of tie and dye within a typical 45-minute period. Given the nature of practical work, the full drying and final cleanup might extend beyond this single period or require pupils to complete it as homework. Ensure all safety equipment is available and worn. Pre-preparing dye solutions can save time. Constant supervision is important, especially when handling hot water and chemicals.



Community Join the conversation Open discussion +