

Class: Primary Five
Term: First Term
Subject: Basic Science and Technology
Curriculum Theme: Basic Technology
Previous Lesson: Function of Vehicle Internal Parts
Topic: Definition Of Drawing Technically, Identification Of Drawing instruments
Content/Learning area: Definition of Technical Drawing, Drawing Instruments
Time Allocation: 40 minutes
performance Objectives
By the end of the lesson, pupils should be able to:
- Cognitive Domain:
1. Define technical drawing.
2. Explain the importance of precision in technical drawing.
3. Identify different drawing instruments and their uses.
- Psychomotor Domain:
1. Handle drawing instruments correctly.
2. Use drawing instruments to create basic shapes.
- affective Domain:
1. Appreciate the importance of accuracy in technical drawing.
2. Show interest in learning about technical drawing.
- Social Domain:
1. Collaborate with peers to identify drawing instruments.
2. Share ideas and knowledge about technical drawing.
Reference Materials
- 9 – Years Basic Education Curriculum
- Abuja Educational Resource Centre scheme of work
- NAPPS National Unified Scheme of Work
- Relevant Textbooks
Instructional Materials
To deliver this lesson, the teacher will use the following materials: pencils, rulers, compasses, set squares, protractors, erasers, and a whiteboard.
Rationale for the Lesson
This lesson introduces pupils to technical drawing, a fundamental skill applicable across various fields. Understanding technical drawing enhances problem-solving and spatial reasoning skills, crucial for future learning and practical applications.
Prerequisite/Previous Knowledge
The teacher will begin by asking pupils what they know about drawing. The teacher will then show examples of technical drawings, sparking curiosity and setting the stage for the lesson.
Lesson Content
What is Technical Drawing?
Technical drawing uses precise lines and symbols to show how something works or is built. It’s used by engineers, architects, and manufacturers to give clear instructions for making things.
Drawing Instruments
Drawing instruments are tools used to create technical drawings with precision and accuracy.
Examples are:
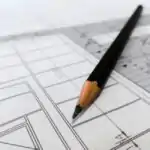
- Pencil: For drawing lines,sketching,and shading.
- Ruler: For measuring and drawing straight lines.
- Compass: For drawing circles and arcs.
- set Square: For drawing right angles and parallel lines.
- Protractor: For measuring and drawing angles.
- Eraser: For removing mistakes.
- Drawing board: Provides a stable surface for drawing.
- T-square: Used for drawing horizontal lines and aligning paper.
Technical Drawing and Drawing Instruments
Technical drawing communicates the exact shape and size of an object by using agreed lines, measurements and symbols. It differs from freehand art because accuracy and scale are important.
- Ruler: draws and measures straight lines.
- Set square: draws vertical, horizontal and standard-angle lines.
- Compass: draws circles and arcs.
- Protractor: measures and constructs angles.
- Pencil and eraser: make and correct lines.
Keep points covered when not in use, use a sharp pencil carefully and read every scale from its zero mark.
Teaching Methods
To deliver this lesson, the teacher will adopt the following methods: Exhibition, description, group work, and question-and-answer.
Instructional Procedures
To deliver this lesson, the teacher will adopt the following steps:
Step 1: Introduction
Time: 5 minutes
Teaching Skill: Set Induction
Teacher’s Activity: Briefly introduce the topic of technical drawing and it’s importance.
Pupils’ Activity: Listen attentively and participate in the discussion.
Step 2: Explanation of Key Concepts
Time: 10 minutes
Teaching Skill: Explaining, illustrating
Teacher’s Activity: Explain the definition of technical drawing and its purpose.
Pupils’ Activity: Take notes and ask clarifying questions.
step 3: Exhibition/Guided Practice
Time: 10 minutes
Teaching Skill: Demonstrating, guiding
Teacher’s Activity: Demonstrate the use of each drawing instrument.
Pupils’ Activity: Observe carefully and practice using the instruments under guidance.
Step 4: Autonomous Practice
Time: 5 minutes
Teaching Skill: Monitoring, assisting
Teacher’s Activity: Supervise pupils as they practice using the instruments independently.
Pupils’ Activity: Practice drawing basic shapes and lines using the instruments.
Step 5: Note-Taking
Time: 5 minutes
Teaching Skill: Guiding, summarizing
Teacher’s Activity: Guide pupils in summarizing key concepts and definitions.
Pupils’ Activity: Write down key points and definitions in their notebooks.
Step 6: Evaluation/Review
Time: 5 minutes
Teaching Skill: Questioning, assessing
Teacher’s Activity: Ask review questions to assess understanding.
Pupils’ Activity: Answer questions and participate in the review.
Objective-aligned checks:
- Define technical drawing.
- Explain the importance of precision in technical drawing.
- Identify different drawing instruments and their uses.
Step 7: Conclusion
Time: 5 minutes
Teaching Skill: Summarizing, encouraging
Teacher’s Activity: Summarize the key concepts and encourage pupils to continue practicing their drawing skills.
Pupils’ Activity: Listen attentively and ask any remaining questions.
Lesson Keywords
- technical Drawing – A precise way of drawing to show how things are made.
- Instruments – Tools used for drawing.
- Precision – Accuracy and exactness in drawing.
- Ruler – A tool for measuring and drawing straight lines.
- Compass – A tool for drawing circles and arcs.
Lesson Evaluation
To evaluate the learning, the teacher asks pupils to:
- What is technical drawing and why is it important?
- Name three drawing instruments and explain their uses.
- How is a compass used to draw a circle?
- Why is precision important in technical drawing?
- give examples of how technical drawings are used.
Assignment/Homework
- List five drawing instruments and their uses.
- Draw a simple shape using a ruler and pencil.
- Explain the importance of accuracy in technical drawing.
Differentiation
- For slower learners: Provide one-on-one assistance and simplified instructions.
- For advanced learners: Challenge them to create more complex drawings and explore advanced techniques.
- For visual/auditory/kinesthetic learners: Use visual aids, verbal explanations, and hands-on activities to cater to different learning styles.
Note for Teachers
Ensure that all drawing instruments are available and in good condition. Provide clear demonstrations and guidance to pupils as they practice using the instruments. Encourage pupils to ask questions and seek assistance as needed.

Community Join the conversation Open discussion +