

Class: Junior Secondary School 1 (JSS1, JSS 1)
Term: 2nd Term
Week: 3
Age: 12 years
Duration: 45 minutes
Subject: Basic Science And Technology
Curriculum Theme: Basic Technology
Previous Lesson: Uses of Different Building Materials
Topic: Drawing Instruments
Subject Matter: Types and uses of drawing instruments
Specific Objectives
By the end of the lesson, pupils should be able to:
- Cognitive Domain:
(a) Identify various drawing instruments used in Basic Technology.
(b) State the uses of different drawing instruments. - Affective Domain:
(a) Appreciate the importance of using the correct drawing instruments in technical drawing. - Psychomotor Domain:
(a) Demonstrate how to handle and use selected drawing instruments correctly. - Social Domain:
(a) Cooperate with group members in identifying and arranging drawing instruments properly.
Reference Materials
The following resources were used in planning this lesson:
- 9 Years Basic Education Curriculum
- Lagos State Unified Scheme of work for Junior Secondary Schools
- Wikipedia – Technical drawing tool
- Relevant Textbooks
Instructional Materials
The teacher will teach this lesson with the aid of:
- Real drawing instruments (e.g., ruler, set square, compass, protractor, dividers)
- Charts showing labeled drawing instruments
- Drawing board and T-square
- Sample technical drawing sheet
- Multimedia slides or pictures of instruments
Rationale for the Lesson
Understanding the types and uses of drawing instruments helps pupils produce accurate and neat technical drawings essential in design and engineering fields.
Prerequisite/Previous Knowledge
Pupils have been introduced to the meaning and importance of technical drawing and can recognize basic classroom tools such as rulers and pencils.
Lesson Content/Board Summary
Drawing Instruments
Types of Drawing Instruments
Drawing instruments are tools used by students, engineers, architects, and designers to draw accurate lines, shapes, and angles in technical drawings. Each instrument has a specific function that contributes to neat and precise work.
The following are the common types of drawing instruments:
- Drawing Board: Used to support the paper while drawing.
- T-Square: Used to draw horizontal lines and to guide set squares.
- Set Squares: Used for drawing vertical and inclined lines at 30°, 45°, 60°, and 90°.
- Protractor: Used to measure and draw angles.
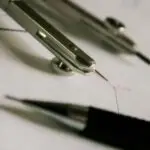
- Compass: Used for drawing circles and arcs.
- Dividers: Used to transfer measurements or divide lines into equal parts.
- Ruler or Scale: Used for measuring and drawing straight lines.
- Pencils: Used for sketching and drawing different line weights.
- Eraser: Used to remove unwanted marks or mistakes.
- French Curve: Used for drawing smooth, irregular curves.
Uses of Drawing Instruments
Every drawing instrument has a specific purpose that ensures the accuracy and beauty of technical drawings.
The following are the uses of drawing instruments:
- Drawing boards and T-squares help provide a firm and straight surface for accurate lines.
- Set squares and protractors help draw and measure precise angles.
- Compasses and dividers assist in drawing circles and transferring distances.
- Rulers and scales ensure correct measurements and proportions.
- Pencils of different grades are used for various line weights.
- Erasers help correct errors and maintain neatness.
- French curves help draw irregular shapes and smooth transitions.
Care and Maintenance of Drawing Instruments
Drawing instruments should be handled carefully to last long and function properly.
The following are ways to care for drawing instruments:
- Keep them clean and dry after use.
- Store them in instrument cases or pouches.
- Avoid dropping or pressing hard on them.
- Replace damaged or blunt parts when necessary.
- Handle with care during transport and use.
Teaching Methods/Instructional Techniques:
Discussion, Lecture, Demonstration, Explanation, Question and Answer, Group Work, Visual Aids
Instructional Procedures
To deliver this lesson, the teacher will adopt the following steps:
Step 1: Introduction
Time: 5 minutes
Teaching Skill: Set Induction
Teacher’s Activity: The teacher displays a set of drawing instruments and asks pupils if they have seen or used any of them before.
Pupils’ Activity: Pupils observe and respond based on previous experience.
Learning Point: Pupils become curious and ready to learn about the types and uses of drawing instruments.
Step 2: Identification of Drawing Instruments
Time: 10 minutes
Teaching Skill: Observation and Explanation
Teacher’s Activity: The teacher identifies and names each drawing instrument while showing them physically or on a chart.
Pupils’ Activity: Pupils listen, observe, and repeat the names of the instruments.
Learning Point: Pupils can identify various drawing instruments.
Step 3: Uses of Drawing Instruments
Time: 10 minutes
Teaching Skill: Discussion
Teacher’s Activity: The teacher explains the function of each instrument using examples and demonstration.
Pupils’ Activity: Pupils discuss in groups and relate each instrument to its use.
Learning Point: Pupils understand the function of each drawing instrument.
Step 4: Care and Maintenance of Drawing Instruments
Time: 10 minutes
Teaching Skill: Explanation and Demonstration
Teacher’s Activity: The teacher explains and demonstrates how to properly care for drawing instruments.
Pupils’ Activity: Pupils practice proper handling techniques.
Learning Point: Pupils learn to handle and maintain drawing instruments correctly.
Step 5: Note-Taking
Time: 5 minutes
Teaching Skill: Reinforcement
Teacher’s Activity: The teacher writes the board summary for pupils to copy.
Pupils’ Activity: Pupils copy notes into their exercise books.
Learning Point: Pupils have a written record of the lesson for revision.
Step 6: Evaluation/Review
Time: 3 minutes
Teaching Skill: Questioning
Teacher’s Activity: The teacher evaluates the learning by asking the following questions:
- Mention five drawing instruments and their uses.
- What is the function of a compass?
- State two ways of caring for drawing instruments.
Pupils’ Activity: Pupils answer the questions orally.
Learning Point: Pupils demonstrate understanding of the topic.
Step 7: Conclusion
Time: 2 minutes
Teaching Skill: Summarization
Teacher’s Activity: The teacher summarizes the lesson and encourages pupils to keep their drawing instruments neat and safe.
Pupils’ Activity: Pupils listen attentively.
Learning Point: Pupils understand the importance of proper handling of drawing instruments.
Home Task: Record two correct examples of Drawing Instruments from the lesson or home environment and explain each in your own words.
Lesson Keywords
- Instrument – a tool used for a specific purpose
- Compass – tool used to draw circles or arcs
- Protractor – semicircular tool used to measure angles
- Divider – tool used to transfer or divide distances
- Set Square – triangular instrument used for drawing angles
Differentiation
The teacher simplifies demonstrations for slower learners and provides extension exercises such as identifying instruments in images for advanced learners.
Note for teachers using this lesson plan
Ensure each pupil has access to or can observe the instruments closely. Encourage careful handling and practice correct techniques to develop neatness and precision.


Community Join the conversation Open discussion +