

Note for teachers using this lesson plan
Before this lesson, gather all the simple machines listed, especially a corked bottle and a bottle opener, for a clear demonstration. The central idea for pupils is that simple machines are tools that make work easier and faster. Ensure pupils actively observe the demonstrations and get a chance to handle safe examples like a sharpener or spoon to feel how they help. Successful learning will be evident when pupils can repeat the definition and point to examples of simple machines.
Class: Pre-School Level 3
Term: Third Term
Week: 10
Age: 4 years
Duration: 30 minutes
Subject: Basic Science and Technology
Curriculum Theme: Basic Science and Technology
Previous Lesson: Things that help us do work
Topic: SIMPLE MACHINES: Meaning and Examples
Subject Matter: SIMPLE MACHINES: Meaning Examples.
Specific Objectives
By the end of the lesson, pupils should be able to:
Cognitive Domain
- Define simple machines by repeating after the teacher.
- Identify examples of simple machines when shown.
- State how simple machines make work easier.
Affective Domain
- Show interest in how different tools help people.
- Appreciate the usefulness of simple machines in daily life.
Psychomotor Domain
- Observe the demonstration of a simple machine in use.
- Demonstrate the use of a safe simple machine like a sharpener or spoon.
Social Domain
- Participate actively in class discussions and activities.
- Share simple machines with peers during group observation.
Reference Materials
- NAPPS National Unified Teaching Scheme for Pre-School Level 3.
- Relevant Early Childhood Care and Education resources.
Instructional Materials
- Charts showing various simple machines (e.g., broom, sharpener, bottle opener, spoon, fork).
- A corked bottle and a bottle opener.
- A hand sharpener and a pencil.
- A small broom and a dustpan.
- Spoons and forks (cutleries).
- A suitable educational video on simple machines for preschoolers.
Rationale for the Lesson
Learning about simple machines at this age helps pupils understand that everyday tools make tasks easier and faster. It introduces them to basic scientific concepts through practical examples they encounter at home and school, fostering observation skills and an appreciation for how things work in their environment.
Prerequisite/Previous Knowledge
Pupils are familiar with various objects and tools used at home and school, and they understand that some tasks can be difficult to do with bare hands.
Lesson Content/Board Summary
SIMPLE MACHINES: Meaning and Examples
Simple machines are tools that help us do work more easily and quickly. They make our jobs less difficult!
Examples of Simple Machines:
- Bottle Opener: Helps to open bottles easily.
- Sharpener: Helps to sharpen pencils quickly.
- Broom: Helps to sweep dirt away faster.
- Dustpan: Helps to collect dirt after sweeping.
- Spoon/Fork (Cutleries): Helps us to eat food easily. A spoon helps to scoop, and a fork helps to pick up food.
Key Words
- Simple: Easy to understand or do.
- Machines: Tools or devices that do work.
- Easier: Less difficult.
- Faster: More quickly.
- Tools: Objects used to help do work.
Simple Machines Rhyme
Tune: “Twinkle, Twinkle Little Star”
Simple machines, oh so grand,
Help us work across the land.
Broom to sweep and sharpener too,
Making tasks for me and you.
Bottle opener, quick and bright,
Simple machines, what a sight!
Actions: Mimic sweeping, sharpening, opening a bottle as the words are sung.
Watch and Learn About Simple Machines
💡 Teacher Guide for Using This Board Summary
How to teach the content: Explain the meaning of simple machines in very simple terms, repeating the phrase “tools that make work easier and faster” several times. Use gestures to show “easier” and “faster.” Go through each example, showing the actual object and explaining its function.
What to show or demonstrate: Show the corked bottle. First, pretend to open it with your bare hands, showing it’s difficult. Then, use the bottle opener to open it easily and quickly, emphasizing the difference. Also, demonstrate sharpening a pencil with a sharpener, sweeping with a broom, and scooping with a spoon. Allow pupils to try sharpening a pencil (under close supervision) or scooping with a spoon.
How to use the rhyme/song: Introduce the rhyme after explaining the meaning and showing some examples. Sing it slowly with actions, repeating it 2-3 times for pupils to join in. Encourage them to do the actions.
How to use the video: Introduce the video as a fun way to see more simple machines. After watching, ask pupils to name some simple machines they saw in the video and how they help. Encourage them to mimic the actions shown.
What to watch for: Observe if pupils can repeat the definition and point to the correct simple machine when you name it. Watch for their engagement during demonstrations and their attempts to use the safe tools.
Teaching Methods/Instructional Techniques
- Play-based Learning
- Demonstration
- Guided Practice
- Songs and Rhymes
- Picture Talk
- Question and Answer
- Observation
- Manipulation of Objects
Instructional Procedures
Step 1: Introduction
Time: 3 minutes
Teaching Skill: Engagement/Recalling
Teacher’s Activity: The teacher greets the pupils, leads a short warm-up song, and asks pupils about tools they use at home to help their parents (e.g., broom, spoon). The teacher then introduces the topic: “Today, we will learn about ‘Simple Machines’ – special tools that make our work easier!”
Pupils’ Activity: Pupils respond to greetings, sing along, mention tools they know, and listen attentively.
Learning Point: Pupils are engaged and ready for the lesson, connecting to prior knowledge.
Step 2: Presentation – Meaning of Simple Machines
Time: 5 minutes
Teaching Skill: Explanation/Repetition
Teacher’s Activity: The teacher explains, “Simple machines are tools that help us do work more easily and quickly.” The teacher repeats this definition slowly, encouraging pupils to repeat after her. The teacher uses hand gestures to illustrate “easier” and “faster.”
Pupils’ Activity: Pupils listen carefully and repeat the definition of simple machines after the teacher.
Learning Point: Pupils memorise the basic definition of simple machines.
Step 3: Demonstration – Bottle Opener
Time: 5 minutes
Teaching Skill: Demonstration/Observation
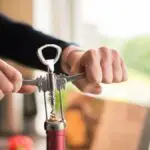
Teacher’s Activity: The teacher brings out a corked bottle and a bottle opener. The teacher first pretends to open the bottle with bare hands, showing it is difficult. Then, the teacher uses the bottle opener to open the bottle easily and quickly, saying, “See how the bottle opener makes it so easy and fast!” The teacher asks pupils what they observed.
Pupils’ Activity: Pupils observe the teacher’s demonstration, comparing the effort needed with and without the bottle opener. They respond to questions about what they saw.
Learning Point: Pupils understand practically how a simple machine makes work easier.
Step 4: Presentation – Other Examples
Time: 5 minutes
Teaching Skill: Identification/Explanation
Teacher’s Activity: The teacher shows other simple machines like a sharpener, broom, dustpan, spoons, and forks. For each, the teacher asks, “What is this?” and “How does it help us?” The teacher demonstrates the use of each item (e.g., sharpening a pencil, sweeping a small area, scooping with a spoon).
Pupils’ Activity: Pupils identify the simple machines, share how they think they help, and observe the demonstrations. Some pupils may get to try using a sharpener or spoon under supervision.
Learning Point: Pupils identify various simple machines and understand their functions.
Step 5: Simple Machines Rhyme
Time: 3 minutes
Teaching Skill: Reinforcement/Singing
Teacher’s Activity: The teacher leads the pupils in singing the “Simple Machines Rhyme” (as in the Board Summary) with actions. The teacher sings it a few times, encouraging all pupils to join in and perform the actions.
Pupils’ Activity: Pupils sing the rhyme along with the teacher and perform the corresponding actions.
Learning Point: Pupils reinforce their learning through song and movement.
Step 6: Video and Pupil Practice
Time: 4 minutes
Teaching Skill: Visual Learning/Application
Teacher’s Activity: The teacher plays the short educational video on simple machines. After the video, the teacher asks pupils to name any new simple machines they saw or to recall the ones discussed. The teacher then allows pupils to handle and briefly use safe simple machines like a sharpener (with a pencil) or a spoon/fork.
Pupils’ Activity: Pupils watch the video, name simple machines they recall, and practice using the safe simple machines provided.
Learning Point: Pupils consolidate their understanding through visual aids and hands-on practice.
Step 7: Evaluation/Review
Time: 4–5 minutes
Teaching Skill: Questioning/Assessment
Teacher’s Activity: The teacher checks pupils’ understanding through short questions and practical tasks.
- “What are simple machines?” (Encourage repetition of the definition).
- “Show me the bottle opener.”
- “How does a sharpener help us?”
- “Point to the broom.”
- “What helps us to eat our food easily?”
Pupils’ Activity: Pupils respond orally and demonstrate the required skill where appropriate (e.g., pointing to the correct object).
Learning Point: Pupils demonstrate understanding of the lesson content and objectives.
Step 8: Conclusion
Time: 1 minute
Teaching Skill: Summarizing/Praise
Teacher’s Activity: The teacher praises the pupils for their participation and good learning. The teacher reminds them that simple machines are all around us, helping us every day. The teacher encourages them to look for simple machines at home.
Pupils’ Activity: Pupils listen to the teacher’s summary and praise.
Learning Point: Pupils conclude the lesson with a positive reinforcement and a task for home observation.
Lesson Keywords
- Simple Machine – A tool that makes work easier and faster.
- Tool – An object used to help do work.
- Easier – Not difficult.
- Faster – More quickly.
- Bottle Opener – A tool for opening bottles.
- Sharpener – A tool for sharpening pencils.
- Broom – A tool for sweeping.
Differentiation
- Support: For pupils who struggle, provide larger pictures of simple machines, repeat the definition more often, and guide their hands to feel the objects. Focus on just 2-3 key examples.
- Extension: For pupils who grasp the concept quickly, ask them to name other simple machines they see at home or school (e.g., scissors, hammer – with teacher guidance on safety). Encourage them to explain *why* a particular tool is a simple machine.
Community Join the conversation Open discussion +