

Note for teachers using this lesson plan
Before this lesson, ensure you have a clear, safe, and open space for pupils to move freely without bumping into each other. The central idea is for pupils to understand what bending means and to physically demonstrate touching their knees and toes. Observe closely to ensure pupils are bending safely and correctly, and encourage active participation from all children.
Class: Pre-School Level 3
Term: Third Term
Week: 2
Age: 4 years
Duration: 30 minutes
Subject: Physical & Health Education
Curriculum Theme: Physical and Health Education
Previous Lesson: Simple body movements and identification of some body parts.
Topic: BENDING EXERCISE
Subject Matter: Bending exercise and touching the knees and toes.
Specific Objectives
By the end of the lesson, pupils should be able to:
Cognitive Domain
- Identify their knees and toes when asked.
- Understand the meaning of “bending” in the context of exercise.
Affective Domain
- Participate actively and joyfully in bending exercises.
- Follow the teacher’s instructions for physical movements.
Psychomotor Domain
- Demonstrate bending down to touch their knees.
- Demonstrate bending down to touch their toes.
Social Domain
- Take turns and share space safely during group exercises.
Reference Materials
- NAPPS National Unified Teaching Scheme for Pre-School Level 3
- Relevant Early Childhood Care and Education resources
Instructional Materials
- Open playground or clear classroom space
- Video display (TV or projector)
- Pictures of children bending and touching knees/toes
Rationale for the Lesson
This lesson is important for 4-year-olds as it helps them develop body awareness, gross motor skills, and flexibility. Learning to bend and touch their knees and toes strengthens their core muscles and improves coordination, which are foundational for more complex physical activities and overall healthy development.Prerequisite/Previous Knowledge
Pupils can identify some basic body parts like head, shoulders, and feet. They can also perform simple movements like standing, walking, and clapping.Lesson Content/Board Summary
Bending Exercise: Touching the Knees and Toes
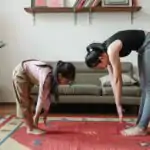
Bending is when you move your body or a part of your body so it is not straight. It helps us reach things on the floor or tie our shoelaces. Today, we will learn to bend our bodies to touch our knees and toes. What are Knees? Your knees are the joints in the middle of your legs that help you bend your legs. (Teacher points to knees on self and pupils point to their own knees.) What are Toes? Your toes are the small parts at the end of your feet. (Teacher points to toes on self and pupils point to their own toes.) How to Bend and Touch Your Knees:- Stand up straight.
- Bend your body forward a little.
- Bend your knees.
- Reach down with your hands to touch your knees.
- Stand back up.
- Stand up straight.
- Keep your legs straight (or slightly bent if needed).
- Bend your body forward from your waist.
- Reach down with your hands to touch your toes.
- Stand back up.
Movement Rhyme: Bend and Touch
Tune: Twinkle, Twinkle Little Star
Lyrics:
Bend, bend, bend down low,
Touch your knees, then let’s go!
Bend, bend, bend down deep,
Touch your toes, then take a leap!
Stand up tall, stretch up high,
Bending makes us strong, oh my!
Actions: Pupils follow the actions: bend down, touch knees, stand up, bend down, touch toes, stand up, stretch up high.
Watch and Practise
Key Words
- Bend – to move your body so it is not straight.
- Knees – the middle part of your legs that helps you bend them.
- Toes – the small parts at the end of your feet.
💡 Teacher Guide for Using This Board Summary
How to teach the content: Introduce “bending” by demonstrating with your own body. Clearly define and point to your knees and toes, asking pupils to identify theirs. Go through the steps for touching knees and toes slowly, one step at a time, allowing pupils to imitate you.
What to show or demonstrate: Physically demonstrate bending to touch your knees and then your toes. Show pictures of children performing these actions if available. Emphasize keeping balance and moving gently.
How to use the rhyme/song: Introduce the “Bend and Touch” rhyme after initial demonstrations. Sing it slowly several times, performing the actions clearly. Encourage pupils to sing along and follow the actions. Repeat the rhyme throughout the lesson to reinforce the movements.
How to use the video: Introduce the video as a fun way to see others doing similar movements. Play the “Head, Shoulders, Knees & Toes” song. Encourage pupils to watch and try to follow the actions, especially focusing on the bending for knees and toes. After the video, ask pupils what they saw and what parts they touched.
What to watch for: Observe if pupils are bending safely (not too fast or forcefully). Check if they can correctly identify their knees and toes. Provide individual support for those struggling with balance or coordination.
Teaching Methods/Instructional Techniques
- Play-based Learning
- Demonstration
- Guided Practice
- Songs and Rhymes
- Video Demonstration
- Imitation
- Question and Answer
- Practical Activity
Instructional Procedures
Step 1: Introduction
Time: 3 minutes
Teaching Skill: Engaging/Motivation
Teacher’s Activity: The teacher greets pupils and starts with a warm-up activity like stretching arms up high and wiggling fingers. The teacher then asks, “Who can show me their knees? Who can show me their toes?”
Pupils’ Activity: Pupils greet the teacher, stretch, wiggle fingers, and point to their knees and toes.
Learning Point: Pupils recall and identify some body parts.
Step 2: Explanation of Bending and Identification
Time: 5 minutes
Teaching Skill: Explaining/Demonstrating
Teacher’s Activity: The teacher explains what “bending” means by demonstrating with their body. “When I move my body like this (bends), I am bending. We bend to pick things up or to tie our shoes.” The teacher then points to their knees and toes, asking pupils to identify theirs again.
Pupils’ Activity: Pupils observe the teacher’s demonstration, listen to the explanation, and point to their own knees and toes.
Learning Point: Pupils understand the concept of bending and correctly identify knees and toes.
Step 3: Teacher Demonstration of Touching Knees
Time: 4 minutes
Teaching Skill: Demonstration/Modelling
Teacher’s Activity: The teacher clearly demonstrates how to bend and touch their knees, breaking it down into simple steps (stand, bend body, bend knees, touch knees, stand up). The teacher repeats the demonstration slowly.
Pupils’ Activity: Pupils watch the teacher’s demonstration carefully.
Learning Point: Pupils observe the correct technique for bending to touch knees.
Step 4: Guided Practice – Touching Knees
Time: 5 minutes
Teaching Skill: Guided Practice/Correction
Teacher’s Activity: The teacher guides pupils to imitate the bending and touching knees action. “Let’s all stand up. Now, slowly bend and touch your knees! Good job! Stand up straight again.” The teacher provides encouragement and gentle correction.
Pupils’ Activity: Pupils stand up and practise bending to touch their knees, following the teacher’s guidance.
Learning Point: Pupils practise and improve their ability to bend and touch their knees.
Step 5: Teacher Demonstration and Guided Practice – Touching Toes
Time: 5 minutes
Teaching Skill: Demonstration/Guided Practice
Teacher’s Activity: The teacher demonstrates how to bend and touch their toes, emphasizing keeping legs relatively straight (or slightly bent if needed for flexibility). “Now, let’s try to touch our toes! Bend from your waist, reach down, and touch your toes.” The teacher then guides pupils to practise.
Pupils’ Activity: Pupils observe the teacher, then stand and practise bending to touch their toes with guidance.
Learning Point: Pupils learn and practise bending to touch their toes.
Step 6: Rhyme and Video Reinforcement
Time: 4 minutes
Teaching Skill: Reinforcement/Engagement
Teacher’s Activity: The teacher leads pupils in singing the “Bend and Touch” rhyme with actions. Afterwards, the teacher plays the “Head, Shoulders, Knees & Toes” video, encouraging pupils to sing and move along, paying attention to the bending parts.
Pupils’ Activity: Pupils sing the rhyme with actions, then watch the video and try to follow the movements.
Learning Point: Pupils reinforce bending movements through song and visual aids.
Step 7: Evaluation/Review
Time: 3 minutes
Teaching Skill: Questioning/Assessment
Teacher’s Activity: The teacher checks pupils’ understanding through short questions and practical tasks.
- “Show me your knees!”
- “Show me your toes!”
- “Can you bend and touch your knees?”
- “Can you bend and touch your toes?”
Pupils’ Activity: Pupils respond orally and demonstrate the required skill where appropriate.
Learning Point: Pupils demonstrate understanding of the lesson.
Step 8: Conclusion
Time: 1 minute
Teaching Skill: Summarising/Closing
Teacher’s Activity: The teacher praises pupils for their active participation and reminds them that bending helps them stay flexible and strong. “You all did a great job bending today! Keep practising to make your bodies strong!”
Pupils’ Activity: Pupils listen to the teacher and respond with claps or cheers.
Learning Point: Pupils feel encouraged and understand the benefit of the exercise.
Lesson Keywords
- Bend – to move your body so it is not straight.
- Knees – the middle part of your legs that helps you bend them.
- Toes – the small parts at the end of your feet.
Differentiation
- Support: For pupils who find it difficult to bend, provide hand-over-hand guidance or encourage them to only bend as far as they comfortably can. Use larger, clearer gestures for demonstration. Allow them to sit on the floor and try to touch their knees or toes from a seated position if standing is too challenging.
- Extension: For pupils who quickly grasp the concept, encourage them to try bending and touching their ankles or even reaching further down. Challenge them to hold the bend for a count of three or to try bending sideways.
Community Join the conversation Open discussion +