

Class: Primary 5
Term: 2nd Term
Subject: Pre-Vocational studies
Curriculum Theme: Home Economics
Previous Lesson: Simple Basic Stitches
Topic: Steps in Making Temporary Stitches
Content/Learning Area: e.g. tacking,basting,tailor’s marking….Time Allocation: 40 minutes
Performance Objectives
By the end of the lesson, pupils should be able too:
- Cognitive Domain: Understand and explain the concept of temporary stitches, including tacking, basting, and tailor’s marking.
- Affective Domain: Appreciate the importance of using temporary stitches in sewing tasks.
- Psychomotor Domain: Demonstrate the correct technique of tacking, basting, and using tailor’s marking.
- Social Domain: Collaborate in pairs to practice the steps of temporary stitching, sharing tools and assisting each other.
Reference Materials
The following resources were used in planning this lesson:
- 9 – Years Basic Education Curriculum
- Abuja Educational Resource Center Scheme of Work
- NAPPS National Unified Scheme of Work
- Online Information from: sewinginspo.com – 15 types Of Tacking Stitches With Example And Picture – Sewing Inspo
- Relevant Textbooks
Instructional Materials
To deliver this lesson, the teacher will use the following materials:
- Needle and thread
- Fabric swatches
- Chalk for marking
- Scissors
- Pins
- Ruler
rationale for the Lesson
Understanding temporary stitches is essential for learners, as they provide the foundation for making adjustments in clothing before final stitching.It helps in ensuring that designs are aligned properly and mistakes are corrected easily, making sewing tasks more efficient and accurate.
Prerequisite/Previous Knowledge
pupils should already be familiar with basic stitches,such as running stitch and backstitch,which will help them understand the concept of temporary stitches and their request.
lesson Content
Steps in Making temporary Stitches
Temporary stitches are quick and easy stitches used to hold fabric in place before permanent stitching. They can be removed easily without damaging the fabric.
The following are the steps in making temporary stitches:
- Tacking:
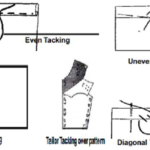
Tacking is used to hold fabric together temporarily. To tack, use a long, loose stitch that can easily be removed. It helps in aligning pieces of fabric before sewing them together permanently.Tacking is useful for holding seams in place before final stitching, securing facings or linings, and temporarily attaching embellishments.
- Basting:
Basting is similar to tacking but is used for longer stitches. It is indeed often used to hold large sections of fabric together temporarily, such as when hemming. Basting is also used for fitting garments before sewing, holding quilt layers together before quilting, and securing pleats or gathers temporarily.
- Tailor’s marking:
Tailor’s marking uses chalk or a fabric marker to make temporary lines or dots on fabric. These marks guide the sewer in stitching the fabric correctly and aligning pieces. Tailor’s marking is essential for transferring pattern markings, indicating seam lines, and marking placement for pockets or buttons.
Teaching Methods
To deliver this lesson, the teacher will adopt the following methods: Exhibition, Description, Visual Aids, Hands-on Practice, Questioning.
Instructional Procedures
To deliver this lesson, the teacher will adopt the following steps:
Step 1: Introduction (Set Induction)
Time: 5 mins
Teaching Skill: Set Induction
Teacher’s Activity: Introduce the topic of temporary stitches. Ask,“What do you think temporary stitches are used for?”
Pupils’ Activity: Listen,respond,and share any experiences with sewing
Step 2: Tacking (Definition and Application)
Time: 7 mins
Teaching Skill: Demonstration
Teacher’s Activity: Show how to perform a tacking stitch on fabric. Explain when and why it is used.Pupils’ Activity: Watch attentively, ask questions, and try tacking on their own fabric swatches
Step 3: Basting (Definition and Application)
Time: 7 mins
Teaching Skill: Demonstration
Teacher’s Activity: Demonstrate the basting stitch and explain its use in temporary stitching.
Pupils’ Activity: Observe and practice basting on fabric
Step 4: Tailor’s Marking
Time: 7 mins
Teaching Skill: Explanation and demonstration
Teacher’s Activity: Show how to use chalk to mark fabric for temporary stitching. Explain how it helps in aligning stitches and designs.
pupils’ Activity: Practice marking fabric using tailor’s chalk
Step 5: Practice Time (Hands-on Activity)
Time: 7 mins
Teaching Skill: Guided Practice
Teacher’s Activity: Assist pupils as they practice tacking, basting, and marking on their fabric.
Pupils’ Activity: Work in pairs or individually to complete the practice task
Step 6: Note-Taking
Time: 4 mins
Teaching Skill: reflection and note-taking
Teacher’s Activity: Recap the steps involved in temporary stitches. Have pupils copy the key points into their notebooks.Pupils’ Activity: Take notes on the lesson’s key points
Step 7: Evaluation/Review
Time: 3 mins
Teaching Skill: Oral questioning
Teacher’s Activity: Ask questions to evaluate understanding. End the lesson with a summary of the importance of temporary stitches.
pupils’ Activity: Answer the questions and participate in the class conclusion
Objective-aligned checks:
- Understand and explain the concept of temporary stitches, including tacking, basting, and tailor’s marking.
- Demonstrate the correct technique of tacking, basting, and using tailor’s marking.
Step 8: Conclusion
Time: –
Teaching Skill: –
Teacher’s Activity: –
Pupils’ Activity: –
Lesson Keywords
- Tacking – A temporary stitch used to hold fabric together before permanent sewing.
- basting – A long, loose temporary stitch used to hold layers of fabric in place.
- Tailor’s Marking – Using chalk or fabric marker to make temporary lines on fabric for guiding stitches.
- Temporary Stitches – Stitches that are meant to be removed after permanent stitching.
- Fabric Alignment – Ensuring pieces of fabric are correctly lined up before sewing.
Lesson Evaluation
To evaluate the learning, the teacher asks pupils to:
- What is the purpose of temporary stitches like tacking and basting?
- How do you perform a tacking stitch?
- Why is it important to use tailor’s marking on fabric?
- What is the difference between tacking and basting?
- Can you demonstrate how to mark fabric using tailor’s chalk?
Assignment/Homework
- Practice tacking and basting on a small piece of fabric.
- Use tailor’s chalk to mark a straight line on fabric and then stitch along the line.
- Write a short paragraph explaining why temporary stitches are important in sewing.
differentiation
- For slower learners: Provide one-on-one assistance and simplified instructions.Use larger fabric swatches for easier handling.
- For advanced learners: Challenge them to create a small project using temporary stitches, such as a simple pouch or bookmark.
- For visual learners: use diagrams and videos to demonstrate the stitching techniques.
- For auditory learners: Provide verbal explanations and encourage them to repeat the steps aloud.
- For kinesthetic learners: Allow plenty of hands-on practice and encourage them to move around while working on their projects.
Note for teachers
When demonstrating temporary stitches,ensure that pupils understand the difference between tacking,basting,and marking. Provide enough practice time for them to get pleasant with these stitches. Encourage them to work in pairs so they can assist one another and learn collaboratively. Happy teaching!


Community Join the conversation Open discussion +