

Class: Primary 5
Term: 2nd Term
Subject: Pre-Vocational Studies
Curriculum Theme: Home Economics
Previous Lesson:
Topic: Identification Of Sewing Tools And Equipments
Content/Learning Area: Tape measure,Scissors,Pins,Needle e.t.c
Time Allocation: 40 minutes
Performance Objectives
By the end of the lesson, pupils should be able to:
- Cognitive Domain: Identify at least 10 sewing tools and their uses.
- Affective Domain: Appreciate the importance of using appropriate sewing tools for effective work.
- Psychomotor Domain: Demonstrate how to use a tape measure and scissors.
- Social Domain: Work cooperatively in groups to discuss the tools’ uses.
Reference Materials
The following resources were used in planning this lesson:
- 9–Years basic Education Curriculum, Abuja.
- Educational resource Centre Scheme of Work.
- NAPPS National Unified Scheme of Work.
- Online Data from: Treasurie – 21 Sewing Tools & Equipment for Beginners
- Relevant Textbooks.
Instructional Materials
To deliver this lesson, the teacher will employ the help of the following materials:
- Real sewing tools: Tape measure, Scissors, Pins, Needle, etc.
- Charts showing pictures of sewing tools.
- A small piece of fabric.
Rationale for the Lesson
Understanding sewing tools is essential for pupils as it introduces them to the foundational equipment used in sewing and fosters creativity and self-reliance in making and mending clothes.
Prerequisite/Previous Knowledge
Pupils are familiar with basic household items and tools they have seen adults use for sewing.
Lesson Content
Identification Of Sewing Tools And Equipments
Sewing tools and equipments are items used to cut, measure, join, or prepare fabric for sewing. Understanding these tools makes sewing more effective and enjoyable.Below are examples of sewing tools:
The following are examples of sewing tools:
- Tape Measure – Used for taking accurate body measurements.
- Scissors – Used for cutting fabric and threads.
- Pins – Hold fabric in place before sewing.
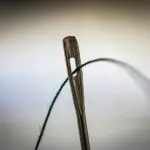
- Needle – Used for hand sewing or attaching buttons.
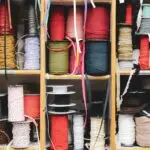
- Thread – Used to join fabric pieces together.
- seam ripper – Removes incorrect stitches neatly.
- Tailor’s Chalk – Marks fabric for cutting or sewing.
- Thimble – Protects fingers while sewing.
- measuring Gauge – Measures small spaces and hems.
- Fabric – The material used for sewing projects.
- Iron – Used to press fabric and remove wrinkles.
- Sewing Machine – Automates the process of stitching fabric together.
Teaching Methods
to deliver this lesson, the teacher will adopt the following methods: Question-and-Answer, Demonstration, Guided Practice, Group Discussion, Direct Instruction, Recap.
Instructional Procedures
To deliver this lesson, the teacher will adopt the following steps:
Step 1: introduction
Time: 5 mins
Teaching Skill: Set Induction
Teacher’s Activity: Displays sewing tools and asks pupils if they can name or identify any of them.Pupils’ Activity: pupils respond by naming tools they recognize.
Step 2: Explanation of Sewing Tools
Time: 10 mins
Teaching Skill: Expository
Teacher’s Activity: Explains the functions of each sewing tool while holding or showing them.
Pupils’ Activity: Pupils listen attentively and observe the tools.
Step 3: practical Demonstration
Time: 10 mins
Teaching Skill: Demonstration
Teacher’s Activity: Shows how to use a tape measure and scissors on a piece of fabric.Pupils’ Activity: Pupils practice measuring and cutting under supervision.
Step 4: Group Work
Time: 7 mins
Teaching Skill: Collaborative
Teacher’s Activity: Divides pupils into groups to discuss the importance of using proper tools.
Pupils’ Activity: Pupils share ideas and write them down as a group.
Step 5: Note-Taking
Time: 5 mins
Teaching Skill: Expository
Teacher’s activity: Guides pupils to copy a summary of the lesson into their notebooks.Pupils’ Activity: Pupils copy notes accurately.
Step 6: Evaluation/Review
Time: 2 mins
Teaching Skill: Interactive
Teacher’s Activity: Asks oral questions about the tools and their uses.
Pupils’ Activity: Pupils respond to questions.
Objective-aligned checks:
- Identify at least 10 sewing tools and their uses.
- Demonstrate how to use a tape measure and scissors.
Step 7: Conclusion
Time: 1 min
Teaching Skill: Summary
Teacher’s Activity: Summarizes the lesson, emphasizing the importance of each tool.pupils’ Activity: Pupils listen attentively.
Lesson Keywords
- Tape Measure – A flexible ruler used for taking body measurements.
- Scissors – A tool with blades used for cutting fabric.
- Pins – Small, pointed objects used to hold fabric together temporarily.
- Needle – A slender tool with a pointed end used for sewing.
- Thread – A thin strand of fiber used for sewing pieces of fabric together.
Lesson Evaluation
To evaluate the learning, the teacher asks pupils to:
- Name five sewing tools and describe their uses.
- Demonstrate how to use a tape measure.
- Explain why it is important to use the correct sewing tools.
- List three tools needed for cutting fabric.
- Identify which tool protects the fingers while sewing.
Assignment/Homework
- Draw and label five different sewing tools.
- Write a short paragraph explaining the importance of using a tape measure in sewing.
- List three safety rules to follow when using scissors and needles.
Differentiation
- For slower learners: provide simplified diagrams of the tools and focus on identifying only the basic tools.
- For advanced learners: Challenge them to research and present on the history and evolution of sewing tools.
- For visual/auditory/kinesthetic learners: Use a variety of visual aids, verbal explanations, and hands-on activities to cater to different learning styles.
Note for Teachers
Ensure the tools are safely handled during the demonstration to avoid accidents. Encourage all pupils to actively participate in group work and practicals for better retention. Happy teaching!
Community Join the conversation Open discussion +