

Class: Senior Secondary School 1 (SS1, SS 1, SSS1, SSS 1)
Term: 3rd Term
Week: 2
Age: 15 years
Duration: 45 minutes
Subject: Visual Art
Curriculum Theme: Visual Art
Previous Lesson: Art Terminologies: Three-Dimensional Art Terms and Examples.
Topic: INTRODUCTION TO MODELLING
Subject Matter: Meaning of ceramics, types of clay including primary and secondary, properties of clay such as plasticity, ceramic tools and equipment and their uses, functions and uses of ceramics
Specific Objectives
By the end of the lesson, pupils should be able to:
Cognitive Domain:
- Define ceramics.
- Identify and describe primary and secondary types of clay.
- State the properties of clay, with emphasis on plasticity.
- List various ceramic tools and equipment and explain their uses.
- Mention the functions and uses of ceramics.
Affective Domain:
- Appreciate the importance of ceramic tools in modelling.
- Value the unique properties of clay for artistic expression.
Psychomotor Domain:
- Observe and correctly identify different ceramic tools.
Social Domain:
- Work cooperatively in identifying and discussing ceramic materials and tools.
Reference Materials
The following resources were used in planning this lesson:
- 9 Years Basic Education Curriculum
- State Unified Scheme of Work
- Visual Arts for Senior Secondary Schools by A. A. Adeyemi
Instructional Materials
The teacher will teach this lesson with the aid of:
- Clay samples
- Sponge
- Twine
- Potter’s wheel (if available or a diagram)
- Various ceramic tools (e.g., cutting wire, modelling tools, loop tools)
Rationale for the Lesson
This lesson helps pupils understand the basic materials and processes involved in modelling, specifically ceramics. Understanding clay and its properties is important for creating various useful and decorative items, connecting art to everyday life.
Prerequisite/Previous Knowledge
Pupils may have some general knowledge of art materials and basic crafts from their earlier art lessons.
Lesson Content/Board Summary
INTRODUCTION TO MODELLING: CERAMICS
Meaning of Ceramics
Ceramics refers to objects made from clay and other raw materials, which are shaped and then hardened by heat (firing) in a kiln. It is an ancient art form used to create both functional and decorative items.
Types of Clay
Clay is a natural, fine-grained material that can be moulded when wet and becomes hard when fired. There are two main types of clay:
- Primary Clay: This type of clay is found at the original site where it was formed. It is generally purer, coarser, and less plastic. An example is Kaolin.
- Secondary Clay: This type of clay has been transported from its original site by water, wind, or glaciers, picking up impurities along the way. It is finer, more plastic, and often contains various minerals which affect its colour and firing properties. Examples include Ball clay and Earthenware clay.
Properties of Clay
The following are important properties of clay:
- Plasticity: This is the most important property of clay. It refers to the clay’s ability to be moulded and hold its shape without cracking or collapsing when wet.
- Shrinkage: Clay shrinks as it dries and during firing due to the loss of water.
- Porosity: The ability of fired clay to absorb water.
- Vitrification: The process where clay becomes glass-like, hard, and non-porous when fired at high temperatures.
Ceramic Tools and Equipment and Their Uses
The following are some common ceramic tools and their uses:
- Cutting Wire: Used for cutting large blocks of clay and removing pots from the potter’s wheel.
- Modelling Tools: Wooden or plastic tools with various shapes used for shaping, smoothing, and adding details to clay.
- Loop Tools: Tools with metal loops at the ends, used for carving, trimming, and hollowing out clay forms.
- Needle Tool: A sharp, pointed tool used for cutting, scoring, piercing, and measuring thickness.
- Sponge: Used for dampening clay, smoothing surfaces, and cleaning.
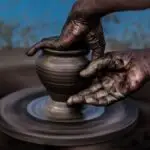
- Potter’s Wheel: A machine used for throwing (shaping) clay into symmetrical forms like bowls and pots.
Functions and Uses of Ceramics
The following are some functions and uses of ceramics:
- Making domestic utensils like plates, cups, and bowls.
- Producing decorative items such as vases, sculptures, and figurines.
- Creating building materials like bricks, tiles, and sanitary wares.
- Manufacturing electrical insulators and laboratory equipment.
- Artistic expression and cultural preservation.
Teaching Methods/Instructional Techniques
Discussion, Lecture, Demonstration, Question and Answer, Visual Aids
Instructional Procedures
Step 1: Introduction
Time: 5 minutes
Teaching Skill: Set Induction
Teacher’s Activity: The teacher greets the pupils and asks them to mention any object they know that is made from clay or looks like it’s made from earth. The teacher then introduces the topic: “Introduction to Modelling: Ceramics” and explains that today’s lesson will focus on understanding ceramics, clay, and the tools used.
Pupils’ Activity: Pupils respond to the teacher’s questions and pay attention to the introduction.
Learning Point: Pupils are prepared for the lesson and recall prior knowledge related to clay materials.
Step 2: Meaning of Ceramics
Time: 7 minutes
Teaching Skill: Explanation/Definition
Teacher’s Activity: The teacher defines ceramics, explaining that it involves shaping clay and other materials and then firing them to harden. The teacher gives examples of ceramic products.
Pupils’ Activity: Pupils listen attentively and take notes on the definition of ceramics.
Learning Point: Pupils understand the meaning of ceramics.
Step 3: Types of Clay
Time: 7 minutes
Teaching Skill: Elaboration/Classification
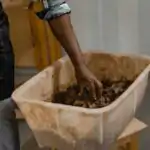
Teacher’s Activity: The teacher explains the two main types of clay: primary and secondary. The teacher describes their characteristics and provides examples for each, using the clay samples to illustrate if possible.
Pupils’ Activity: Pupils listen, observe the clay samples, and differentiate between primary and secondary clay.
Learning Point: Pupils can identify and describe different types of clay.
Step 4: Properties of Clay
Time: 7 minutes
Teaching Skill: Explanation/Demonstration
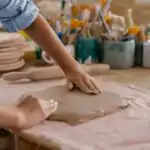
Teacher’s Activity: The teacher explains the key properties of clay, focusing on plasticity. The teacher may demonstrate plasticity by manipulating a piece of wet clay, showing how it can be moulded and holds its shape. Other properties like shrinkage and porosity are also explained.
Pupils’ Activity: Pupils observe the demonstration and discuss the importance of plasticity in clay.
Learning Point: Pupils understand the essential properties of clay, especially plasticity.
Step 5: Ceramic Tools and Equipment and Their Uses
Time: 7 minutes
Teaching Skill: Demonstration/Identification
Teacher’s Activity: The teacher displays various ceramic tools and equipment (cutting wire, modelling tools, loop tools, needle tool, sponge, potter’s wheel diagram). The teacher demonstrates how each tool is used and explains its specific function.
Pupils’ Activity: Pupils observe the tools and their uses, asking questions for clarification.
Learning Point: Pupils can identify common ceramic tools and state their uses.
Step 6: Functions and Uses of Ceramics
Time: 5 minutes
Teaching Skill: Enumeration/Discussion
Teacher’s Activity: The teacher leads a discussion on the various functions and uses of ceramics in daily life, ranging from domestic items to industrial applications and artistic expression.
Pupils’ Activity: Pupils contribute by mentioning examples of ceramic items they know and their uses.
Learning Point: Pupils understand the practical and artistic applications of ceramics.
Step 7: Evaluation/Review
Time: 5 minutes
Teaching Skill: Questioning/Assessment
Teacher’s Activity: The teacher evaluates the learning by asking the following questions:
- Define ceramics.
- Mention two types of clay and briefly describe one.
- State two important properties of clay.
- List three ceramic tools and their uses.
Pupils’ Activity: Pupils answer orally and in writing.
Learning Point: Pupils demonstrate understanding of the lesson.
Step 8: Conclusion
Time: 2 minutes
Teaching Skill: Summarization
Teacher’s Activity: The teacher briefly summarizes the key points of the lesson, reinforcing the understanding of ceramics, types of clay, their properties, and the tools used. The teacher assigns homework: “Draw and label three ceramic tools you observed today.”
Pupils’ Activity: Pupils listen to the summary and copy down the homework.
Learning Point: Pupils consolidate their learning and apply knowledge through homework.
Lesson Keywords
- Ceramics – Art and technology of making objects from clay and other raw materials by shaping and then hardening by heat.
- Clay – A natural, fine-grained material that is plastic when wet and hard when fired.
- Plasticity – The ability of wet clay to be moulded and hold its shape without cracking.
- Primary clay – Clay found at its original formation site, generally purer and less plastic.
- Secondary clay – Clay transported from its original site, often finer and more plastic due to impurities.
- Modelling – The process of creating forms from soft, malleable materials like clay.
Differentiation
For pupils who grasp concepts quickly, the teacher can encourage them to research different firing temperatures for various ceramic wares (e.g., earthenware, stoneware, porcelain). For those needing more support, the teacher will provide simplified definitions and more direct guidance during tool identification, perhaps using flashcards with tool names and pictures.
Note for teachers using this lesson plan
Ensure to have actual clay samples and as many ceramic tools as possible for demonstration to enhance practical understanding. Encourage pupils to touch and feel the clay (if appropriate) to better understand its properties. Emphasize safety when handling any sharp tools.
Community Join the conversation Open discussion +