

Class: Junior Secondary School 1 (JSS1, JSS 1)
Term: 2nd Term
Week: 6 & 7
Age: 12 years
Duration: 45 minutes
Subject: Basic Science And Technology
Curriculum Theme: Basic Technology
Previous Lesson: Board Practice, Setting Paper, Sharpening Pencils and Using Drawing Instruments
Topic: Board Practice And Freehand Sketching
Subject Matter: Definition of freehand sketching, Techniques of drawing lines, curves, circles and irregular shapes, Sketching of simple workshop hand tools (building, woodwork, metalwork, hand tools).
Specific Objectives
By the end of the lesson, pupils should be able to:
- Cognitive Domain:
(a) Explain the meaning and purpose of freehand sketching in technical drawing.
(b) Identify and describe techniques used in drawing lines, curves, circles, and irregular shapes.
(c) Recognize common workshop hand tools used in building, woodwork, and metalwork. - Affective Domain:
(a) Appreciate the importance of neatness, accuracy, and patience in freehand sketching.
(b) Show interest in developing drawing and sketching skills. - Psychomotor Domain:
(a) Demonstrate the ability to sketch straight lines, curves, and simple tools accurately by hand.
(b) Practice drawing freehand sketches of basic workshop hand tools. - Social Domain:
(a) Work cooperatively with classmates during group sketching activities.
(b) Share tools and materials responsibly while participating in sketching exercises.
Reference Materials
The following resources were used in planning this lesson:
- 9 Years Basic Education Curriculum
- Lagos State Unified Scheme of Work for Junior Secondary Schools
- ThoughtCo – “What Is Freehand Drawing?” (https://www.thoughtco.com/what-is-freehand-drawing-182437)
- Relevant Textbooks
Instructional Materials
The teacher will teach this lesson with the aid of:
- Drawing boards and pencils
- Set squares and rulers
- Erasers and sharpeners
- Samples of building, woodwork, and metalwork tools
- Charts showing various line types and drawing examples
- Whiteboard and marker
Rationale for the Lesson
This lesson helps pupils develop foundational technical drawing skills, understand the importance of freehand sketching, and identify tools used in workshop practices.
Prerequisite/Previous Knowledge
Pupils have been introduced to basic drawing instruments and can recognize simple lines and shapes from previous lessons on technical drawing instruments and their uses.
Lesson Content/Board Summary
Board Practice and Freehand Sketching
Definition of Freehand Sketching
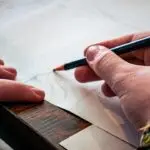
Freehand sketching is the process of drawing objects or shapes without the use of drawing instruments such as rulers, compasses, or set squares. It is often used to make quick, rough representations of ideas or tools before a detailed technical drawing is produced.
The following are the purposes of freehand sketching:
- To represent ideas quickly.
- To communicate design concepts clearly.
- To serve as a guide for detailed drawings.
- To improve artistic and technical drawing skills.
Techniques of Drawing Lines, Curves, Circles, and Irregular Shapes
In freehand sketching, different techniques are applied to draw various forms neatly and proportionally. Good control of hand movement and proper posture are essential for accuracy.
The following are basic techniques of freehand sketching:
- Draw lines using wrist and arm movement rather than finger movement.
- Keep the paper steady on the drawing surface.
- Use light strokes first, then darken when satisfied.
- Practice drawing horizontal, vertical, and diagonal lines repeatedly.
- For curves and circles, move the hand smoothly and maintain steady pressure.
- To draw irregular shapes, sketch lightly and adjust outlines for accuracy.
Sketching of Simple Workshop Hand Tools
Workshop hand tools are used for practical work in building, woodwork, and metalwork. Pupils should be able to sketch these tools accurately by hand.
Examples include:
- Building Tools: trowel, hammer, chisel, plumb line, measuring tape.
- Woodwork Tools: saw, mallet, plane, brace and bit, marking gauge.
- Metalwork Tools: file, hacksaw, spanner, vice, cold chisel.
The following are tips for sketching tools:
- Observe the main shape and structure of the tool.
- Start with simple outlines before adding details.
- Maintain proportion and symmetry.
- Label each part of the tool neatly.
- Keep the sketch clean and presentable.
Teaching Methods/Instructional Techniques:
Lecture, Discussion, Demonstration, Illustration, Explanation, Question and Answer, Group Work
Instructional Procedures
To deliver this lesson, the teacher will adopt the following steps:
Step 1: Introduction
Time: 5 minutes
Teaching Skill: Set Induction
Teacher’s Activity: The teacher displays sketches of tools and asks pupils what they think the sketches represent, relating it to their previous lesson on drawing instruments.
Pupils’ Activity: Pupils respond by identifying familiar tools and guessing how they were drawn.
Learning Point: Pupils become curious and motivated to learn about freehand sketching and board practice.
Step 2: Definition of Freehand Sketching
Time: 8 minutes
Teaching Skill: Explanation
Teacher’s Activity: The teacher defines freehand sketching, explains its purpose, and writes key points on the board.
Pupils’ Activity: Pupils listen and take notes.
Learning Point: Pupils understand what freehand sketching is and its uses in technical drawing.
Step 3: Techniques of Drawing Lines, Curves, Circles, and Irregular Shapes
Time: 10 minutes
Teaching Skill: Demonstration
Teacher’s Activity: The teacher demonstrates how to draw straight lines, curves, and circles on the board without instruments and guides pupils to practice.
Pupils’ Activity: Pupils imitate the teacher’s technique using their drawing books.
Learning Point: Pupils learn and practice the correct techniques of sketching freehand lines and shapes.
Step 4: Sketching of Simple Workshop Hand Tools
Time: 10 minutes
Teaching Skill: Guided Practice
Teacher’s Activity: The teacher displays real tools or charts and guides pupils to sketch simple tools like hammer, saw, and file.
Pupils’ Activity: Pupils sketch the tools as shown and compare results in groups.
Learning Point: Pupils can sketch common workshop tools accurately using freehand techniques.
Step 5: Note-Taking
Time: 5 minutes
Teaching Skill: Explanation
Teacher’s Activity: The teacher writes the summarized note of the lesson content on the board.
Pupils’ Activity: Pupils copy the note neatly into their notebooks.
Learning Point: Pupils have a written summary of what was taught.
Step 6: Evaluation/Review
Time: 5 minutes
Teaching Skill: Questioning
Teacher’s Activity: The teacher evaluates the learning by asking the following questions:
- What is freehand sketching?
- Mention three techniques used in freehand sketching.
- List three examples each of building, woodwork, and metalwork tools.
- State two tips for sketching tools correctly.
Pupils’ Activity: Pupils answer the questions orally and participate in short drawing tasks.
Learning Point: Pupils demonstrate understanding of the lesson objectives.
Step 7: Conclusion
Time: 2 minutes
Teaching Skill: Reinforcement
Teacher’s Activity: The teacher summarizes the lesson, emphasizes neatness and practice, and encourages pupils to continue improving their sketching skills.
Pupils’ Activity: Pupils listen attentively and ask relevant questions.
Learning Point: Pupils are motivated to apply freehand sketching in future technical drawing lessons.
Home Task: Record two correct examples of Board Practice And Freehand Sketching from the lesson or home environment and explain each in your own words.
Lesson Keywords
- Freehand Sketching – drawing without using instruments.
- Line – a continuous mark made on a surface.
- Curve – a smoothly bending line without angles.
- Tool – an instrument used for work or construction.
- Proportion – the correct relationship in size and shape of drawn objects.
Differentiation
Provide additional guidance and slower pacing for weaker learners; pair fast learners with them for peer support. Give advanced learners extra practice on tool detailing.
Note for teachers using this lesson plan
Encourage constant sketching practice to improve pupils’ confidence and control. Always check posture and pencil grip. Praise neatness and effort, not only perfection.

Community Join the conversation Open discussion +