

Class: Senior Secondary School 1 (SS1, SS 1, SSS1, SSS 1)
Term: 3rd Term
Week: 9
Age: 15 years
Duration: 45 minutes
Subject: Auto Mechanic Work
Curriculum Theme: Auto Mechanic Work
Previous Lesson: Manifold Functions and Types.
Topic: RIMS – Functions, Types, Sizes and Removal
Subject Matter: Functions of rims, types of rims, alloy rims, press steel rims, rim sizes, tools used for rim removal, removing and fixing rims.
Specific Objectives
By the end of the lesson, pupils should be able to:
Cognitive Domain:
- Define a vehicle rim.
- State at least three functions of a rim.
- Identify and explain two types of rims.
- Describe how rim sizes are determined.
Affective Domain:
- Appreciate the importance of selecting the correct rim for a vehicle.
- Value safety precautions when removing and fixing rims.
Psychomotor Domain:
- Identify tools used for rim removal and fixing.
- Demonstrate the procedure for removing a rim from a wheel assembly.
- Demonstrate the procedure for fixing a rim onto a wheel assembly.
Social Domain:
- Work cooperatively with peers during practical demonstrations.
Reference Materials
The following resources were used in planning this lesson:
- 9 Years Basic Education Curriculum for Auto Mechanic Work.
- State Unified Scheme of Work for Senior Secondary School Auto Mechanic Work.
- Auto Mechanic for Senior Secondary Schools, Book 1.
- https://www.automechanicresources.com
- https://www.vehicletechnology.org
Instructional Materials
The teacher will teach this lesson with the aid of:
- An alloy rim.
- A pressed steel rim.
- Relevant rim tools (e.g., lug wrench, jack, jack stands, tyre lever).
- Charts showing different rim types and sizes.
- Posters illustrating rim removal and fixing steps.
Rationale for the Lesson
Understanding rims is important because they are a fundamental part of vehicle wheels, directly affecting vehicle safety and performance. This lesson helps pupils to correctly identify, select, and safely handle rims, which is a key skill in auto mechanic work.
Prerequisite/Previous Knowledge
Pupils have basic knowledge of vehicle components and the importance of wheels in a vehicle.
Lesson Content/Board Summary
RIMS – Functions, Types, Sizes and Removal
Definition of a Rim
A rim is the outer edge of a wheel, holding the tyre. It is typically a circular metal part that the tyre is mounted onto.
Functions of Rims
The following are the main functions of rims:
- To provide a stable mounting surface for the tyre.
- To transfer the vehicle’s weight from the axle to the tyre.
- To dissipate heat generated by braking and tyre friction.
- To contribute to the overall aesthetics of the vehicle.
Types of Rims
The two common types of rims are:
- Pressed Steel Rims: These are made from steel sheets pressed into shape and welded. They are generally heavier, more durable, and less expensive, often found on standard passenger vehicles and commercial vehicles.
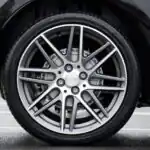
- Alloy Rims: These are made from an alloy of aluminium and other metals. They are lighter, offer better heat dissipation, and come in various designs, often used for performance vehicles and for aesthetic appeal.
Rim Sizes
Rim sizes are typically indicated by two measurements: diameter and width. For example, “15x7J” means:
- 15: The rim diameter in inches (the diameter of the tyre bead seat).
- 7: The rim width in inches (the distance between the two tyre bead seats).
- J: The profile of the rim flange (the shape of the edge that holds the tyre).
Tools Used for Rim Removal and Fixing
The following tools are commonly used for removing and fixing rims:
- Lug wrench (or wheel brace)
- Vehicle jack
- Jack stands
- Wheel chocks
- Tyre lever (for tyre removal from rim)
- Torque wrench (for correct tightening)
Procedure for Removing and Fixing Rims
The following are the general steps for removing and fixing rims:
-
Removing a Rim:
- Park the vehicle on a level surface and engage the parking brake.
- Place wheel chocks under the wheel diagonally opposite to the one being removed.
- Loosen the lug nuts slightly with a lug wrench while the wheel is on the ground.
- Jack up the vehicle until the wheel is off the ground and place a jack stand for support.
- Remove the lug nuts completely.
- Pull the wheel and rim assembly off the wheel studs.
-
Fixing a Rim:
- Align the rim with the wheel studs and push it onto the hub.
- Hand-tighten the lug nuts onto the studs.
- Lower the vehicle until the wheel just touches the ground.
- Tighten the lug nuts in a star pattern using a lug wrench.
- Lower the vehicle completely and remove the jack and jack stand.
- Give a final tightening to the lug nuts with a torque wrench to the manufacturer’s specifications.
- Remove the wheel chocks.
Teaching Methods/Instructional Techniques
Discussion, Lecture, Demonstration, Question and Answer, Visual Aids
Instructional Procedures
Step 1: Introduction
Time: 5 minutes
Teaching Skill: Set Induction
Teacher’s Activity: The teacher greets the pupils and asks them to identify the circular metal part of a vehicle wheel that holds the tyre. The teacher then introduces the topic: RIMS – Functions, Types, Sizes and Removal.
Pupils’ Activity: Pupils respond to the questions and listen attentively to the introduction.
Learning Point: Pupils are introduced to the lesson topic and its relevance.
Step 2: Explanation of Rim Functions
Time: 8 minutes
Teaching Skill: Explanation/Lecture
Teacher’s Activity: The teacher defines a rim and explains its various functions, using charts and examples of actual rims to illustrate.
Pupils’ Activity: Pupils listen, take notes, and ask questions for clarification.
Learning Point: Pupils understand what a rim is and its roles in a vehicle.
Step 3: Types of Rims
Time: 7 minutes
Teaching Skill: Demonstration/Explanation
Teacher’s Activity: The teacher presents and explains the two main types of rims: pressed steel and alloy rims, highlighting their characteristics, advantages, and disadvantages. The teacher uses the actual alloy and pressed steel rims for demonstration.
Pupils’ Activity: Pupils observe the different rim types, identify their features, and ask questions.
Learning Point: Pupils can differentiate between pressed steel and alloy rims.
Step 4: Understanding Rim Sizes
Time: 5 minutes
Teaching Skill: Explanation/Visual Aids
Teacher’s Activity: The teacher explains how rim sizes are measured (diameter and width) using the charts and by pointing out markings on the sample rims.
Pupils’ Activity: Pupils observe the charts and rim markings, understanding the meaning of rim size specifications.
Learning Point: Pupils learn to interpret rim size specifications.
Step 5: Tools for Rim Removal
Time: 5 minutes
Teaching Skill: Demonstration/Identification
Teacher’s Activity: The teacher displays and identifies the tools used for rim removal and fixing, explaining the purpose of each tool.
Pupils’ Activity: Pupils identify the tools and their uses.
Learning Point: Pupils know the necessary tools for rim work.
Step 6: Demonstration of Rim Removal and Fixing
Time: 10 minutes
Teaching Skill: Demonstration/Practical
Teacher’s Activity: The teacher demonstrates the step-by-step procedure for safely removing a rim from a wheel assembly and then fixing it back, emphasizing safety precautions.
Pupils’ Activity: Pupils observe the demonstration carefully, noting the steps and safety measures.
Learning Point: Pupils understand the practical steps involved in rim removal and fixing.
Step 7: Evaluation/Review
Time: 5 minutes
Teaching Skill: Questioning/Assessment
Teacher’s Activity: The teacher evaluates the learning by asking the following questions:
- What is a vehicle rim?
- Mention three functions of a rim.
- State two types of rims you know.
- Explain how rim sizes are determined.
- List three tools used for removing a rim.
Pupils’ Activity: Pupils answer orally and in writing.
Learning Point: Pupils demonstrate understanding of the lesson.
Step 8: Conclusion
Time: 3 minutes
Teaching Skill: Summarization/Assignment
Teacher’s Activity: The teacher summarizes the key points of the lesson and assigns pupils to research safety standards for wheel and rim maintenance.
Pupils’ Activity: Pupils listen to the summary and note down the assignment.
Learning Point: Pupils consolidate their learning and are given further tasks.
Lesson Keywords
- Rim – The outer edge of a wheel, holding the tyre.
- Alloy Rim – A wheel rim made from an alloy of aluminium and other metals.
- Pressed Steel Rim – A wheel rim made from pressed and welded steel sheets.
- Lug Nuts – Nuts used to secure a wheel to a vehicle’s hub.
- Tyre Bead – The edge of a tyre that sits on the rim.
Differentiation
For pupils who grasp concepts quickly, they will be encouraged to assist peers during practical identification of tools and rim types. For pupils requiring more support, the teacher will provide additional one-on-one explanations and simplified diagrams, focusing on key definitions and basic identification.
Note for teachers using this lesson plan
Ensure all demonstration tools and materials are safe and in good working condition before the lesson. Emphasize safety procedures throughout the practical demonstration to prevent accidents. Allow pupils to handle the tools and rims under strict supervision to enhance their practical understanding.


Community Join the conversation Open discussion +