

Class: Senior Secondary School 1 (SS1, SS 1, SSS1, SSS 1)
Term: 3rd Term
Week: 2
Age: 15 years
Duration: 45 minutes
Subject: Auto Mechanic Work
Curriculum Theme: Auto Mechanic Work
Previous Lesson: Braking System: Friction Concept and Purpose of Brakes.
Topic: BRAKING SYSTEM – Functions, Drum Brakes and Disc Brakes
Subject Matter: Functions of braking system, drum brakes, disc brakes, where drum and disc brakes are commonly found.
Specific Objectives
By the end of the lesson, pupils should be able to:
Cognitive Domain:
- Define a braking system.
- State at least three functions of a braking system.
- Explain the working principle of drum brakes.
- Explain the working principle of disc brakes.
- State where drum and disc brakes are commonly found in vehicles.
Affective Domain:
- Appreciate the importance of a functional braking system for vehicle and road safety.
- Show interest in learning about different types of braking systems.
Psychomotor Domain:
- Identify actual drum brake components.
- Identify actual disc brake components.
Social Domain:
- Participate actively in group discussions about braking systems.
Reference Materials
The following resources were used in planning this lesson:
- 9 Years Basic Education Curriculum for Senior Secondary Schools.
- State Unified Scheme of Work for Auto Mechanic Work SSS 1.
- S.L. Nagpal (2010). Automobile Mechanics. S. Chand & Company Ltd.
- James E. Duffy (2017). Modern Automotive Technology. Goodheart-Willcox Co. Inc.
Instructional Materials
The teacher will teach this lesson with the aid of:
- A live vehicle (if available) or a diagram of a vehicle braking system.
- Actual drum brake assembly.
- Actual disc brake assembly.
- Whiteboard and markers.
Rationale for the Lesson
This lesson helps pupils understand how vehicles are stopped safely. It enables them to know the parts that make up the braking system and how they work, which is important for vehicle maintenance and road safety in their daily lives.
Prerequisite/Previous Knowledge
Pupils are assumed to have prior knowledge of basic vehicle components and the general concept of how a vehicle moves.
Lesson Content/Board Summary
BRAKING SYSTEM
Definition of Braking System
A braking system is a mechanical device that inhibits motion by absorbing energy from a moving system. It is used for slowing or stopping a moving vehicle, holding it stationary, or controlling its speed when moving downhill.
Functions of the Braking System
The following are the main functions of a vehicle’s braking system:
- To slow down or stop the vehicle.
- To hold the vehicle stationary when parked.
- To control the speed of the vehicle when descending a hill.
- To ensure safety by providing reliable stopping power.
Types of Braking Systems (Based on Brake Mechanism)
The two primary types of mechanical brakes found in modern vehicles are drum brakes and disc brakes.
Drum Brakes
Drum brakes are a type of brake that uses friction caused by a set of shoes or pads that press outward against a rotating cylinder-shaped part called a brake drum. When the brake pedal is pressed, hydraulic pressure forces the brake shoes against the inner surface of the drum, creating friction to slow or stop the wheel.
Drum brakes are commonly found on the rear wheels of many older vehicles and some modern entry-level cars, as well as on heavy-duty vehicles.
Disc Brakes
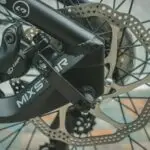
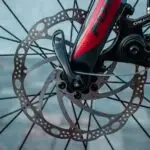
Disc brakes are a type of brake that uses calipers to squeeze pairs of pads against a disc or rotor to create friction. When the brake pedal is pressed, hydraulic pressure forces the brake pads to clamp onto the rotating brake disc, generating friction to slow or stop the wheel.
Disc brakes are commonly found on the front wheels of almost all modern vehicles and on all four wheels of many performance and luxury vehicles due to their superior heat dissipation and stopping power.
Teaching Methods/Instructional Techniques
Discussion, Lecture, Demonstration, Question and Answer, Visual Aids
Instructional Procedures
Step 1: Introduction
Time: 5 minutes
Teaching Skill: Set Induction
Teacher’s Activity: The teacher greets the pupils and asks questions about how vehicles stop. For example, “What makes a moving car stop?” or “Why is it important for a car to have good brakes?” The teacher then introduces the topic: “Braking System – Functions, Drum Brakes and Disc Brakes.”
Pupils’ Activity: Pupils respond to the questions and listen attentively to the topic introduction.
Learning Point: Pupils recall prior knowledge and are mentally prepared for the lesson.
Step 2: Presentation of Braking System Functions
Time: 10 minutes
Teaching Skill: Explanation/Lecture
Teacher’s Activity: The teacher defines a braking system and explains its primary functions, writing key points on the board. The teacher encourages pupils to contribute their ideas on why brakes are essential.
Pupils’ Activity: Pupils listen, take notes, and actively participate in the discussion by stating functions of brakes.
Learning Point: Pupils understand the definition and importance of a vehicle’s braking system.
Step 3: Explanation of Drum Brakes
Time: 8 minutes
Teaching Skill: Explanation/Demonstration
Teacher’s Activity: The teacher explains what drum brakes are, their main components, and how they work. The teacher uses the actual drum brake assembly or a diagram to illustrate the explanation.
Pupils’ Activity: Pupils observe the demonstration, listen to the explanation, and ask questions for clarity.
Learning Point: Pupils gain knowledge of the structure and working principle of drum brakes.
Step 4: Demonstration/Identification of Drum Brakes
Time: 5 minutes
Teaching Skill: Practical Demonstration
Teacher’s Activity: The teacher points out the drum brake components on the actual assembly or diagram and asks pupils to identify them. The teacher also states common locations for drum brakes in vehicles.
Pupils’ Activity: Pupils identify the components shown and note down typical locations of drum brakes.
Learning Point: Pupils can visually identify drum brake parts and know their common placement.
Step 5: Explanation of Disc Brakes
Time: 8 minutes
Teaching Skill: Explanation/Demonstration
Teacher’s Activity: The teacher explains what disc brakes are, their main components (caliper, pads, rotor), and how they work. The teacher uses the actual disc brake assembly or a diagram for illustration.
Pupils’ Activity: Pupils observe the demonstration, listen to the explanation, and ask questions.
Learning Point: Pupils understand the structure and working principle of disc brakes.
Step 6: Demonstration/Identification of Disc Brakes
Time: 5 minutes
Teaching Skill: Practical Demonstration
Teacher’s Activity: The teacher points out the disc brake components on the actual assembly or diagram and asks pupils to identify them. The teacher also states common locations for disc brakes in vehicles.
Pupils’ Activity: Pupils identify the components shown and note down typical locations of disc brakes.
Learning Point: Pupils can visually identify disc brake parts and know their common placement.
Step 7: Evaluation/Review
Time: 5 minutes
Teaching Skill: Questioning/Assessment
Teacher’s Activity: The teacher evaluates the learning by asking the following questions:
- Define a braking system.
- Mention three functions of a braking system.
- Explain the working principle of a drum brake.
- Where are disc brakes commonly found in a vehicle?
Pupils’ Activity: Pupils answer orally and in writing.
Learning Point: Pupils demonstrate understanding of the lesson.
Step 8: Conclusion
Time: 2 minutes
Teaching Skill: Summarization
Teacher’s Activity: The teacher summarizes the key points of the lesson, emphasizing the importance of a functional braking system for safety. The teacher assigns homework: “Draw and label a simple diagram of a drum brake and a disc brake.”
Pupils’ Activity: Pupils listen to the summary, ask any final questions, and copy the homework.
Learning Point: Pupils consolidate their learning and are given a task to reinforce understanding.
Lesson Keywords
- Braking System – A mechanism used to slow or stop a moving vehicle.
- Drum Brake – A brake type where shoes press against the inside of a rotating drum.
- Disc Brake – A brake type where pads clamp onto a rotating disc or rotor.
- Brake Pedal – The foot-operated lever that activates the braking system.
- Brake Drum – The rotating component in a drum brake assembly.
- Brake Disc/Rotor – The rotating component in a disc brake assembly.
- Caliper – The component in a disc brake that houses the brake pads and pistons.
- Brake Shoe – The component in a drum brake that presses against the drum.
Differentiation
The teacher will provide additional support to struggling pupils by simplifying explanations and using more visual aids. Advanced pupils will be encouraged to research further into advanced braking systems like ABS.
Note for teachers using this lesson plan
Ensure all instructional materials are available and in good working condition before the lesson. Encourage active participation and real-life examples to make the lesson relatable and engaging for the pupils. Safety precautions should be observed if using a live vehicle or actual components.

Community Join the conversation Open discussion +