

The Lesson Plan:
Class: Primary 6
Term: 3rd Term
Week: 7
Age: 11 years
Duration: 40 minutes
Subject: Cultural And Creative Arts
Previous Lesson: Meaning Of BatikCurriculum Theme: Cultural and Creative Arts Practices
Previous Lesson:
Topic: Materials Needed For Batik
Content/Learning Area: Materials Needed For Batik
Performance objectives
By the end of the lesson, pupils should be able to:
- Cognitive Domain: Identify and name at least five materials used in making batik.
- Affective Domain: Express interest and thankfulness for indigenous fabric art such as batik.
- Psychomotor Domain: Handle and display the materials used in making batik properly.
- Social domain: Work cooperatively with classmates in identifying and discussing batik materials.
Reference Materials
The following resources were used in planning this lesson:
- 9 Years Basic Education Curriculum
- Abuja Educational Resource Center Scheme of Work
- NAPPS National Unified scheme of Work
- Online Information from: merriam-webster – BATIK Definition & Meaning
- Relevant Textbooks
Instructional Materials
The teacher will teach this lesson with the aid of:
- Samples of batik fabrics
- Pictures of batik-making process
- Real batik-making tools (wax, brush, dye)
- Chart displaying batik materials
- Video clips of batik production
Rationale for the Lesson
Understanding the materials needed for batik helps pupils appreciate local textile production and develop interest in cultural arts and creativity.
Prerequisite/Previous Knowledge
Pupils have seen local fabric designs before and have discussed uses of fabric and decoration in previous lessons.
Lesson Content
Materials Needed For Batik
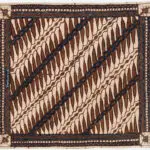
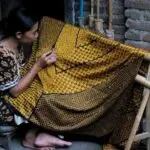
batik is a special method of making gorgeous designs on fabric using wax and dye.This lesson helps us learn the items used to make batik.
Thes are the basic materials needed to produce batik designs.
- Plain white cotton fabric
- Wax
- Dyes
- Water
- Salt
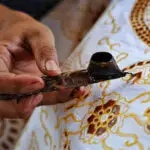
Tools for Applying Wax
these are used to apply hot wax to the fabric.
- Brush
- Foam
- Metal stylus or tjanting
- Spoon
- Knife
Tools for Melting Wax
Wax must be melted before use. The following help with melting wax.
- Stove
- Gas burner
- Pot
- Frying pan
- Heat-proof container
safety and Cleaning Items
these items help keep the environment safe and clean during batik production.
- Hand gloves
- Apron
- Old newspaper
- Soap
- Bucket
Materials Needed for a Batik Activity
Materials may include clean cotton fabric, a planned motif, suitable fabric dye, wax or approved resist, applicator or brush, containers, stirring tool, gloves, apron, table covering and drying line. Adults provide any heat source and wax pot.
Each material has a role. Substitute only when the material is safe and compatible with the dye process.
Teaching Methods
Discussion, clarification, Demonstration, Storytelling, Visual Aids, Question and Answer
Instructional Procedures
To deliver this lesson, the teacher will adopt the following steps:
Step 1: Introduction
Time: 5 mins
Teaching Skill: Set Induction
Teacher’s Activity: the teacher tells a story about a village where people make and sell colorful fabrics.
Pupils’ Activity: Pupils listen attentively and respond to questions.
Learning Point: Pupils are prepared and curious about the lesson.
Step 2: main Materials for Batik
Time: 7 mins
Teaching Skill: Explanation
Teacher’s activity: The teacher introduces and explains the main materials needed for batik.
Pupils’ Activity: Pupils name and repeat the materials after the teacher.
Learning Point: Pupils identify key materials used in batik making.
Step 3: Tools for Applying Wax
Time: 6 mins
Teaching Skill: Demonstration
Teacher’s Activity: The teacher shows real tools or pictures used to apply wax and explains their use.
Pupils’ Activity: Pupils observe, handle, and name the tools shown.
Learning Point: Pupils understand how wax is applied in batik.
Step 4: Tools for Melting Wax
Time: 5 mins
Teaching Skill: Explanation
Teacher’s Activity: The teacher explains how wax is melted and lists tools used for melting.
Pupils’ Activity: Pupils describe how wax can be melted and name the tools.
Learning Point: Pupils learn the heat tools used in batik.
Step 5: Safety and Cleaning Items
Time: 5 mins
Teaching Skill: Storytelling
Teacher’s Activity: The teacher tells a short story of a careless batik maker who stained his clothes.
Pupils’ Activity: Pupils identify the items that could have helped him stay clean.
Learning Point: Pupils recognize safety and hygiene items.
Step 6: Note Taking
Time: 3 mins
Teaching Skill: Note Writing
Teacher’s Activity: The teacher guides pupils to copy the class notes from the board.
Pupils’ Activity: Pupils write neatly in their notebooks.
Learning Point: Pupils record crucial facts from the lesson.
Step 7: Evaluation
Time: 5 mins
Teaching Skill: Questioning
Teacher’s Activity: The teacher asks oral questions and gives tasks based on the lesson.
Pupils’ Activity: Pupils answer questions and complete short tasks.
Learning Point: Pupils demonstrate what they have learned.
Step 8: Conclusion
Time: 4 mins
Teaching Skill: Instructional, Cognitive
Teacher’s Activity: The teacher reviews key points and encourages pupils to observe batik at home.
Pupils’ Activity: Pupils share what they liked about the lesson.
Learning Point: Pupils reflect and consolidate the lesson.
Lesson Keywords
- Batik: A method of making designs on fabric with wax and dye
- Dye: Colored liquid used to stain cloth
- Wax: A thick substance used to cover parts of the fabric
- Stylus: A tool used to draw with hot wax
- Apron: A protective cloth worn to avoid stains
Lesson Evaluation
To evaluate the learning, the teacher asks pupils to:
- Mention two main materials needed for making batik.
- List two tools used to apply wax on cloth.
- Name two items that can be used to melt wax.
- Mention any two safety items used in batik making.
- Describe one use of dye in batik production.
Differentiation
The teacher will provide more visual aids and real-life samples for slower learners and give advanced questions to fast learners.
Note for teachers using this lesson plan
Encourage pupils to bring old fabrics from home and observe their patterns. Relate the lesson to cultural identity and local crafts.
Community Join the conversation Open discussion +