

Class: Senior Secondary School 2 (SS2 / SSS2)
Term: 3rd Term
Week: 1
Age: 16 years
Duration: 45 minutes
Subject: Auto Mechanic Work
Curriculum Theme: Braking Systems
Previous Lesson: .
Topic: BRAKING SYSTEM— MECHANICAL AND HYDRAULIC OPERATION OF DISC AND DRUM BRAKES.
Subject Matter: Meaning of BRAKING SYSTEM— MECHANICAL AND HYDRAULIC OPERATION OF DISC AND DRUM BRAKES (definition of braking system types), mechanical operation of disc and drum brakes (linkages and force transfer), hydraulic operation of disc and drum brakes (fluid pressure, cylinders), operational differences between types of brakes (disc vs drum).
Specific Objectives
By the end of the lesson, pupils should be able to:
Cognitive Domain:
- Define a braking system.
- Explain the mechanical operation of disc and drum brakes.
- Explain the hydraulic operation of disc and drum brakes.
- State the operational differences between disc and drum brakes.
Affective Domain:
- Appreciate the importance of a functional braking system for safety.
- Willingly participate in discussions about brake components and operations.
Psychomotor Domain:
- Identify major brake components such as master cylinder, wheel cylinder, brake calipers, brake pads, and brake shoes.
- Sketch simple diagrams illustrating the operation of disc and drum brakes.
Social Domain:
- Work collaboratively in identifying and discussing various braking system components.
Reference Materials
The following resources were used in planning this lesson:
- Senior Secondary Schools Education Curriculum
- State Unified Scheme of Work
- Automobile Mechanics by William H. Crouse and Donald L. Anglin
- https://www.youtube.com/watch?v=kYv_I-3j7l4
- https://www.youtube.com/watch?v=JmU8aYt7wU0
Instructional Materials
The teacher will teach this lesson with the aid of:
- Master cylinder
- Wheel cylinder
- Brake calipers
- Live vehicle (if available)
- Tools and equipment for brake inspection
- Charts showing diagrams of disc and drum brakes
Rationale for the Lesson
This lesson helps pupils understand how vehicle braking systems work, which is important for vehicle safety and maintenance. Understanding these systems enables pupils to diagnose basic brake faults and appreciate the technology involved in stopping a vehicle safely.
Prerequisite/Previous Knowledge
Pupils have a basic understanding of force, pressure, and simple mechanical linkages.
Lesson Content/Board Summary
BRAKING SYSTEM— MECHANICAL AND HYDRAULIC OPERATION OF DISC AND DRUM BRAKES
Definition of Braking System
A braking system is a mechanical device that inhibits motion by absorbing energy from a moving system. It is used for slowing or stopping a moving vehicle or preventing its motion.
Types of Braking Systems
Braking systems can be broadly categorized based on their method of force transmission:
- Mechanical Brakes
- Hydraulic Brakes
Mechanical Operation of Brakes
Mechanical brakes transmit force through physical linkages such as cables, rods, or levers. This method is common in parking brakes (handbrakes) where a cable directly pulls on brake shoes or calipers to hold the vehicle stationary. In older vehicles, some service brakes also used mechanical linkages.
Example (Parking Brake): When the handbrake lever is pulled, a cable connected to it pulls on a lever mechanism at the rear wheels, which in turn forces the brake shoes against the drum or actuates a small caliper on a disc.
Hydraulic Operation of Brakes
Hydraulic brakes transmit force through an incompressible fluid. This system operates based on Pascal’s Principle, which states that pressure applied to an enclosed fluid is transmitted undiminished to every portion of the fluid and the walls of the containing vessel.
Key Components:
- Master Cylinder: Converts the force from the brake pedal into hydraulic pressure.
- Brake Lines/Hoses: Carries the hydraulic fluid (brake fluid) from the master cylinder to the wheel cylinders/calipers.
- Wheel Cylinders (Drum Brakes) / Calipers (Disc Brakes): Converts hydraulic pressure back into mechanical force to apply the brakes.
Hydraulic Disc Brake Operation
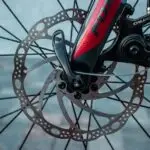
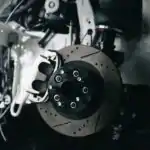
Disc brakes consist of a rotating disc (rotor) and a stationary caliper assembly. The caliper contains pistons and brake pads.
Operation Steps:
- When the brake pedal is pressed, the master cylinder generates hydraulic pressure.
- This pressure travels through the brake lines to the caliper.
- The hydraulic pressure forces the caliper pistons to move.
- The pistons push the brake pads against both sides of the rotating rotor.
- Friction between the pads and rotor slows down and stops the wheel.
Hydraulic Drum Brake Operation
Drum brakes consist of a rotating drum and stationary brake shoes and a wheel cylinder.
Operation Steps:
- When the brake pedal is pressed, the master cylinder generates hydraulic pressure.
- This pressure travels through the brake lines to the wheel cylinder located inside the brake drum.
- The hydraulic pressure forces the pistons in the wheel cylinder outwards.
- The pistons push the brake shoes against the inner surface of the rotating brake drum.
- Friction between the shoes and drum slows down and stops the wheel.
Operational Differences Between Disc and Drum Brakes
There are several key differences in how disc and drum brakes operate and perform:
- Heat Dissipation: Disc brakes dissipate heat more effectively due to their open design, reducing brake fade. Drum brakes tend to retain heat, making them more prone to fade during prolonged braking.
- Self-Adjustment: Many modern disc brakes are self-adjusting. Drum brakes may require manual adjustment or have automatic adjusters that can sometimes fail.
- Brake Fade: Disc brakes are less susceptible to brake fade (loss of braking power due to overheating) than drum brakes.
- Complexity: Drum brakes generally have more components (shoes, springs, adjusters) within the drum, making them more complex to service than disc brakes.
- Water Performance: Disc brakes shed water more easily, maintaining better performance in wet conditions. Drum brakes can temporarily lose effectiveness when wet.
- Stopping Power: Disc brakes generally offer superior stopping power and better modulation (control) compared to drum brakes, especially in high-performance applications.
Teaching Methods/Instructional Techniques
Discussion, Lecture, Demonstration, Question and Answer, Visual Aids
Instructional Procedures
Step 1: Introduction
Time: 5 minutes
Teaching Skill: Set Induction
Teacher’s Activity: The teacher greets the pupils and reviews the previous lesson. The teacher then introduces the new topic, “Braking System— Mechanical and Hydraulic Operation of Disc and Drum Brakes,” by asking pupils about the importance of brakes in a vehicle.
Pupils’ Activity: Pupils respond to the teacher’s questions and state the importance of brakes for safety.
Learning Point: Pupils are prepared for the lesson and understand its relevance.
Step 2: Definition of Braking System
Time: 5 minutes
Teaching Skill: Explanation/Definition
Teacher’s Activity: The teacher defines a braking system and introduces the two main types: mechanical and hydraulic brakes.
Pupils’ Activity: Pupils listen attentively and copy the definition into their notebooks.
Learning Point: Pupils understand the basic definition and types of braking systems.
Step 3: Mechanical Operation of Brakes
Time: 10 minutes
Teaching Skill: Demonstration/Explanation
Teacher’s Activity: The teacher explains the mechanical operation of brakes, using charts or a live vehicle’s parking brake mechanism to demonstrate how force is transferred through cables and linkages. The teacher highlights common applications.
Pupils’ Activity: Pupils observe the demonstration, ask questions, and take notes.
Learning Point: Pupils grasp the principle of mechanical brake operation and its applications.
Step 4: Hydraulic Operation – Principles and Components
Time: 5 minutes
Teaching Skill: Explanation
Teacher’s Activity: The teacher explains the principle of hydraulic operation based on Pascal’s Principle and identifies key components like the master cylinder and brake lines, showing them if instructional materials are available.
Pupils’ Activity: Pupils listen, observe the components, and understand the role of hydraulic fluid.
Learning Point: Pupils understand the fundamental principle behind hydraulic brakes and their main components.
Step 5: Hydraulic Operation – Disc Brakes
Time: 5 minutes
Teaching Skill: Demonstration/Explanation
Teacher’s Activity: The teacher explains the operation of hydraulic disc brakes, demonstrating with a brake caliper and rotor (if available) or pointing to a chart showing the fluid pathway and caliper action.
Pupils’ Activity: Pupils observe the demonstration, identify components like the caliper and brake pads, and follow the operational steps.
Learning Point: Pupils understand how hydraulic pressure actuates disc brakes.
Step 6: Hydraulic Operation – Drum Brakes
Time: 5 minutes
Teaching Skill: Demonstration/Explanation
Teacher’s Activity: The teacher explains the operation of hydraulic drum brakes, demonstrating with a wheel cylinder and brake shoes (if available) or pointing to a chart showing the shoe action inside the drum.
Pupils’ Activity: Pupils observe the demonstration, identify components like the wheel cylinder and brake shoes, and follow the operational steps.
Learning Point: Pupils understand how hydraulic pressure actuates drum brakes.
Step 7: Evaluation/Review
Time: 5 minutes
Teaching Skill: Questioning/Assessment
Teacher’s Activity: The teacher evaluates the learning by asking the following questions:
- What is a braking system?
- State two types of braking systems based on their operation.
- Explain how a mechanical brake operates.
- Describe the operational difference between disc and drum brakes regarding heat dissipation.
Pupils’ Activity: Pupils answer orally and in writing.
Learning Point: Pupils demonstrate understanding of the lesson.
Step 8: Conclusion
Time: 5 minutes
Teaching Skill: Summarization/Assignment
Teacher’s Activity: The teacher summarizes the main points of the lesson, emphasizing the importance of understanding different braking systems for vehicle safety and maintenance. The teacher assigns homework: “Draw and label simple diagrams of a hydraulic disc brake and a hydraulic drum brake.”
Pupils’ Activity: Pupils listen to the summary and copy down the homework.
Learning Point: Pupils consolidate their learning and are given a task to reinforce understanding.
Lesson Keywords
- Braking system – A mechanical device that inhibits motion by absorbing energy from a moving system.
- Mechanical brakes – Brakes that transmit force through physical linkages like cables or rods.
- Hydraulic brakes – Brakes that transmit force through an incompressible fluid based on Pascal’s Principle.
- Disc brake – A braking system where pads squeeze a rotating disc (rotor) to create friction.
- Drum brake – A braking system where shoes push against the inside of a rotating drum to create friction.
- Master cylinder – Converts brake pedal force into hydraulic pressure.
- Wheel cylinder – In drum brakes, converts hydraulic pressure into mechanical force to push brake shoes.
- Caliper – In disc brakes, houses pistons and brake pads to squeeze the rotor.
- Brake pads – Friction material used in disc brakes.
- Brake shoes – Friction material used in drum brakes.
- Pascal’s principle – Pressure applied to an enclosed fluid is transmitted undiminished throughout the fluid.
Differentiation
For struggling learners, the teacher will provide simplified diagrams and offer one-on-one explanations. More advanced pupils will be encouraged to research different types of brake fluids and their properties, or delve into the principles of Anti-lock Braking Systems (ABS).
Note for teachers using this lesson plan
Ensure to use visual aids like charts or actual brake components for effective demonstration. Emphasize safety precautions if using a live vehicle or disassembled brake parts. Encourage pupils to ask questions and relate the lesson to real-world vehicle operation and maintenance.


Community Join the conversation Open discussion +