

Note for teachers using this lesson plan
Before the lesson, ensure you have a collection of pictures or safe representations of harmful and sharp objects (e.g., blunt plastic scissors, toy knife, pictures of nails, pins, broken glass, matches). The central idea for pupils is to recognise these objects and understand that they should never touch them but immediately inform a trusted adult. Successful learning will be observed when pupils can point to harmful objects and verbally state “No touch!” or “Tell an adult!” when shown such items.
Class: Pre-School Level 2
Term: Second Term
Week: 4
Age: 3 years
Duration: 30 minutes
Subject: Health Habits
Curriculum Theme: Health Habits
Previous Lesson: Learning about personal hygiene
Topic: SAFETY: IDENTIFYING HARMFUL AND SHARP OBJECTS
Subject Matter: Safety: Identifying and Avoiding Harmful and Sharp Objects
Specific Objectives
By the end of the lesson, pupils should be able to:
Cognitive Domain
- Identify pictures of harmful and sharp objects.
- Name at least two harmful or sharp objects.
- State why some objects are dangerous.
Affective Domain
- Show caution when presented with pictures of sharp or harmful objects.
- Express willingness to tell an adult about dangerous objects.
Psychomotor Domain
- Point to harmful and sharp objects from a group of pictures.
- Demonstrate how to move away from a dangerous object.
Social Domain
- Participate in discussions about safety at home and school.
Reference Materials
- NAPPS National Unified Teaching Scheme for Pre-School Level 2
- Early Childhood Care and Education resources
- Suitable early-years health habits workbook
Instructional Materials
- Picture cards of various objects (e.g., knife, scissors, broken glass, nails, pins, blade, matches, spoon, cup, ball, crayon)
- Chart posters showing safe and unsafe objects
- Flash cards of harmful and sharp objects
- Storybook with safety themes
- Safe, blunt plastic toy knife and scissors (for demonstration, not play)
Rationale for the Lesson
This lesson is crucial for 3-year-olds as it teaches them to recognise common dangers in their environment. Understanding what objects can hurt them and how to react helps build essential safety awareness and promotes their well-being at home and in school.Prerequisite/Previous Knowledge
Pupils can identify common household objects and understand simple instructions like “stop” or “don’t touch.”Lesson Content/Board Summary
SAFETY: IDENTIFYING HARMFUL AND SHARP OBJECTS
Some objects around us can hurt us if we touch them or play with them. These are called harmful or dangerous objects.
What are Harmful and Sharp Objects?
- Harmful objects are things that can cause pain or injury.
- Sharp objects are things that have pointed edges or tips that can cut or prick you.
Examples of Harmful and Sharp Objects
- Nails: Can prick your skin.
- Pins: Small and sharp, can prick you.
- Blade: Very sharp, can cut you badly.
- Broken Glass: Has very sharp edges, can cut you deeply.
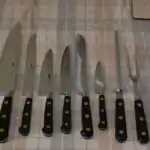
- Knives: Used for cutting food, but very sharp and dangerous for children.
- Scissors: Used for cutting paper, but can cut fingers if not used carefully by an adult.
- Matches/Fire: Can cause burns and fire.
How to Stay Safe
- Do NOT touch harmful or sharp objects.
- Tell an adult immediately if you see a harmful or sharp object.
- Keep away from places where these objects might be.
Key Words
- Harmful – Can hurt you.
- Sharp – Has a pointed edge that can cut or prick.
- Avoid – Keep away from.
- Adult – A grown-up person (like Mummy, Daddy, Teacher).
Safety Rhyme
Tune: Twinkle, Twinkle Little Star
Sharp things, sharp things, everywhere,
Knives and pins, we must beware.
Broken glass and blades so bright,
Never touch with all your might.
Sharp things, sharp things, don’t you touch,
Tell an adult, it means so much!
Actions: Point around for “everywhere”, shake head for “beware”, point to finger and then to an adult for “tell an adult”.
Watch and Learn About Dangerous Objects
💡 Teacher Guide for Using This Board Summary
How to teach the content: Explain what “harmful” and “sharp” mean using simple language. Show pictures of each object as you name them. Emphasize that these objects are not toys and should never be touched by children. Use a clear, firm voice when discussing the dangers.
What to show or demonstrate: Display picture cards of nails, pins, blades, broken glass, knives, scissors, and matches. Contrast them with safe objects (e.g., a spoon, a plastic cup). For “blade,” use a picture only. For scissors and knives, show a blunt toy version or a picture, stressing that only adults use them. Demonstrate how to shake your head and say “No!” to a dangerous object, and then point to an imaginary adult.
How to use the rhyme/song: Introduce the “Safety Rhyme” after discussing the examples. Sing it slowly with the pupils, demonstrating the actions. Repeat the rhyme 2-3 times to help them remember the message and actions.
How to use the video: Introduce the video as a way to see more dangerous things and how to stay safe. Play the video, pausing if necessary to point out specific objects and reinforce the “don’t touch, tell an adult” message. After watching, ask pupils to name one dangerous object they saw and what they should do if they see it.
What to watch for: Observe if pupils can correctly identify harmful objects from pictures and if they understand the instruction to “tell an adult.” Correct any misconceptions gently and reinforce the safety message.
Teaching Methods/Instructional Techniques
- Play-based Learning
- Demonstration
- Guided Practice
- Songs and Rhymes
- Picture Talk
- Question and Answer
- Repetition
- Video Presentation
Instructional Procedures
Step 1: Introduction
Time: 3 minutes
Teaching Skill: Engagement/Recall
Teacher’s Activity: The teacher greets the pupils and leads them in a simple “Good Morning” song. The teacher then asks pupils what they remember about staying healthy (e.g., washing hands). The teacher introduces today’s topic: “Today, we will learn about things that can hurt us and how to stay safe!”
Pupils’ Activity: Pupils respond to greetings, sing the song, and share what they remember about staying healthy. They listen attentively to the introduction.
Learning Point: Pupils are engaged and ready to learn about safety.
Step 2: Presentation (What are harmful and sharp objects?)
Time: 5 minutes
Teaching Skill: Explanation/Visual Aid
Teacher’s Activity: The teacher explains in simple terms what “harmful” and “sharp” objects are. The teacher shows a picture of a sharp object (e.g., a pencil tip) and a safe object (e.g., a soft toy) for comparison. “Harmful objects can hurt us. Sharp objects have pointy parts that can cut or prick us.”
Pupils’ Activity: Pupils listen to the explanation and observe the pictures, pointing to the sharp object when asked.
Learning Point: Pupils understand the basic concepts of harmful and sharp.
Step 3: Demonstration (Examples of Harmful and Sharp Objects)
Time: 6 minutes
Teaching Skill: Demonstration/Identification
Teacher’s Activity: The teacher displays picture cards of specific harmful and sharp objects one by one (nails, pins, blade, broken glass, knife, scissors, matches). For each, the teacher names the object and briefly explains its danger (e.g., “This is a nail, it can prick you!”). The teacher emphasizes, “Don’t touch!”
Pupils’ Activity: Pupils observe the picture cards, listen to the teacher, and repeat the names of the objects. They practice saying “Don’t touch!”
Learning Point: Pupils identify specific harmful and sharp objects and understand their immediate danger.
Step 4: Guided Practice (Identifying Harmful Objects)
Time: 4 minutes
Teaching Skill: Guided Practice/Recognition
Teacher’s Activity: The teacher lays out a mix of picture cards (harmful and safe objects). The teacher asks pupils, “Point to something that can hurt you.” or “Show me a sharp object.” The teacher provides positive reinforcement for correct identifications.
Pupils’ Activity: Pupils take turns pointing to the harmful or sharp objects among the mixed cards.
Learning Point: Pupils practice identifying harmful and sharp objects independently.
Step 5: Reinforcement (Safety Rhyme and Video)
Time: 5 minutes
Teaching Skill: Reinforcement/Engagement
Teacher’s Activity: The teacher leads the pupils in singing the “Safety Rhyme” with actions. After the rhyme, the teacher introduces and plays the short video about dangerous objects. The teacher encourages pupils to watch carefully and remember what to do.
Pupils’ Activity: Pupils sing the rhyme with actions. They watch the video attentively and try to identify objects shown.
Learning Point: The safety message is reinforced through song and visual media.
Step 6: Application (Avoiding Harmful Objects)
Time: 3 minutes
Teaching Skill: Application/Role-play
Teacher’s Activity: The teacher asks, “What should you do if you see a sharp knife on the table?” The teacher guides pupils to say, “Don’t touch! Tell Mummy/Daddy/Teacher!” The teacher models a simple role-play of finding a dangerous object and telling an adult.
Pupils’ Activity: Pupils respond orally, saying “Don’t touch! Tell an adult!” They participate in a simple role-play of telling an adult about a dangerous object.
Learning Point: Pupils learn the correct action to take when encountering harmful objects.
Step 7: Evaluation/Review
Time: 4 minutes
Teaching Skill: Questioning/Assessment
Teacher’s Activity: The teacher checks pupils’ understanding through short questions and practical tasks.
- “Show me a picture of a sharp object.”
- “What should you do if you see broken glass on the floor?”
- “Name one thing that can cut you.”
- “Who should you tell if you find a dangerous object?”
Pupils’ Activity: Pupils respond orally and demonstrate the required skill where appropriate (e.g., pointing to a picture, saying “Tell an adult”).
Learning Point: Pupils demonstrate understanding of the lesson.
Step 8: Conclusion
Time: 2 minutes
Teaching Skill: Summarisation
Teacher’s Activity: The teacher summarises the lesson by repeating, “Always remember: don’t touch harmful or sharp objects, and always tell a grown-up!” The teacher praises pupils for their participation.
Pupils’ Activity: Pupils listen to the summary and repeat the key safety message.
Learning Point: Pupils consolidate the main safety rule.
Lesson Keywords
- Harmful – Can hurt you or make you sick.
- Sharp – Has a pointed edge that can cut or prick.
- Avoid – To keep away from something.
- Adult – A grown-up person, like your parents or teacher.
Differentiation
- Support: For pupils who struggle, use fewer picture cards at a time, provide hand-over-hand guidance for pointing, and repeat key phrases like “Don’t touch!” and “Tell an adult!” more frequently. Use larger, more distinct pictures.
- Extension: For pupils who grasp the concept quickly, encourage them to name other harmful objects they might see at home (e.g., medicines, hot water, electrical sockets) and explain why they are dangerous. Ask them to suggest different ways to tell an adult.
Community Join the conversation Open discussion +