

Class: Primary Six
Term: First term
Subject: Pre-vocational Studies
Curriculum Theme: Agricultural Science
Previous Lesson: Methods Of Farm Produce Preservation, Bagging And Bottling
Topic: Steps in Sun Drying Farm Produce
Content/Learning Area: Steps in Sun Drying Farm Produce
Time Allocation: 40 minutes
Performance Objectives
By the end of the lesson, pupils should be able too:
- cognitive Domain:
List the steps involved in sun drying farm produce.
- Affective Domain:
Show an thankfulness for the importance of preserving farm produce through sun drying.
- Psychomotor Domain:
Demonstrate how to spread farm produce for sun drying in a practical exercise.
- Social Domain:
Work collaboratively in groups to discuss the benefits of sun drying farm produce.
Reference Materials
- 9 – Years Basic Education curriculum
- Abuja Educational Resource Centre Scheme of Work
- NAPPS National Unified Scheme of Work
- Online details from CGSpace – DRYING AGRICULTURAL PRODUCE
- Relevant Textbooks
Instructional Materials
To deliver this lesson, the teacher will use the following materials:
- Farm produce (e.g., grains, fruits, vegetables)
- Trays or mats
- Clean water
- A sunny outdoor space
- Whiteboard and marker
Rationale for the Lesson
Sun drying is a crucial, cost-effective preservation method, especially valuable in areas lacking refrigeration. Understanding this technique is vital for food security and reducing food waste.
Prerequisite/previous Knowledge
Pupils have basic knowledge of food preservation methods.
Lesson Content
steps in Sun Drying Farm Produce
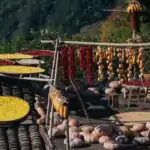
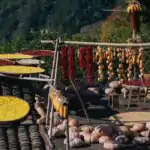
Sun drying is an ancient method of preserving farm produce. It uses the sunS heat to remove moisture, preventing spoilage.
- Select the Produce: Choose fresh, clean produce free from spoilage.
- Clean the Produce: Wash thoroughly with clean water.
- Prepare a Drying Area: Find a sunny, well-ventilated spot and lay out a clean mat or tray.
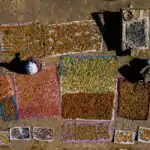
- Spread the produce: arrange produce evenly, ensuring each piece has space to dry.
- Monitor Drying Process: Regularly check and turn the produce for even drying.
- Store the dried Produce: Once dry, store in an airtight container.
Steps for Safe Sun-drying
Select sound produce, wash or sort as required, cut evenly, blanch only when the approved method calls for it, arrange on a clean raised tray, cover with safe mesh, turn regularly, protect from rain, test dryness, cool and package in a dry container.
Record start and finish dates and inspect later for moisture or mould. Do not taste questionable produce to test safety.
Teaching Methods
To deliver this lesson, the teacher will adopt the following methods: Interactive discussion, demonstration, direct instruction, hands-on activity, and group work.
Instructional Procedures
To deliver this lesson, the teacher will adopt the following steps:
Step 1: Introduction
Time: 5 mins
Teaching Skill: Set Induction
Teacher’s Activity: Asks pupils about their experiences with farm produce preservation.
Pupils’ Activity: Share their experiences and knowledge.
step 2: Explanation of Sun Drying
Time: 10 mins
Teaching Skill: Explanation
Teacher’s Activity: Explains the sun drying method and its importance.
Pupils’ Activity: listen attentively and ask clarifying questions.
Step 3: Steps in Sun Drying
Time: 10 mins
Teaching Skill: Direct Instruction
Teacher’s Activity: Explains the steps involved in sun drying.
Pupils’ Activity: Take notes and ask questions.
Step 4: Practical Demonstration
Time: 5 mins
Teaching Skill: Demonstration
Teacher’s Activity: Demonstrates the preparation and drying process.
Pupils’ Activity: Observe and participate in the demonstration.
Step 5: Group Discussion
Time: 5 mins
Teaching Skill: Facilitation
Teacher’s Activity: Facilitates group discussions on the benefits of sun drying.
Pupils’ Activity: Discuss and share their thoughts in groups.
Step 6: Evaluation/Review
Time: 3 mins
Teaching Skill: Questioning
Teacher’s Activity: Asks questions to assess understanding.
Pupils’ Activity: Answer the questions.
Step 7: Conclusion
Time: 2 mins
Teaching Skill: Summarizing
Teacher’s Activity: Reviews key points and gives a closing remark.
Pupils’ Activity: Listen and ask final questions.
Lesson Keywords
- Sun Drying – A method of preserving food by removing moisture using sunlight.
- Farm Produce – agricultural products such as grains, fruits, and vegetables.
- Preservation – The process of preventing food from spoiling.
- Moisture – The water content in food that can lead to spoilage.
- Airtight Container – A container that prevents air from entering, used for storing dried produce.
Lesson evaluation
To evaluate the learning, the teacher asks pupils to:
- What is sun drying?
- Name three steps in sun drying farm produce.
- Why is even spreading crucial during sun drying?
- What happens after the produce is fully dry?
- Discuss one benefit of sun drying in groups.
Assignment/homework
- List five types of farm produce that can be preserved through sun drying.
- Research and write a short paragraph on the importance of sun drying in food preservation.
- Describe the ideal conditions for sun drying farm produce.
Differentiation
- For slower learners: Provide one-on-one assistance during the practical demonstration.
- For advanced learners: Advanced pupils can research additional sun-drying techniques and present their findings to the class.
- For visual/auditory/kinesthetic learners: Use visual aids, verbal explanations, and hands-on activities to cater to different learning styles.
Note for teachers
Ensure to provide clear and concise instructions during the practical demonstration. Monitor pupils’ participation and provide feedback as needed. Emphasize the importance of hygiene and safety during the sun-drying process.
Community Join the conversation Open discussion +