

Class: Junior Secondary School 3 (JSS3, JSS 3)
Term: 2nd Term
Week: 5 – 6
Age: 14 years
Duration: 45 minutes
Subject: Basic Science And Technology
Curriculum Theme: Basic Technology
Previous Lesson: Simple Woodwork Projects and Tools
Topic: Metal Work Projects – Metal Joining
Subject Matter: Methods of joining metals, Tools and materials used for joining metals
Specific Objectives
By the end of the lesson, pupils should be able to:
- Cognitive Domain:
(a) Explain the meaning of metal joining.
(b) Identify and describe methods used in joining metals. - Affective Domain:
(a) Show interest in metal work activities and safety practices.
(b) Appreciate the importance of proper metal joining in everyday tools and structures. - Psychomotor Domain:
(a) Demonstrate correct handling of basic metal joining tools.
(b) Perform simple metal joining procedures under supervision. - Social Domain:
(a) Work cooperatively in groups during practical demonstrations.
(b) Share tools responsibly with classmates.
Reference Materials
The following resources was used in planning this lesson:
- 9 Years Basic Education Curriculum
- Lagos State Unified Scheme of Work for Junior Secondary Schools
- Wikipedia – Brazing
- Relevant Textbooks
Instructional Materials
The teacher will teach this lesson with the aid of:
- Charts showing metal joining methods
- Samples of joined metals
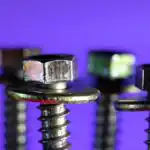
- Rivets, bolts, and nuts
- Pictures of welding and soldering processes
- Chalkboard and chalk
Rationale for the Lesson
This lesson equips learners with basic technological skills and knowledge needed to understand how metal objects are constructed and repaired in daily life.
Prerequisite/Previous Knowledge
Pupils have prior knowledge of metals and their uses from earlier Basic Technology lessons and have seen joined metal objects in everyday life.
Lesson Content
Metal Work Projects – Metal Joining
Meaning of Metal Joining
Metal joining is the process of connecting two or more metal parts together to form a single strong unit. It is commonly used in making tools, machines, furniture, and buildings.
Methods of Joining Metals
Different methods are used to join metals depending on the type of metal and the purpose of the product.
The following are methods of joining metals:
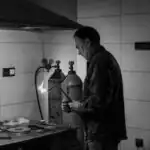
- Welding – joining metals by melting them together using heat.
- Soldering – joining metals using a low melting metal called solder.
- Brazing – joining metals using molten filler metal at high temperature.
- Riveting – joining metals using rivets hammered into holes.
- Bolting and Nutting – joining metals using bolts and nuts.
Tools and Materials Used for Joining Metals
Metal joining requires specific tools and materials to ensure strength and safety.
These include:
- Welding machine
- Soldering iron
- Rivets
- Bolts and nuts
- Hammer
- Protective goggles
Teaching Methods/Instructional Techniques:
Discussion, Explanation, Demonstration, Visual Aids, Group Work
Instructional Procedures
To deliver this lesson, the teacher will adopt the following steps:
Step 1: Introduction
Time: 5 minutes
Teaching Skill: Set Induction
Teacher’s Activity: The teacher asks pupils questions about metal objects they use daily and briefly reviews previous knowledge of metals.
Pupils’ Activity: Pupils respond to questions and mention examples of metal objects.
Learning Point: Metals are commonly used materials that can be joined together.
Step 2: Meaning of Metal Joining
Time: 8 minutes
Teaching Skill: Explanation
Teacher’s Activity: The teacher explains the meaning of metal joining and gives everyday examples.
Pupils’ Activity: Pupils listen attentively and ask questions.
Learning Point: Metal joining is the process of connecting metal parts together.
Step 3: Methods of Joining Metals
Time: 12 minutes
Teaching Skill: Demonstration
Teacher’s Activity: The teacher explains and displays charts showing different methods of metal joining.
Pupils’ Activity: Pupils observe and identify methods shown.
Learning Point: Metals can be joined using various methods such as welding and riveting.
Step 4: Tools and Materials for Metal Joining
Time: 8 minutes
Teaching Skill: Demonstration
Teacher’s Activity: The teacher shows samples of tools and materials used for metal joining and explains their uses.
Pupils’ Activity: Pupils identify the tools and describe their uses.
Learning Point: Specific tools and materials are required for metal joining.
Step 5: Note-Taking
Time: 5 minutes
Teaching Skill: Explanation
Teacher’s Activity: The teacher writes a summary of the lesson on the board for pupils to copy.
Pupils’ Activity: Pupils copy the notes into their notebooks.
Learning Point: Proper notes help in revision and understanding.
Step 6: Evaluation/Review
Time: 5 minutes
Teaching Skill: Questioning
Teacher’s Activity: The teacher evaluates the learning by asking the following questions:
- What is metal joining?
- Mention three methods of joining metals.
- List two tools used in metal joining.
Pupils’ Activity: Pupils respond to the questions.
Learning Point: Assessment helps to confirm understanding.
Step 7: Conclusion
Time: 2 minutes
Teaching Skill: Summary
Teacher’s Activity: The teacher summarizes the lesson and links it to future practical activities.
Pupils’ Activity: Pupils listen attentively.
Learning Point: Metal joining is an important skill in technology.
Lesson Keywords
- Metal joining – connecting metal parts together
- Welding – joining metals by melting
- Riveting – joining metals with rivets
- Soldering – joining metals using solder
- Tools – equipment used for work
Differentiation
Use group work, visual aids, and simple explanations to support learners with different abilities.
Note for teachers using this lesson plan
Ensure safety precautions are emphasized when discussing metal joining tools and processes, even during demonstrations.


Community Join the conversation Open discussion +