

Class: Junior Secondary School 3 (JSS 3 / JS3)
Term: 3rd Term
Week: 2
Age: 14 years
Duration: 45 minutes
Subject: Basic Science and Technology
Curriculum Theme: Basic Technology
Previous Lesson: Track and Field: 1. Pole Vault Skills.
Topic: FAULT DETECTION
Subject Matter: Definition (trouble shooting): Tools for fault detection
Specific Objectives
By the end of the lesson, pupils should be able to:
Cognitive Domain:
- Define troubleshooting.
- Identify various tools used for fault detection.
- State the function of different fault detection tools.
Affective Domain:
- Appreciate the importance of systematic fault detection.
- Show interest in learning how to use basic fault detection tools.
Psychomotor Domain:
- List at least five tools used for fault detection.
- Demonstrate the basic use of a multimeter for continuity testing (if available).
Social Domain:
- Collaborate with peers to discuss common faults in household appliances.
- Understand how fault detection contributes to safety and efficiency.
Reference Materials
The following resources were used in planning this lesson:
- 9 Years Basic Education Curriculum
- State Unified Scheme of Work
- Basic Science and Technology for Junior Secondary Schools Book 3
- https://www.youtube.com/watch?v=J_J5h2p08jY
- https://www.youtube.com/watch?v=2r5pL41-k3c
Instructional Materials
The teacher will teach this lesson with the aid of:
- Charts showing various fault detection tools.
- A functional multimeter (if available).
- A screwdriver and pliers.
- Examples of faulty simple devices (e.g., non-working torchlight, radio).
Rationale for the Lesson
This lesson helps pupils understand how to identify and solve problems in machines and systems. It enables them to recognize common faults and the tools used to find them, which is useful in daily life and for future technical skills.
Prerequisite/Previous Knowledge
Pupils should have basic knowledge of simple electrical circuits, tools, and common household appliances.
Lesson Content/Board Summary
FAULT DETECTION
Definition of Troubleshooting
Troubleshooting is a systematic process of diagnosing and solving problems or faults within a system, machine, or process. It involves identifying the cause of a malfunction and taking steps to correct it to restore normal operation.
Tools for Fault Detection
Various tools are used to detect faults in different systems. These tools help technicians identify the exact location and nature of a problem. Some common tools include:
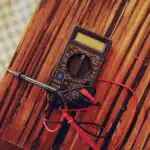
- Multimeter: Used to measure voltage, current, and resistance in electrical circuits. It helps check for continuity, open circuits, or short circuits.
- Screwdrivers: Essential for opening casings, tightening loose connections, or disassembling parts to access internal components.
- Pliers: Used for gripping, bending, or cutting wires and small components during repair or inspection.
- Spanners/Wrenches: For tightening or loosening nuts and bolts, especially in mechanical systems.
- Test Lamps/Continuity Testers: Simple tools to check if an electrical circuit is complete or if power is present.
- Diagnostic Software: Used in electronic and computer systems to read error codes, monitor system performance, and identify software or hardware issues.
- Visual Inspection: Though not a physical tool, careful observation for signs like smoke, burnt components, loose wires, or unusual noises is a primary method of fault detection.
- Thermal Imagers: Detect heat signatures to identify overheating components in electrical or mechanical systems.
Teaching Methods/Instructional Techniques
Discussion, Lecture, Demonstration, Question and Answer, Visual Aids
Instructional Procedures
Step 1: Introduction
Time: 5 minutes
Teaching Skill: Set Induction
Teacher’s Activity: The teacher greets the pupils and asks them if they have ever experienced a faulty appliance at home, like a non-working fan or television. The teacher then introduces the topic: Fault Detection.
Pupils’ Activity: Pupils respond to the teacher’s questions and listen attentively to the introduction.
Learning Point: Pupils are introduced to the concept of faults and the need for detection.
Step 2: Definition of Troubleshooting
Time: 10 minutes
Teaching Skill: Explanation/Definition
Teacher’s Activity: The teacher explains the meaning of troubleshooting, emphasizing it as a systematic process of identifying and solving problems.
Pupils’ Activity: Pupils listen, take notes, and ask questions for clarification.
Learning Point: Pupils understand the definition of troubleshooting.
Step 3: Introduction to Fault Detection Tools
Time: 8 minutes
Teaching Skill: Listing/Identification
Teacher’s Activity: The teacher introduces various tools used for fault detection, such as multimeters, screwdrivers, pliers, and test lamps, showing real tools or charts.
Pupils’ Activity: Pupils observe the tools/charts and identify them as the teacher calls them out.
Learning Point: Pupils become familiar with common fault detection tools.
Step 4: Functions of Multimeter and Screwdriver
Time: 7 minutes
Teaching Skill: Demonstration/Explanation
Teacher’s Activity: The teacher explains and demonstrates the basic functions of a multimeter (e.g., checking continuity) and screwdrivers in fault detection.
Pupils’ Activity: Pupils pay attention to the demonstrations and explanations, asking questions about their uses.
Learning Point: Pupils understand the specific uses of multimeters and screwdrivers.
Step 5: Functions of Pliers, Spanners, and Test Lamps
Time: 7 minutes
Teaching Skill: Explanation/Discussion
Teacher’s Activity: The teacher further explains the functions of pliers, spanners/wrenches, and test lamps, providing practical examples of where they would be used.
Pupils’ Activity: Pupils listen and contribute to the discussion by sharing their experiences or observations.
Learning Point: Pupils learn the uses of other essential fault detection tools.
Step 6: Other Fault Detection Methods
Time: 3 minutes
Teaching Skill: Elaboration
Teacher’s Activity: The teacher mentions other methods like visual inspection, diagnostic software, and thermal imagers, briefly explaining their application.
Pupils’ Activity: Pupils listen and note down these additional methods.
Learning Point: Pupils are aware of a broader range of fault detection techniques.
Step 7: Evaluation/Review
Time: 5 minutes
Teaching Skill: Questioning/Assessment
Teacher’s Activity: The teacher evaluates the learning by asking the following questions:
- What is troubleshooting?
- List three tools used for fault detection.
- Explain the use of a multimeter in fault detection.
- Mention two non-physical methods of detecting faults.
Pupils’ Activity: Pupils answer orally and in writing.
Learning Point: Pupils demonstrate understanding of the lesson.
Step 8: Conclusion
Time: 2 minutes
Teaching Skill: Summarization
Teacher’s Activity: The teacher summarizes the key points of the lesson, reinforcing the importance of fault detection in daily life and technology. The teacher gives pupils an assignment to identify a common fault in a household item and suggest a tool for its detection.
Pupils’ Activity: Pupils listen to the summary and copy the assignment.
Learning Point: Pupils consolidate their understanding and are given a task to apply their knowledge.
Lesson Keywords
- Troubleshooting – A systematic process of identifying and solving problems in a system.
- Fault Detection – The process of locating and identifying the cause of a malfunction.
- Multimeter – An electronic measuring instrument that combines several measurement functions in one unit.
- Continuity – The presence of a complete path for current flow in an electrical circuit.
- Diagnostic Software – Computer programs used to identify and troubleshoot issues in hardware or software.
Differentiation
For pupils who grasp concepts quickly, the teacher can challenge them to research more advanced fault detection techniques or common faults in specific appliances. For those needing more support, the teacher will provide simplified explanations, repeat demonstrations, and offer one-on-one guidance, focusing on identifying basic tools and their primary uses.
Note for teachers using this lesson plan
Teachers should ensure they have actual tools or clear visual aids for demonstration to make the lesson practical and engaging. Encourage pupils to share their experiences with faulty devices to make the topic relatable. Emphasize safety precautions when discussing electrical fault detection.

Community Join the conversation Open discussion +