

Class: Junior Secondary School 1 (JSS 1 / JS1)
Term: 3rd Term
Week: 7 – 8
Age: 12 years
Duration: 45 minutes
Subject: Basic Science and Technology
Curriculum Theme: Computer Studies / Information Technology
Previous Lesson: Advantages and Disadvantages of, Pictures.
Topic: MASTERY OF THE KEYBOARD
Subject Matter: Description of keyboard, Types of keyboard, Sections of the keyboard, Correct sitting position, Using keyboard to type.
Specific Objectives
By the end of the lesson, pupils should be able to:
Cognitive Domain:
- Describe what a keyboard is.
- List different types of keyboards.
- Identify the various sections of a keyboard.
- Explain the correct sitting position for typing.
Affective Domain:
- Appreciate the importance of proper keyboard usage.
- Show interest in developing basic typing skills.
Psychomotor Domain:
- Demonstrate the correct sitting posture for typing.
- Practice typing simple words or sentences using a keyboard.
Social Domain:
- Collaborate with classmates during practical keyboard exercises.
Reference Materials
The following resources were used in planning this lesson:
- 9 Years Basic Education Curriculum
- State Unified Scheme of Work
- Basic Science and Technology for Junior Secondary Schools 1
Instructional Materials
The teacher will teach this lesson with the aid of:
- Actual computer keyboards
- Pictures and charts showing different keyboards and their sections
- Video clips demonstrating keyboard usage and correct posture
- Projector (if available)
Rationale for the Lesson
This lesson helps pupils to understand a fundamental input device of a computer, the keyboard. It enables them to identify different types and sections of keyboards and develop basic typing skills with correct posture, which is important for their future computer literacy.
Prerequisite/Previous Knowledge
Pupils should have a basic understanding of what a computer is and some of its main parts.
Lesson Content/Board Summary
MASTERY OF THE KEYBOARD
Description of a Keyboard
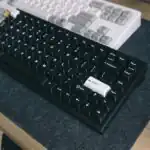
A keyboard is an input device used to enter data and commands into a computer. It has keys arranged in a specific pattern, similar to a typewriter, which represent letters, numbers, symbols, and functions.
Types of Keyboard
The following are common types of keyboards:
- QWERTY Keyboard: This is the most common type, named after the first six keys on the top-left row of letters.
- Ergonomic Keyboard: Designed to reduce strain on wrists and hands, often split or curved.
- Gaming Keyboard: Features additional keys, backlighting, and faster response times for gaming.
- Multimedia Keyboard: Includes extra keys for controlling media functions like volume, play/pause, and internet browsing.
- Virtual Keyboard: Software-based keyboard displayed on a screen, used with touchscreens or a mouse.
Sections of the Keyboard
A standard keyboard is typically divided into several sections:
- Alphanumeric Section: Contains letters (A-Z), numbers (0-9), and symbols, used for typing text.
- Numeric Keypad: A block of number keys, usually on the right side, for quick entry of numerical data.
- Function Keys (F1-F12): Located at the top, they perform specific functions depending on the software being used.
- Navigation/Cursor Control Keys: Includes arrow keys, Home, End, Page Up, Page Down for moving the cursor or scrolling.
- Special Keys: Such as Enter, Shift, Ctrl, Alt, Delete, Backspace, and Tab, which perform various control functions.
Correct Sitting Position for Typing
Maintaining a correct posture while typing is important to prevent discomfort and injury. Key points for correct sitting position include:
- Chair Height: Adjust your chair so your feet are flat on the floor or on a footrest, with knees at a 90-degree angle.
- Back Support: Sit upright with your back supported by the chair, shoulders relaxed.
- Monitor Distance: Keep the monitor at arm’s length, with the top of the screen at or slightly below eye level.
- Keyboard and Mouse Placement: Position the keyboard directly in front of you, close enough so your elbows are at a 90-degree angle and wrists are straight (not bent up or down).
- Wrist Position: Keep your wrists straight and floating above the keyboard, not resting on the desk or a wrist rest while typing.
Using the Keyboard to Type
Typing involves pressing keys to input characters. Practice is essential to improve speed and accuracy. Begin by practicing typing letters, then simple words and sentences, focusing on using both hands and the correct finger placement for each key.
Teaching Methods/Instructional Techniques
Discussion, Lecture, Demonstration, Question and Answer, Visual Aids
Instructional Procedures
Step 1: Introduction
Time: 5 minutes
Teaching Skill: Set Induction
Teacher’s Activity: The teacher greets the pupils, reviews the previous lesson, and introduces the new topic, “Mastery of the Keyboard,” by asking pupils what they use to type on a computer.
Pupils’ Activity: Pupils respond to the teacher’s questions and listen attentively to the introduction.
Learning Point: Pupils recall previous knowledge and are introduced to the new lesson.
Step 2: Description of Keyboard
Time: 8 minutes
Teaching Skill: Explanation/Demonstration
Teacher’s Activity: The teacher displays a keyboard and uses charts/pictures to describe what a keyboard is, explaining its primary function as an input device.
Pupils’ Activity: Pupils observe the keyboard and charts, and listen to the explanation.
Learning Point: Pupils understand the basic definition and function of a keyboard.
Step 3: Types of Keyboard
Time: 8 minutes
Teaching Skill: Explanation/Visual Aids
Teacher’s Activity: The teacher shows different types of keyboards (e.g., QWERTY, ergonomic) using actual keyboards, pictures, or video clips, explaining their unique features.
Pupils’ Activity: Pupils identify and differentiate between various types of keyboards.
Learning Point: Pupils learn about the different forms and uses of keyboards.
Step 4: Sections of the Keyboard
Time: 8 minutes
Teaching Skill: Identification/Demonstration
Teacher’s Activity: The teacher points out and explains the various sections of a standard keyboard, such as the alphanumeric section, numeric keypad, function keys, and navigation keys.
Pupils’ Activity: Pupils identify and name the different sections of the keyboard as explained by the teacher.
Learning Point: Pupils can locate and understand the purpose of different key groups on a keyboard.
Step 5: Correct Sitting Position
Time: 8 minutes
Teaching Skill: Demonstration/Practice
Teacher’s Activity: The teacher demonstrates and explains the correct sitting posture for typing, including chair height, back support, monitor distance, and wrist position.
Pupils’ Activity: Pupils practice and adjust their sitting positions according to the teacher’s instructions.
Learning Point: Pupils learn and practice ergonomically correct posture for safe typing.
Step 6: Basic Typing Practice
Time: 8 minutes
Teaching Skill: Guided Practice
Teacher’s Activity: The teacher guides pupils through basic typing exercises, starting with individual letters, then simple words, emphasizing the use of both hands.
Pupils’ Activity: Pupils attempt to type simple characters and words on available keyboards or simulated keyboards.
Learning Point: Pupils begin to develop practical typing skills.
Step 7: Evaluation/Review
Time: 5 minutes
Teaching Skill: Questioning/Assessment
Teacher’s Activity: The teacher evaluates the learning by asking the following questions:
- What is a keyboard?
- Mention two types of keyboards you know.
- List three sections of a keyboard.
- Explain the correct sitting position for typing.
Pupils’ Activity: Pupils answer orally and in writing.
Learning Point: Pupils demonstrate understanding of the lesson.
Step 8: Conclusion
Time: 3 minutes
Teaching Skill: Summarization
Teacher’s Activity: The teacher summarizes the key points of the lesson and gives pupils homework to draw and label a keyboard.
Pupils’ Activity: Pupils listen to the summary and copy down the homework.
Learning Point: The lesson is consolidated and pupils are given a task to reinforce learning.
Home Task: Record two correct examples of MASTERY OF THE KEYBOARD from the lesson or home environment and explain each in your own words.
Lesson Keywords
- Keyboard – An input device used to enter data into a computer.
- QWERTY – The most common keyboard layout.
- Ergonomic – Designed for comfort and to reduce strain.
- Alphanumeric – Section of the keyboard with letters and numbers.
- Numeric keypad – Section of the keyboard with numbers arranged like a calculator.
- Posture – The way one holds their body while sitting or standing.
- Typing – The process of writing using a keyboard.
Differentiation
For pupils who grasp concepts quickly, the teacher can provide more complex typing exercises. For those who need more support, the teacher will offer one-on-one guidance during practical sessions and encourage peer support. Group activities for identifying keyboard sections can also be used.
Note for teachers using this lesson plan
It is important to provide ample practical demonstration of keyboard parts and correct posture. If actual computers are limited, use printed keyboard layouts for identification and allow pupils to simulate typing movements. Emphasize the importance of correct posture to prevent future health issues related to computer use.

Community Join the conversation Open discussion +