

Class: Senior Secondary School 1 (SS1, SS 1, SSS1, SSS 1)
Term: 3rd Term
Week: 6
Age: 15 years
Duration: 45 minutes
Subject: Metal Work
Curriculum Theme: Pre-Vocational Studies
Previous Lesson: Drill Breakage Causes and Safe Fixing of Drills.
Topic: Type of Drills
Subject Matter: straight shank drills, carbide tipped drills, sub land drills, identifying drill types, fixing drills in the chuck, basic drilling operation practice
Specific Objectives
By the end of the lesson, pupils should be able to:
Cognitive Domain:
- Identify at least three types of drills.
- Differentiate between straight shank drills and carbide tipped drills.
Affective Domain:
- Appreciate the importance of selecting the correct drill for different materials.
- Show readiness to follow safety procedures during drilling operations.
Psychomotor Domain:
- Correctly fix a drill bit into a drill press chuck.
- Perform a basic drilling operation on a given material.
Social Domain:
- Collaborate with peers during practical identification and drilling exercises.
Reference Materials
The following resources were used in planning this lesson:
- 9 Years Basic Education Curriculum for Metal Work (Senior Secondary).
- State Unified Scheme of Work for Senior Secondary Metal Work.
- Metal Work for Senior Secondary Schools by A.O. Okoro.
Instructional Materials
The teacher will teach this lesson with the aid of:
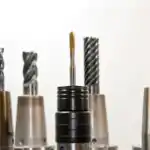
- A set of different drill bits (straight shank, carbide tipped, sub land).
- A drill press.
- An identification chart showing various drill types.
- Workpiece materials (wood, mild steel).
- Safety goggles.
Rationale for the Lesson
This lesson helps pupils understand the different types of drills and their uses in metalwork. Knowing how to identify and use the correct drill bit is important for performing drilling operations safely and effectively in various practical applications.
Prerequisite/Previous Knowledge
Pupils should have basic knowledge of hand tools and workshop safety rules.
Lesson Content/Board Summary
Type of Drills
Introduction to Drills
Drills are cutting tools used to create cylindrical holes in various materials. They are designed to be rotated and pressed against a workpiece to remove material.
Types of Drills
The following are common types of drills:
- Straight Shank Drills: These drills have a cylindrical shank of the same diameter as the cutting part. They are commonly used for general-purpose drilling and are held in a drill chuck.
- Carbide Tipped Drills: These drills have cutting edges made of carbide inserts, which are brazed or welded onto a steel body. Carbide is very hard and resistant to wear, making these drills suitable for tough materials like cast iron, hardened steel, and abrasive plastics.
- Sub Land Drills: These are specialized drills with multiple lands at different diameters along their length. They are designed to drill multiple diameters or perform operations like counterboring and chamfering in a single pass, improving efficiency.
Identifying Drill Types
Drill types can be identified by the following characteristics:
- Shank Design: Straight, tapered, or hexagonal shanks.
- Material of Cutting Edge: High-speed steel (HSS) or carbide.
- Geometry: Shape of the flutes, point angle, and number of lands.
- Markings: Information stamped on the shank, such as size, material, or manufacturer.
Fixing Drills in the Chuck
The following steps are involved in securely fixing a drill bit into a drill press chuck:
- Select the appropriate drill bit size and type for the required hole.
- Ensure the drill press is turned off and unplugged before changing bits.
- Open the chuck jaws slightly wider than the drill shank using the chuck key.
- Insert the drill shank fully into the chuck, ensuring it is centered.
- Tighten the chuck jaws firmly and evenly using the chuck key.
- Remove the chuck key immediately after tightening to prevent it from flying off during operation.
Basic Drilling Operation Practice
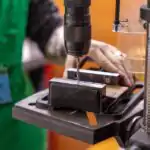
Basic drilling involves preparing the workpiece, securely clamping it to the drill press table, selecting the correct drill speed, bringing the rotating drill into contact with the material, and applying steady, even pressure to create a hole. It is important to use appropriate cutting fluids and observe all safety precautions, such as wearing safety goggles.
Teaching Methods/Instructional Techniques
Discussion, Lecture, Demonstration, Question and Answer, Visual Aids
Instructional Procedures
Step 1: Introduction
Time: 5 minutes
Teaching Skill: Set Induction
Teacher’s Activity: The teacher greets the pupils and asks them if they know what a drill is and what it is used for. The teacher then introduces the topic, “Type of Drills,” and states the learning objectives.
Pupils’ Activity: Pupils respond to the questions and listen attentively to the introduction.
Learning Point: Pupils are introduced to the lesson topic and its relevance.
Step 2: Presentation of Drill Types
Time: 10 minutes
Teaching Skill: Explanation/Demonstration
Teacher’s Activity: The teacher presents different types of drill bits (straight shank, carbide tipped, sub land drills) and uses an identification chart to explain their features and applications. The teacher defines each type.
Pupils’ Activity: Pupils observe the drill bits, examine the chart, and listen to the explanations. They ask questions for clarification.
Learning Point: Pupils identify and understand the characteristics of various drill types.
Step 3: Identification Practice
Time: 7 minutes
Teaching Skill: Guided Practice
Teacher’s Activity: The teacher mixes the drill bits and asks pupils to pick out specific types (e.g., “Show me a carbide tipped drill”). The teacher guides them to explain how they identified each drill.
Pupils’ Activity: Pupils practice identifying different drill types and explain their reasoning.
Learning Point: Pupils apply their knowledge to correctly identify drill types.
Step 4: Demonstration of Fixing Drills in the Chuck
Time: 8 minutes
Teaching Skill: Demonstration/Modelling
Teacher’s Activity: The teacher demonstrates the correct procedure for fixing a drill bit into the drill press chuck, emphasizing safety precautions like ensuring the machine is off and removing the chuck key immediately after tightening. The teacher explains each step.
Pupils’ Activity: Pupils observe the demonstration carefully and note the steps and safety points.
Learning Point: Pupils learn the correct and safe method for fixing a drill in a chuck.
Step 5: Basic Drilling Operation Demonstration
Time: 8 minutes
Teaching Skill: Demonstration/Modelling
Teacher’s Activity: The teacher demonstrates a basic drilling operation on a workpiece, explaining the process of clamping, setting speed, applying pressure, and using safety goggles. The teacher encourages questions.
Pupils’ Activity: Pupils observe the drilling demonstration and ask questions about the process and safety.
Learning Point: Pupils understand the practical steps and safety measures for drilling.
Step 6: Evaluation/Review
Time: 5 minutes
Teaching Skill: Questioning/Assessment
Teacher’s Activity: The teacher evaluates the learning by asking the following questions:
- What is the main purpose of a drill?
- Mention two types of drills discussed in the lesson.
- How can you differentiate a straight shank drill from a carbide tipped drill?
- List three steps involved in fixing a drill bit into a chuck.
- State one safety precaution to observe during drilling operations.
Pupils’ Activity: Pupils answer orally and in writing.
Learning Point: Pupils demonstrate understanding of the lesson.
Step 7: Conclusion
Time: 2 minutes
Teaching Skill: Summarization
Teacher’s Activity: The teacher summarizes the key learning points of the lesson, reiterating the importance of knowing drill types and safe drilling practices. The teacher assigns homework: “Draw and label any two types of drills discussed in class.”
Pupils’ Activity: Pupils listen to the summary and copy down the homework.
Learning Point: Pupils consolidate their understanding of the lesson content.
Lesson Keywords
- Drill – A cutting tool used to create cylindrical holes.
- Shank – The part of a drill bit that is held by the chuck.
- Chuck – A clamping device used to hold a drill bit in a drill press or hand drill.
- Carbide – A very hard material used for cutting tools, often for drilling hard metals.
- Sub Land Drill – A specialized drill designed to create multiple diameters in one pass.
Differentiation
For pupils who grasp concepts quickly, the teacher can challenge them to research other specialized drill types or the different parts of a drill bit. For pupils needing more support, the teacher will provide closer supervision during identification and practical sessions, offering one-on-one guidance and simplified instructions.
Note for teachers using this lesson plan
Ensure all safety protocols are strictly followed during practical demonstrations. Emphasize the importance of wearing safety goggles and securing workpieces. Provide ample opportunity for pupils to handle the different drill bits and observe their features up close. Practical application is key to understanding this topic.

Community Join the conversation Open discussion +