

Class: Senior Secondary School 1 (SS1, SS 1, SSS1, SSS 1)
Term: 2nd Term
Week: 8
Age: 15 years
Duration: 45 minutes
Subject: Metal Work
Curriculum Theme: Pre-Vocational Studies
Previous Lesson: Measuring Tools and Measurement in the Workshop.
Topic: Marking Out Tools and Procedures
Subject Matter: Marking out tools (scriber, try square, centre punch, surface plate, marking out table); Marking a 100mm by 100mm metal piece; Using a surface plate for flatness reference.
Specific Objectives
By the end of the lesson, pupils should be able to:
Cognitive Domain:
- Identify at least four different marking out tools.
- State the specific use of a scriber, try square, and centre punch.
- Explain the importance of marking out in metalwork.
Affective Domain:
- Appreciate the need for accuracy in marking out operations.
- Show interest in using marking out tools correctly and safely.
Psychomotor Domain:
- Demonstrate the correct use of a scriber and try square to mark a square on a metal piece.
- Practice marking a 100mm by 100mm square on a sample metal piece.
Social Domain:
- Collaborate with peers during practical marking out activities.
- Adhere to safety guidelines while handling marking out tools.
Reference Materials
The following resources were used in planning this lesson:
- 9 Years Basic Education Curriculum (Senior Secondary School Metal Work)
- State Unified Scheme of Work for Senior Secondary Schools
- Basic Metalwork for Senior Secondary Schools by S.A. Dada
Instructional Materials
The teacher will teach this lesson with the aid of:
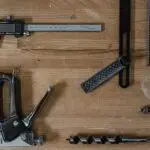
- Scriber
- Try square
- Centre punch
- Surface plate
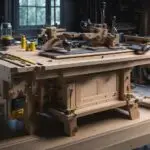
- Marking out table
- Metal workpieces (sample pieces for practice)
- Steel rule
- Engineers’ blue (or chalk for demonstration)
Rationale for the Lesson
This lesson helps pupils understand the fundamental steps involved in preparing metal for fabrication. Learning to accurately mark out ensures that finished products meet specifications and reduces material waste, which is important for practical skills and resource management.
Prerequisite/Previous Knowledge
Pupils should have basic knowledge of workshop safety rules and the identification of some common hand tools used in the metalwork shop.
Lesson Content/Board Summary
Marking Out Tools and Procedures
What is Marking Out?
Marking out is the process of transferring dimensions and outlines from a drawing or plan onto a workpiece before cutting, shaping, or machining.
Importance of Marking Out
Marking out is important for the following reasons:
- Ensures accuracy in fabrication.
- Guides cutting and machining operations.
- Reduces material waste.
- Helps in achieving desired product dimensions.
Common Marking Out Tools and Their Uses
1. Scriber
A scriber is a hand tool used for making fine lines on metal surfaces. It has a hardened steel point.
Uses of a scriber include:
- Marking lines for cutting.
- Indicating drilling points.
- Transferring dimensions onto workpieces.
2. Try Square
A try square is a tool used for checking and marking right angles (90 degrees) on workpieces. It consists of a blade and a stock.
Uses of a try square include:
- Checking the squareness of edges.
- Marking lines perpendicular to an edge.
- Setting out right angles.
3. Centre Punch
A centre punch is a tool used to make small indentations (punch marks) on a workpiece. These marks serve as starting points for drilling holes.
Uses of a centre punch include:
- Creating pilot marks for drill bits.
- Marking layout points that need to be permanent.
4. Surface Plate
A surface plate is a flat, rigid, and stable surface used as a precise reference plane for inspection, marking out, and tooling setup.
Uses of a surface plate include:
- Providing a flat reference for marking out.
- Checking the flatness of workpieces.
- Supporting work during precision measurement.
5. Marking Out Table
A marking out table is a sturdy workbench with a flat, smooth top, often made of cast iron or steel, specifically designed for marking out operations.
Uses of a marking out table include:
- Providing a stable and level surface for marking out.
- Supporting heavy workpieces during layout.
Procedure for Marking a 100mm x 100mm Metal Piece
The steps to mark out a 100mm by 100mm metal piece are:
- Clean the metal surface thoroughly to remove oil or dirt.
- Apply a marking medium (e.g., engineers’ blue) to the surface for clear lines.
- Place the workpiece on a marking out table.
- Using a steel rule and scriber, draw a straight reference line near one edge.
- Using a try square, draw a line perpendicular to the reference line, forming a 90-degree corner.
- Measure 100mm along the reference line and make a mark.
- Measure 100mm along the perpendicular line and make a mark.
- Using the try square and scriber, draw lines parallel to the first two lines, connecting the 100mm marks to form a 100mm x 100mm square.
- Use a centre punch to mark the corners or any drilling points if required.
Using a Surface Plate for Flatness Reference
To use a surface plate for flatness reference:
- Place the workpiece on the clean surface plate.
- Visually inspect for any gaps between the workpiece and the plate.
- Use a feeler gauge to check for consistent contact or measure any gaps, indicating unevenness.
- A workpiece that sits perfectly flat on the surface plate is considered flat.
Teaching Methods/Instructional Techniques
Discussion, Lecture, Demonstration, Question and Answer, Visual Aids
Instructional Procedures
Step 1: Introduction
Time: 5 minutes
Teaching Skill: Set Induction
Teacher’s Activity: The teacher greets the pupils and reviews the previous lesson briefly. The teacher then asks pupils how they would ensure a piece of metal is cut perfectly straight or square for a project. This leads to the topic of marking out.
Pupils’ Activity: Pupils respond to questions and listen attentively.
Learning Point: Pupils are prepared for the new lesson and understand its relevance.
Step 2: Explanation of Marking Out and Tools
Time: 10 minutes
Teaching Skill: Explanation/Definition
Teacher’s Activity: The teacher defines marking out and explains its importance. The teacher then introduces the various marking out tools (scriber, try square, centre punch, surface plate, marking out table) and explains the specific function of each, referring to the board summary.
Pupils’ Activity: Pupils listen, take notes, and ask questions for clarification.
Learning Point: Pupils understand the concept of marking out and the purpose of different marking out tools.
Step 3: Demonstration of Tools and Marking Out Procedure
Time: 15 minutes
Teaching Skill: Demonstration/Practical
Teacher’s Activity: The teacher demonstrates the correct and safe use of each marking out tool (scriber, try square, centre punch) on a sample metal workpiece placed on the marking out table. The teacher then demonstrates the step-by-step procedure for marking a 100mm by 100mm square on the metal piece, including applying marking medium and using the try square for accuracy. The teacher also shows how to use the surface plate to check for flatness.
Pupils’ Activity: Pupils observe the demonstration carefully, noting the techniques and safety precautions.
Learning Point: Pupils learn the practical application of marking out tools and the procedure for marking a square.
Step 4: Practical Activity – Pupil Practice
Time: 10 minutes
Teaching Skill: Supervision/Practice
Teacher’s Activity: The teacher distributes sample metal pieces and the necessary marking out tools to groups of pupils. The teacher guides and supervises pupils as they attempt to mark out a 100mm by 100mm square on their metal pieces, providing assistance and feedback as needed.
Pupils’ Activity: Pupils practice marking out the specified dimensions on their metal workpieces, applying the techniques demonstrated by the teacher.
Learning Point: Pupils gain hands-on experience in using marking out tools and marking out a square.
Step 5: Evaluation/Review
Time: 5 minutes
Teaching Skill: Questioning/Assessment
Teacher’s Activity: The teacher evaluates the learning by asking the following questions:
- Define marking out.
- Mention three marking out tools and state one use for each.
- List three reasons why marking out is important.
- Describe how a surface plate is used for flatness reference.
Pupils’ Activity: Pupils answer orally and in writing.
Learning Point: Pupils demonstrate understanding of the lesson.
Step 8: Conclusion
Time: 0 minutes
Teaching Skill: Summarization
Teacher’s Activity: The teacher summarizes the key points of the lesson, emphasizing the importance of accuracy in marking out for all metalwork projects. The teacher assigns homework: “Draw and label five marking out tools you learned today.”
Pupils’ Activity: Pupils listen to the summary and copy down the homework.
Learning Point: The lesson is reinforced and pupils are given an opportunity for further practice.
Lesson Keywords
- Marking out – The process of transferring dimensions and outlines onto a workpiece.
- Scriber – A tool used to make fine lines on metal surfaces.
- Try square – A tool used for checking and marking right angles.
- Centre punch – A tool used to make small indentations for drilling.
- Surface plate – A flat, rigid surface used as a precise reference plane.
- Marking out table – A sturdy workbench with a flat top for marking out operations.
Differentiation
For pupils who grasp concepts quickly, the teacher can challenge them to mark out more complex shapes or explain the different types of marking media. For pupils requiring more support, the teacher will provide closer supervision during practical sessions and additional one-on-one guidance in using the tools.
Note for teachers using this lesson plan
Ensure all safety precautions are strictly observed during the practical demonstration and pupil activities. Emphasize the importance of clear, accurate marking for successful metalwork fabrication. Encourage pupils to practice regularly to develop precision and confidence in using marking out tools.

Community Join the conversation Open discussion +