

Class: Senior Secondary School 1 (SS1, SS 1, SSS1, SSS 1)
Term: 3rd Term
Week: 7
Age: 15 years
Duration: 45 minutes
Subject: Metal Work
Curriculum Theme: Pre-Vocational Studies
Previous Lesson: Types of Drills and Identification in the Workshop.
Topic: Drilling Operations, Counterboring and Countersinking
Subject Matter: drilling operation steps, boring holes in solid metal, counterboring operation, countersinking operation, tools used for counterboring and countersinking
Specific Objectives
By the end of the lesson, pupils should be able to:
Cognitive Domain:
- Define drilling, boring, counterboring, and countersinking operations.
- State the steps involved in performing a drilling operation.
- Identify the tools used for counterboring and countersinking.
Affective Domain:
- Appreciate the importance of precision and safety in metalwork operations.
- Observe carefully the demonstrations of drilling, counterboring, and countersinking.
Psychomotor Domain:
- Perform basic drilling operations on a sample metal workpiece.
- Demonstrate how to set up and use counterboring and countersinking tools.
Social Domain:
- Work cooperatively with peers during practical sessions.
- Adhere to safety regulations while operating metalworking machinery.
Reference Materials
The following resources were used in planning this lesson:
- 9 Years Basic Education Curriculum for Pre-Vocational Studies.
- State Unified Scheme of Work for Senior Secondary Schools.
- Basic Metal Work for Senior Secondary Schools by A.O. Okoro.
Instructional Materials
The teacher will teach this lesson with the aid of:
- A drill press
- Counterbore tool
- Countersink tool
- Sample metal workpieces
- Safety goggles
- Marking tools (scriber, center punch)
- Measuring tools (ruler, caliper)
Rationale for the Lesson
This lesson helps pupils understand essential metal machining processes that are fundamental in fabricating metal components. Knowing how to drill, bore, counterbore, and countersink accurately enables pupils to produce quality workpieces and contributes to their practical skills in vocational fields.
Prerequisite/Previous Knowledge
Pupils have basic knowledge of hand tools, workshop safety rules, and the importance of accurate measurements in metalwork.
Lesson Content/Board Summary
Drilling Operations, Counterboring, and Countersinking
Drilling Operation
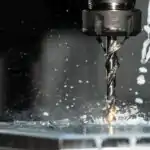
Drilling is the process of creating a cylindrical hole in a solid material using a drill bit.
The following are the steps involved in a drilling operation:
- Mark the center of the hole with a scriber and punch.
- Select the correct drill bit size and mount it securely in the drill chuck.
- Clamp the workpiece firmly on the drill press table.
- Set the appropriate spindle speed for the material.
- Start the drill press and apply steady, even pressure to feed the drill bit into the workpiece.
- Apply cutting fluid if necessary to cool the drill bit and improve cutting action.
- Retract the drill bit periodically to clear chips.
- Stop the drill press and remove the workpiece after the hole is completed.
- Deburr the edges of the drilled hole.
Boring Holes in Solid Metal
Boring is a machining process that enlarges an existing hole or precisely finishes an internal cylindrical surface. It is often used to achieve high accuracy and specific hole diameters that cannot be achieved by drilling alone.
Counterboring Operation
Counterboring is the process of enlarging the top portion of a drilled hole to a specific depth and diameter, creating a flat-bottomed recess. This recess allows the head of a fastener (like a socket head cap screw) to sit flush or below the surface of the workpiece.
Countersinking Operation
Countersinking is the process of creating a conical (cone-shaped) enlargement at the top of a drilled hole. This allows the head of a countersunk screw or rivet to sit flush with or below the surface of the workpiece, providing a smooth finish.
Tools Used for Counterboring and Countersinking
The following tools are commonly used for these operations:
- Counterbore tool: A specialized cutting tool with a pilot at its center to guide it into an existing hole, and cutting flutes to enlarge the hole to a flat bottom.
- Countersink tool: A conical cutting tool, also with a pilot, designed to create an angled recess for countersunk fasteners. Common angles are 82° or 90°.
- Drill press: The machine used to hold and rotate the counterbore or countersink tool.
Teaching Methods/Instructional Techniques
Discussion, Lecture, Demonstration, Question and Answer, Visual Aids
Instructional Procedures
Step 1: Introduction
Time: 5 minutes
Teaching Skill: Set Induction
Teacher’s Activity: The teacher greets the pupils and revises the previous lesson on types of drilling machines. The teacher then asks pupils how holes are made in metal and introduces today’s topic by showing a workpiece with drilled, counterbored, and countersunk holes.
Pupils’ Activity: Pupils respond to questions and observe the samples shown by the teacher.
Learning Point: Pupils recall previous knowledge and are introduced to the new topic.
Step 2: Explanation of Drilling Operation and Steps
Time: 10 minutes
Teaching Skill: Explanation/Demonstration
Teacher’s Activity: The teacher defines drilling and demonstrates the steps for performing a drilling operation on a sample metal workpiece, emphasizing safety procedures and proper tool handling.
Pupils’ Activity: Pupils observe the demonstration, listen to the explanation, and ask questions for clarification.
Learning Point: Pupils understand the definition and practical steps of drilling.
Step 3: Explanation of Boring Holes
Time: 5 minutes
Teaching Skill: Explanation
Teacher’s Activity: The teacher explains the concept of boring as distinct from drilling, highlighting its purpose for enlarging and finishing existing holes to high precision.
Pupils’ Activity: Pupils listen and differentiate between drilling and boring.
Learning Point: Pupils understand the purpose and application of boring.
Step 4: Explanation and Demonstration of Counterboring Operation
Time: 10 minutes
Teaching Skill: Explanation/Demonstration
Teacher’s Activity: The teacher defines counterboring, explains its purpose, and demonstrates how to perform a counterboring operation using a counterbore tool on a pre-drilled sample. The teacher also shows how a fastener fits into a counterbored hole.
Pupils’ Activity: Pupils observe the demonstration, noting the purpose and technique of counterboring.
Learning Point: Pupils grasp the concept and application of counterboring.
Step 5: Explanation and Demonstration of Countersinking Operation
Time: 5 minutes
Teaching Skill: Explanation/Demonstration
Teacher’s Activity: The teacher defines countersinking, explains its purpose, and demonstrates how to perform a countersinking operation using a countersink tool on another pre-drilled sample. The teacher shows how a countersunk fastener sits flush in the created recess.
Pupils’ Activity: Pupils observe the demonstration, understanding the purpose and technique of countersinking.
Learning Point: Pupils understand the concept and application of countersinking.
Step 6: Tools Identification
Time: 5 minutes
Teaching Skill: Identification
Teacher’s Activity: The teacher displays and names the counterbore and countersink tools, asking pupils to identify their distinct features and explain their uses.
Pupils’ Activity: Pupils identify the tools and state their functions.
Learning Point: Pupils can correctly identify and associate tools with their respective operations.
Step 7: Evaluation/Review
Time: 5 minutes
Teaching Skill: Questioning/Assessment
Teacher’s Activity: The teacher evaluates the learning by asking the following questions:
- Define drilling and boring operations.
- Mention three steps involved in performing a drilling operation.
- Explain the purpose of counterboring.
- List two tools used for countersinking.
Pupils’ Activity: Pupils answer orally and in writing.
Learning Point: Pupils demonstrate understanding of the lesson.
Step 8: Conclusion
Time: 5 minutes
Teaching Skill: Summary/Assignment
Teacher’s Activity: The teacher summarizes the key learning points of the lesson. The teacher assigns pupils to sketch and label a counterbore tool and a countersink tool in their notebooks.
Pupils’ Activity: Pupils listen to the summary and copy down the assignment.
Learning Point: Pupils consolidate their learning and apply knowledge through homework.
Lesson Keywords
- Drilling – The process of creating a cylindrical hole in material using a drill bit.
- Boring – The process of enlarging or finishing an existing hole to a precise diameter.
- Counterboring – Enlarging the top part of a hole to a flat-bottomed recess for fastener heads.
- Countersinking – Creating a conical recess at the top of a hole for countersunk fastener heads.
- Drill press – A machine tool used for drilling, boring, counterboring, and countersinking.
- Counterbore tool – A cutting tool with a pilot used to create flat-bottomed recesses.
- Countersink tool – A conical cutting tool with a pilot used to create angled recesses.
Differentiation
For pupils who grasp concepts quickly, the teacher will provide additional practical exercises involving different metal thicknesses or hole sizes. For those needing more support, the teacher will offer one-on-one guidance during demonstrations and provide simplified diagrams or step-by-step checklists for the practical tasks.
Note for teachers using this lesson plan
Ensure all safety precautions are strictly followed during demonstrations and any practical sessions. Emphasize the correct use of personal protective equipment, especially safety goggles. Allow pupils sufficient time for observation and supervised practice to develop their psychomotor skills effectively.

Community Join the conversation Open discussion +