

Class: Senior Secondary School 1 (SS1, SS 1, SSS1, SSS 1)
Term: 3rd Term
Week: 2
Age: 15 years
Duration: 45 minutes
Subject: Metal Work
Curriculum Theme: Pre-Vocational Studies
Previous Lesson: Machine Tools: Definition, Functions and Classification.
Topic: Drills and Drilling Machine
Subject Matter: Drill press and its principal parts, size and capacity of drill press, drilling and reaming differences, types of drilling machines such as sensitive pillar and radial, uses of drilling machine types.
Specific Objectives
By the end of the lesson, pupils should be able to:
Cognitive Domain:
- Define a drill press.
- Identify the principal parts of a drill press.
- State the size and capacity of a drill press.
- Differentiate between drilling and reaming.
- List two types of drilling machines.
- State the uses of different drilling machine types.
Affective Domain:
- Appreciate the importance of drill presses in metalwork.
- Observe safety precautions when using drilling machines.
Psychomotor Domain:
- Draw and label the principal parts of a drill press.
- Identify different drill bits and reamers.
Social Domain:
- Collaborate with peers to identify drilling machine components.
Reference Materials
The following resources were used in planning this lesson:
- 9 Years Basic Education Curriculum for Metalwork (Senior Secondary)
- Lagos State Unified Scheme of Work for Senior Secondary Metalwork
- Metalwork for Senior Secondary Schools by A.O. Okoro
- https://www.machinemfg.com/what-is-a-drilling-machine-types-parts-operation-and-uses/
- https://www.mechanicalbooster.com/2016/06/drill-press-types-parts-operations.html
Instructional Materials
The teacher will teach this lesson with the aid of:
- Actual drill press (if available)
- Labeled diagrams of a drill press
- Sample drill bits
- Sample reamer
- Whiteboard/chalkboard
- Markers/chalk
Rationale for the Lesson
Learning about drills and drilling machines is important because it provides pupils with practical skills in metalwork. Understanding these tools helps them to safely and effectively create holes and refine existing ones in various materials, which is a fundamental skill in many technical fields.
Prerequisite/Previous Knowledge
Pupils have basic knowledge of hand tools used in metalwork and understand the concept of making holes in materials.
Lesson Content/Board Summary
Drills and Drilling Machine
The Drill Press
A drill press is a machine tool used to drill holes in materials, most commonly metal and wood. It holds the workpiece stationary while a rotating drill bit is fed into it to create a hole.
The principal parts of a drill press include:
- Base: Provides stability and support for the machine.
- Column: A vertical support that holds the head and table.
- Table: A flat surface where the workpiece is clamped for drilling. It can often be adjusted vertically and rotated.
- Head: Contains the motor, spindle, and feed mechanisms.
- Spindle: The rotating shaft that holds the drill bit.
- Chuck: A device attached to the spindle that holds the drill bit securely.
- Feed handle: Used to manually lower the spindle and drill bit into the workpiece.
- Motor: Provides power to rotate the spindle.
- Depth stop: A device used to set the desired depth of the hole.
The size and capacity of a drill press are determined by:
- Throat depth (or swing): This is twice the distance from the center of the spindle to the column. It indicates the largest diameter workpiece that can be drilled at its center.
- Drilling capacity: The maximum diameter of the drill bit that can be used effectively.
- Spindle travel: The maximum distance the spindle can move vertically.
- Motor horsepower: Indicates the power of the machine.
Drilling and Reaming
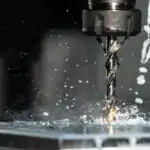
Drilling: This is the process of creating a cylindrical hole in a solid material using a rotating cutting tool called a drill bit.
Reaming: This is a finishing operation used to enlarge or refine an existing drilled hole to a precise size and achieve a smoother internal finish. It uses a multi-fluted cutting tool called a reamer.
The differences between drilling and reaming are:
- Purpose: Drilling creates a hole, while reaming refines an existing hole.
- Accuracy: Drilling is less accurate in terms of hole diameter and finish compared to reaming. Reaming provides high accuracy and better surface finish.
- Material removal: Drilling removes a large amount of material to form the initial hole. Reaming removes a very small amount of material for precision finishing.
Types of Drilling Machines
There are several types of drilling machines, including:
- Sensitive Pillar Drilling Machine:
- Description: A small, light-duty machine with a hand-fed spindle, designed for drilling small holes in light workpieces. The operator “feels” the cutting action, hence “sensitive”.
- Uses: Used for light drilling operations, small workshops, and precise small hole drilling.
- Radial Drilling Machine:
- Description: A large, heavy-duty machine with a radial arm that can be swung, raised, and lowered. The drill head can move along the radial arm, allowing drilling at various positions on a large workpiece.
- Uses: Used for drilling large and heavy workpieces, especially when multiple holes need to be drilled at different locations without repositioning the workpiece. Common in heavy fabrication and construction.
Teaching Methods/Instructional Techniques
Discussion, Lecture, Demonstration, Question and Answer, Visual Aids
Instructional Procedures
Step 1: Introduction
Time: 5 minutes
Teaching Skill: Set Induction
Teacher’s Activity: The teacher greets the pupils and introduces the topic, “Drills and Drilling Machine.” The teacher asks pupils if they have seen a machine used to make holes in metal or wood and what it is called. The teacher then writes the topic on the board.
Pupils’ Activity: Pupils respond to the teacher’s questions and settle down for the lesson, noting the topic.
Learning Point: Pupils are introduced to the lesson topic and relate it to their prior knowledge.
Step 2: Explanation of the Drill Press
Time: 10 minutes
Teaching Skill: Explanation/Demonstration
Teacher’s Activity: The teacher defines a drill press, explains its principal parts using a labeled diagram or an actual machine, and describes how the size and capacity are determined. The teacher encourages pupils to identify parts.
Pupils’ Activity: Pupils listen attentively, observe the diagram/machine, identify parts, and ask questions for clarification.
Learning Point: Pupils understand what a drill press is, its main components, and how its capacity is measured.
Step 3: Differentiating Drilling and Reaming
Time: 7 minutes
Teaching Skill: Comparative Analysis
Teacher’s Activity: The teacher defines drilling and reaming, explaining their distinct purposes. Using a simple diagram or sample tools (drill bit and reamer), the teacher highlights the key differences between the two processes.
Pupils’ Activity: Pupils listen, observe the sample tools, and note the definitions and differences between drilling and reaming.
Learning Point: Pupils can differentiate between drilling and reaming processes.
Step 4: Types of Drilling Machines
Time: 8 minutes
Teaching Skill: Elucidation
Teacher’s Activity: The teacher introduces different types of drilling machines, focusing on the sensitive pillar drilling machine and the radial drilling machine. The teacher describes their characteristics and where they are typically used.
Pupils’ Activity: Pupils listen, take notes, and ask questions about the various types of drilling machines.
Learning Point: Pupils learn about different types of drilling machines.
Step 5: Uses of Drilling Machine Types
Time: 5 minutes
Teaching Skill: Explanation
Teacher’s Activity: The teacher elaborates on the specific uses of the sensitive pillar drilling machine and the radial drilling machine, linking them to their design and capacity. The teacher emphasizes safety precautions during use.
Pupils’ Activity: Pupils listen, note the uses, and understand the importance of safety when operating these machines.
Learning Point: Pupils understand the practical applications of different drilling machines.
Step 6: Drawing and Labeling
Time: 5 minutes
Teaching Skill: Practical Application
Teacher’s Activity: The teacher guides pupils to sketch and label the principal parts of a drill press in their notebooks, reinforcing the identification of components.
Pupils’ Activity: Pupils draw and label the parts of the drill press as instructed by the teacher.
Learning Point: Pupils develop psychomotor skills by drawing and labeling the drill press parts.
Step 7: Evaluation/Review
Time: 5 minutes
Teaching Skill: Questioning/Assessment
Teacher’s Activity: The teacher evaluates the learning by asking the following questions:
- Define a drill press.
- List any four principal parts of a drill press.
- State two ways the capacity of a drill press is determined.
- Differentiate between drilling and reaming.
- Mention two types of drilling machines and their uses.
Pupils’ Activity: Pupils answer orally and in writing.
Learning Point: Pupils demonstrate understanding of the lesson.
Step 8: Conclusion
Time: 1 minute
Teaching Skill: Summarization
Teacher’s Activity: The teacher briefly summarizes the key points of the lesson, reiterating the importance of understanding drills and drilling machines. The teacher assigns homework: “Draw a radial drilling machine and label its main parts.”
Pupils’ Activity: Pupils listen to the summary and note down the assigned homework.
Learning Point: The lesson is reinforced, and pupils are given a task to consolidate their learning.
Lesson Keywords
- Drill press – A machine tool used for drilling holes.
- Drilling – The process of making a hole with a drill bit.
- Reaming – The process of enlarging or finishing a drilled hole to a precise size.
- Spindle – The rotating shaft that holds the drill bit.
- Chuck – A device that holds the drill bit in the spindle.
- Throat depth – A measure of the drill press capacity, indicating the maximum workpiece width it can handle.
- Sensitive pillar drill – A light-duty drilling machine for small, precise holes.
- Radial drill – A heavy-duty drilling machine for large workpieces, with a movable drill head on a radial arm.
Differentiation
For pupils who grasp concepts quickly, the teacher can provide additional tasks such as researching different types of drill bits or safety procedures. For pupils needing more support, the teacher can offer one-on-one guidance during the drawing activity or simplify explanations with more visual aids.
Note for teachers using this lesson plan
Teachers should ensure access to actual drilling machines or high-quality diagrams/videos for effective demonstration. Emphasize safety procedures consistently throughout the lesson, especially when discussing machine operation. Practical application or observation of a drilling machine in use would significantly enhance pupil understanding.

Community Join the conversation Open discussion +